
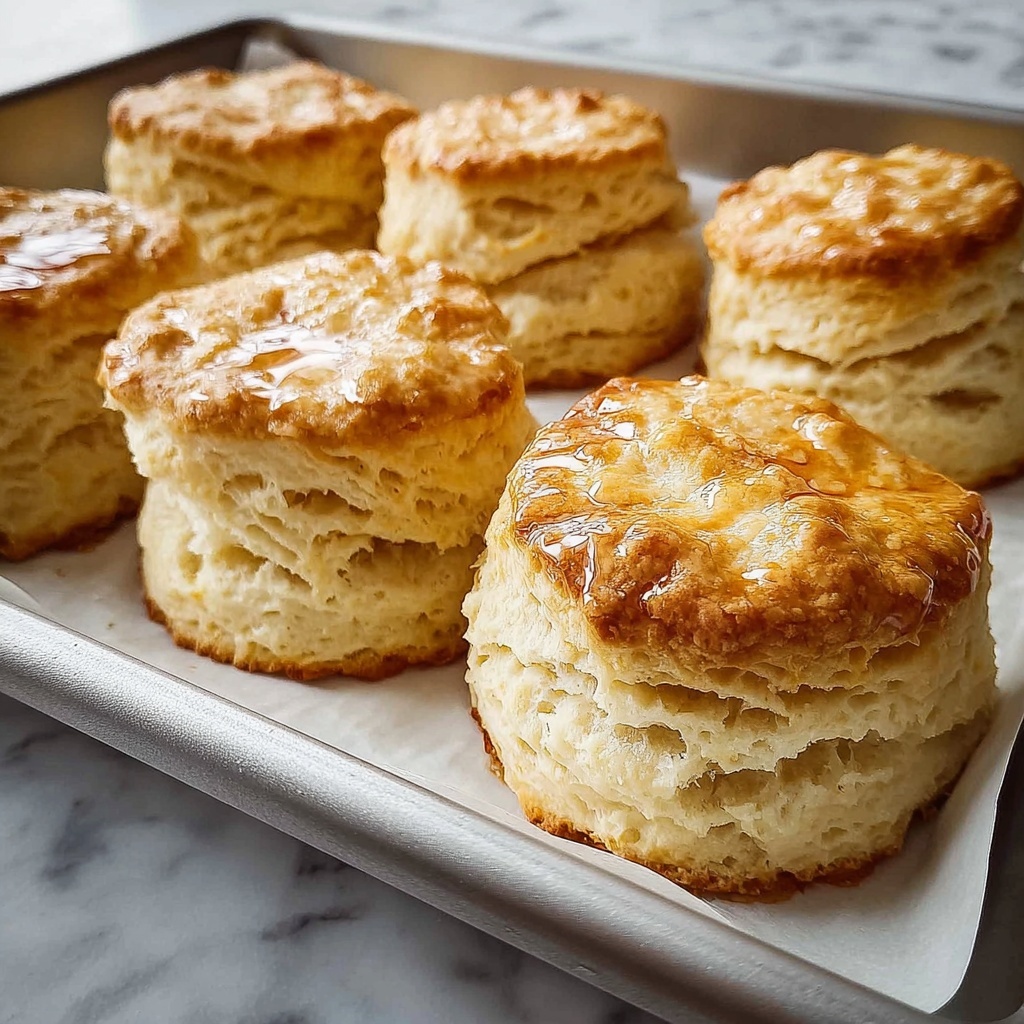
There is something truly comforting about a batch of fluffy homemade biscuits fresh from the oven. Their tender layers and delicate crumb practically melt in your mouth, inviting you to savor each bite slowly. Whether served alongside a hearty stew or simply enjoyed with a pat of butter and a drizzle of honey, these biscuits bring warmth and happiness with every mouthful. When you make them yourself, the experience becomes even more special because you can smell the butter as it bakes and see those flaky edges crisping to perfection. This Fluffy Homemade Biscuits Recipe is the kind of dish you will find yourself craving on rainy afternoons, lazy weekend breakfasts, or any moment that calls for a bit of homemade love.
Biscuits hold a cherished place in American culinary tradition, especially in the South where they are a staple at many family tables and festive occasions. Their roots can be traced back to early settlers who adapted simple European bread recipes to use local ingredients and cooking methods. Over time, biscuits evolved from a humble necessity into a beloved comfort food, synonymous with hospitality and celebration. Many people recall childhood memories of their grandmothers pulling warm biscuits from the oven, filling homes with enticing aromas that signaled a delicious meal was about to begin. Sharing biscuits is more than just a meal—it’s a way of gathering, bonding, and honoring tradition in every flaky bite.
Through this recipe, you will learn how to create a wonderfully soft and airy biscuit that rises beautifully while maintaining a light, tender texture inside. This particular method emphasizes using cold butter and buttermilk to encourage flakiness, while the minimal kneading ensures the dough does not become tough. The step-by-step instructions break down the process into simple actions, making it approachable even if you’re new to baking. By following these guidelines, you’ll gain confidence in preparing biscuits that rival your favorite bakery’s, plus you’ll understand the little details that make each biscuit fluffy and irresistible every time you bake.
Why You’ll Love This Fluffy Homemade Biscuits Recipe
What makes this Fluffy Homemade Biscuits Recipe truly special is how effortlessly it comes together without sacrificing any of the rich textures or deep flavors that define a classic biscuit. Despite seeming like a fancy bakery treat, these biscuits require only a handful of ingredients and straightforward steps. Even beginners in the kitchen can expect a high success rate when following the instructions carefully, making it a wonderfully satisfying baking experience. The ease of preparation allows you to whip up fresh biscuits in just about half an hour from start to finish.
Another reason these biscuits have so much appeal is their universal crowd-pleasing nature. Whether you are feeding a family, hosting a brunch, or bringing something to a potluck, a platter of warm biscuits resonates with everyone. Their buttery, fluffy texture and light crumb are typically enjoyed by kids and grown-ups alike, which makes them an ideal choice when serving varied palates. Because this recipe yields eight generous biscuits, it is perfectly suited for sharing without leaving anyone wishing for more.
One of the most wonderful attributes of these biscuits is their versatility. Their neutral yet comforting base means they can adapt to numerous occasions and pair wonderfully with sweet or savory accompaniments. Imagine them alongside a bowl of steaming chili, halved and smeared with homemade jam, or stacked high with fried chicken. Making biscuits from scratch at home also gives you control over the ingredients, ensuring freshness and flavor far beyond anything you would get from store-bought varieties or takeout options. It connects you with the food in a meaningful way, allowing you to savor every bite made with care.
Ingredients You’ll Need
For this Fluffy Homemade Biscuits Recipe, each ingredient plays an essential role in building the texture and flavor of the finished product. The all-purpose flour provides the structure; its protein content forms the gluten network that traps air while baking. Baking powder and baking soda act as leavening agents, working together to help the biscuits rise and become light. The sugar adds just a touch of sweetness, balancing the flavors, while salt enhances them overall. Unsalted butter, chilled and cubed, is key to flakiness, as small pieces of cold fat create steam pockets during baking, leading to tender layers. Finally, cold buttermilk adds moisture and acidity, which tenderizes the dough and reacts with the leaveners to promote lift.
If you do not have buttermilk on hand, you can easily make a substitute by adding one tablespoon of lemon juice or white vinegar to a measuring cup and then filling it up with milk to the 3/4 cup line. Let it sit for five minutes until it thickens slightly. Unsalted butter is preferred because it allows you to control the salt level. If you only have salted butter, reduce the added salt slightly. For those short on baking powder or baking soda, make sure your leaveners are fresh, as old agents will result in dense biscuits.
- All-purpose flour: Provides the structure needed for your biscuits to hold shape and rise properly. For better results, use a spoon-and-level method when measuring to avoid compacted flour, which can make biscuits heavy.
- Baking powder: The primary leavening agent that produces gas bubbles to help biscuits rise. Check the expiration date to ensure it is active for the best rise.
- Baking soda: Works synergistically with the buttermilk’s acidity to create lift and tenderness. Only a small amount is required, so measure carefully.
- Sugar: Adds a subtle sweetness that balances the savory components of the biscuits. You can omit it for savory-only biscuits but keeping it enhances overall flavor.
- Salt: Enhances flavor and balances the sweetness, ensuring the biscuits taste well-rounded. Use fine salt to distribute evenly throughout the dough.
- Unsalted butter, chilled and cubed: Creates flaky layers through small solid fat pockets that melt during baking. Keep it cold until cutting into flour to avoid greasy dough.
- Buttermilk, cold: Adds moisture and acidity, which reacts with leaveners for fluffiness. Always use cold to slow gluten development and achieve tender biscuits.
How to Make Fluffy Homemade Biscuits Recipe
Crafting these biscuits is a process of gentle mixing and timely chilling that rewards you with soft layers and golden crusts. The success of this recipe depends on how you handle the dough: minimal kneading preserves tenderness, cold ingredients promote flakiness, and careful baking produces a light structure with an inviting crumb. Each step has its purpose and contributes to the final biscuit’s texture and appearance. Knowing what to expect visually and texturally at each stage makes the process both enjoyable and foolproof.
Step 1: Prepare Your Oven and Baking Sheet
Start by preheating your oven to 425°F (220°C). This high temperature gives the biscuits a strong initial rise, known as oven spring, helping them become fluffy and tall. Line your baking sheet with parchment paper to prevent sticking and make cleanup easy. While the oven warms, ensure all your ingredients are measured and ready for assembly. One common mistake at this stage is not having the oven fully heated, which can lead to flat, dense biscuits.
Step 2: Mix Dry Ingredients Thoroughly
In a large bowl, whisk together the 2 cups all-purpose flour, 1 tablespoon baking powder, 1/2 teaspoon baking soda, 1 teaspoon sugar, and 1/2 teaspoon salt. Whisking incorporates air and ensures that the leavening agents are evenly distributed, which helps the biscuits rise uniformly. Look for a light, evenly mixed dry blend without clumps. Avoid skipping this step or mixing too little, as uneven leavening can create flatter biscuits or odd textures.
Step 3: Cut in the Butter
Cut 6 tablespoons of chilled, cubed unsalted butter into the dry mixture using a pastry cutter or your fingers. The goal is to create a coarse crumb texture with small butter pieces about the size of peas. This structure is what traps steam in the oven and contributes to layers. Be careful not to warm the butter by handling it too much, as that can make the dough greasy and affect flakiness. If you see the dough turning uniform and pasty, you’ve likely overworked it at this stage.
Step 4: Add the Buttermilk
Make a well in the center of the crumbly mixture and pour in 3/4 cup cold buttermilk. Use a fork to gently stir the mixture until it just starts to come together. It’s important not to overmix; the dough should be slightly sticky but not wet or sloppy. If needed, add a teaspoon more buttermilk at a time to bring the dough together, but be cautious to keep it firm. The dough will look rough and somewhat shaggy — that’s perfect for flaky biscuits.
Step 5: Knead and Shape the Dough
Turn the dough out onto a lightly floured surface and gently knead it 3-4 times. The kneading is brief because excessive handling develops gluten, which toughens the biscuits. Then pat the dough to an even thickness of about 1 inch. This ensures the biscuits rise evenly while baking. Be sure to flour your hands and surface lightly to prevent sticking, but avoid adding too much flour, which can dry out the dough.
Step 6: Cut and Bake the Biscuits
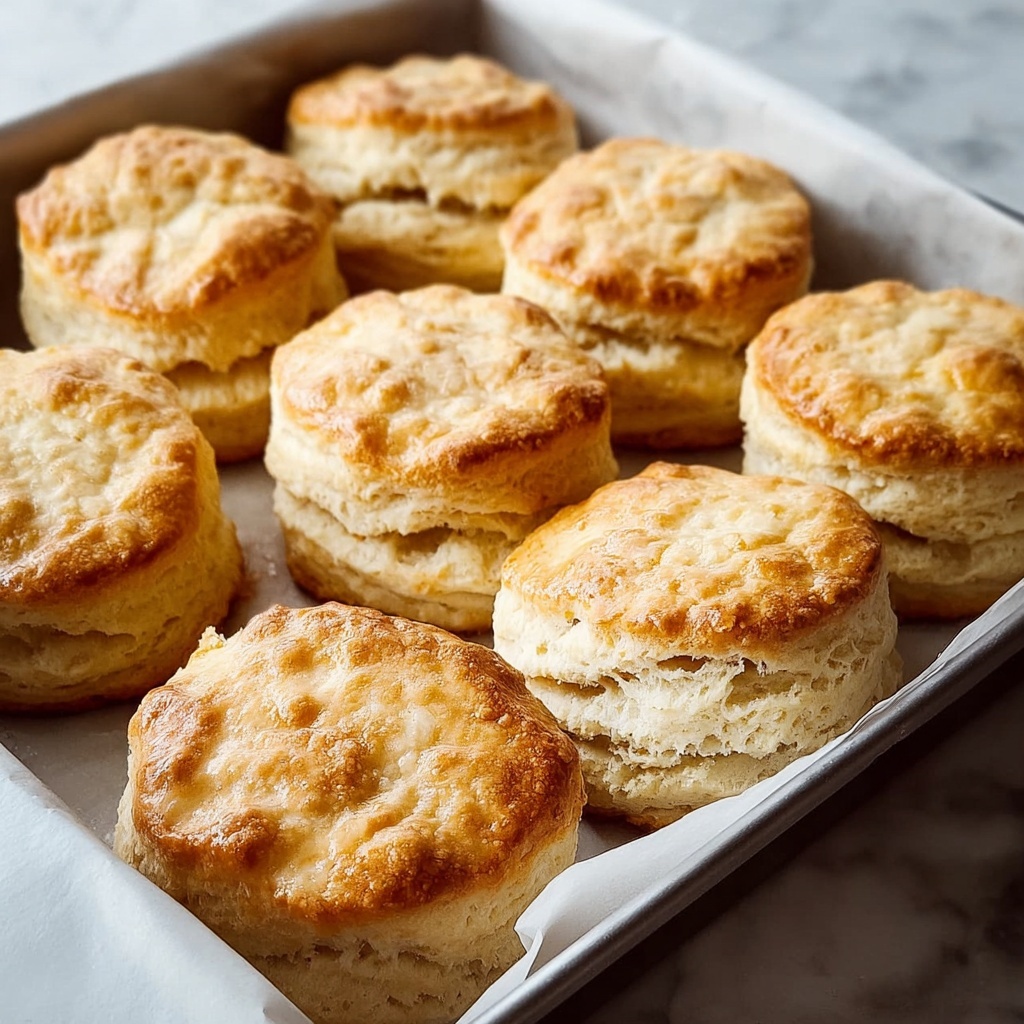
Using a biscuit cutter or a glass, cut circles out of the dough without twisting the cutter to ensure straight edges for better rise. Place the biscuits on the parchment-lined baking sheet, spacing them slightly apart but not too far because close placement encourages softer sides. Re-roll the scraps to use all the dough efficiently, but try not to overhandle them. Bake the biscuits for 12-15 minutes until they are a golden brown color on top and have firm bottoms. Remove from the oven and let them sit for a few minutes before serving to finish setting.
Pro Tips for the Best Fluffy Homemade Biscuits Recipe
Tip 1: Use Cold Butter and Buttermilk
Keeping your butter and buttermilk cold is crucial for flaky biscuits. The cold butter creates steam pockets as it melts in the oven, which forms those coveted layers. If the butter warms too much during mixing, the dough becomes greasy, and you lose that flaky texture, so always chill your ingredients before starting.
Tip 2: Handle the Dough Gently
Limit mixing and kneading to prevent tough biscuits. Overworking the dough activates gluten in the flour, making the biscuits dense instead of light and airy. Remember to stir just until the ingredients come together and knead only a few times, aiming for a rough dough rather than a smooth one.
Tip 3: Avoid Twisting the Cutter
When cutting out the biscuits, press straight down without twisting the biscuit cutter. Twisting seals the edges, which interferes with rising because there is less room for the dough to expand upwards. Cutting cleanly allows for better lift and fluffiness.
Tip 4: Bake at a High Temperature
Baking at 425°F (220°C) gives the biscuits a rapid oven spring, which means they rise quickly before the crust sets. This helps develop an airy interior with a golden, slightly crispy crust. Avoid lowering the temperature, as baking too slowly results in dense biscuits.
Variations and Substitutions
Make It Vegetarian
This recipe is naturally vegetarian since it contains no meat or animal-based broths—only dairy products like butter and buttermilk. To keep it vegetarian while accommodating dietary preferences, make sure to use unsalted butter from a plant-based source or substitute with vegetable shortening or coconut oil for a dairy-free version. The texture will be slightly different but still tender. Avoid adding any meat-based toppings and instead add savory vegetarian fillings like sautéed mushrooms or roasted vegetables.
Make It Spicy
If you love a little heat in your biscuits, try adding 1/2 teaspoon of cayenne pepper or smoked paprika to the dry ingredients to give a gentle kick. For more pronounced spice, finely chopped jalapeños (about one small pepper) can be added to the dough just before mixing in the buttermilk. Adjust the quantity depending on your heat tolerance. You could also serve the biscuits with spicy honey or a hot pepper jelly for a flavorful contrast that brightens the buttery layers.
Protein Swaps
While biscuits are usually served as a side or base, pairing them with protein can make a complete meal. Instead of classic sausage or bacon, try grilled chicken breast strips, pulled pork, smoked turkey, or even pan-seared tofu for protein diversity. If including cooked proteins in the biscuit itself, reduce baking time slightly as meats may dry out otherwise. For instance, chopped cooked ham or shredded chicken added into the dough can provide a savory twist without changing the biscuit texture.
Dietary Modifications
For gluten-free options, use a high-quality gluten-free all-purpose flour blend designed for baking. Make sure it contains xanthan gum or add it separately to help maintain structure. For low-sodium biscuits, reduce salt to 1/4 teaspoon and omit added salt in butter if using salted butter. To make dairy-free biscuits, replace butter with solid coconut oil or a vegan butter substitute and swap buttermilk with almond milk mixed with lemon juice to mimic acidity and moisture. Each modification requires slightly adjusting the liquid amounts to keep the dough from becoming too dry or wet.
How to Serve Fluffy Homemade Biscuits Recipe
Garnishes
Finishing your biscuits with garnishes can elevate their appearance and flavor. A simple pat of melting butter adds richness and sheen, making them instantly inviting. Honey drizzle adds a hint of natural sweetness and a glossy finish that makes the biscuits look as good as they taste. Fresh herbs finely chopped and sprinkled on top, such as chives or parsley, provide a pop of color and freshness that contrasts beautifully with the golden biscuit crust.
Side Dishes
Pairing these biscuits with complementary side dishes can create a balanced and inviting meal. A rich bowl of creamy chicken and mushroom stew highlights the biscuits’ softness and absorbs their buttery flavor. Slow-cooked collard greens lend a tender, earthy counterpoint that balances the biscuits’ richness. A fresh tomato salad with a tangy vinaigrette brightens the meal with acidity and crunch, complementing the soft texture. And for a sweet contrast, strawberry jam or apple butter alongside the biscuits brings seasonal fruit notes that brighten the palate.
Creative Presentation Ideas
For a quick weeknight dinner, serve biscuits split open piled with pulled rotisserie chicken and drizzled with gravy, arranged casually on a rustic wooden board. During a dinner party, present the biscuits on a tiered stand with mini jars of honey, butter, and preserves to invite guests to customize their bites. At a potluck, slice the biscuits in half and transform them into mini slider sandwiches with a variety of cold cuts, cheeses, and pickles displayed on a large platter for easy grabbing. These ideas make your presentation as wonderful to enjoy as the biscuits themselves.
Make Ahead and Storage
Storing Leftovers
If you have leftover biscuits, store them in an airtight container at room temperature for up to two days. A resealable plastic bag or a container with a tight-fitting lid works well to maintain moisture. To preserve the delicate texture, avoid refrigerating as this can dry the biscuits out unless wrapped very tightly. When ready to eat, reheat using one of the methods below to bring back softness and warmth.
Freezing Instructions
Biscuits freeze beautifully and can be stored for up to 2 months. To freeze, cool biscuits completely on a wire rack after baking, then wrap each biscuit individually in plastic wrap or aluminum foil. Place wrapped biscuits in a resealable freezer bag to prevent freezer burn. When you want to enjoy them, thaw overnight in the refrigerator or at room temperature for a couple of hours. You can finish reheating them directly from frozen by adding extra time in the oven or using a microwave briefly before crisping in a hot oven.
Reheating Methods
For the best texture, reheat biscuits in a 350°F (175°C) oven for about 8 to 10 minutes, wrapped loosely in foil to prevent drying. On the stovetop, split the biscuit and warm each half in a dry skillet over medium-low heat for a few minutes until heated through. This method can help create a crisp crust. Using the microwave is fastest, but be careful to heat only briefly (20 to 30 seconds) to avoid toughening. After microwaving, consider toasting lightly in a pan or oven to restore some crunchiness and freshness.
FAQs About Fluffy Homemade Biscuits Recipe
What makes biscuits fluffy instead of dense?
The key to fluffy biscuits lies in the cold butter and minimal handling of the dough. Cold butter creates steam pockets that lift the dough layers while baking, and gentle mixing prevents gluten from overdeveloping, which leads to toughness. Additionally, baking at a high temperature encourages rapid rising that produces a light interior. To ensure fluffiness, keep ingredients cold and knead the dough only a few times.
Can I use regular milk instead of buttermilk?
Regular milk can be used as a substitute if you add an acid like lemon juice or vinegar to mimic the acidity of buttermilk. Let the mixture sit for about 5 minutes until it thickens slightly before adding to the dry ingredients. The acidity reacts with the baking soda to help the biscuits rise and keeps the texture tender. Using regular milk without adding acid will result in less rise and denser biscuits.
Why shouldn’t I twist the biscuit cutter when cutting?
Twisting the cutter seals the edges of the biscuits, which can prevent proper rising during baking. Straight downward cuts create clean edges that allow biscuits to expand upward rather than sideways, resulting in taller, fluffier results. A clean cut also prevents compressing the dough, which helps maintain its light texture.
How long can I store leftover biscuits?
Leftover biscuits are best enjoyed within two days if stored at room temperature in an airtight container. Beyond that time, they can start to dry out or lose their soft texture. For longer storage, freezing is ideal and preserves freshness for up to two months. Always wrap biscuits tightly before freezing to minimize freezer burn.
Can I substitute butter with shortening or oil?
Yes, you can substitute shortening or solid coconut oil for butter to create a similar texture. These fats can produce flaky biscuits because they remain solid at room temperature, allowing for steam pockets during baking. However, the flavor will be slightly different since butter adds a distinctive richness and aroma. Oils, being liquid at room temperature, generally yield less flaky biscuits.
How do I make biscuits less sweet?
You can reduce or omit the sugar in this recipe to make the biscuits more savory. Since the sugar amount is just one teaspoon, lowering it won’t affect the texture much but will make the flavor leaner for pairing with hearty dishes. Taste your dough carefully and feel free to add herbs or cheese to boost savory notes if reducing sugar.
What is the best way to cut out biscuits?
Use a sharp, round biscuit cutter or a glass with a smooth edge to cut biscuits. Press straight down without twisting to get clean edges. Dip the cutter in flour occasionally to prevent sticking. After cutting, place biscuits close together on the baking sheet for softer sides or spaced apart for crispier edges.
Final Thoughts
This Fluffy Homemade Biscuits Recipe is more than a simple bread substitute; it is a comforting, versatile addition to any meal that brings a touch of warmth and care to the table. The careful balance between technique and quality ingredients creates biscuits you will want to bake again and again. They are tender inside with a golden crust outside, embodying that perfect combination of softness and slight crunch. With each bite, you experience the joy of making something from scratch that tastes far superior to anything bought off the shelf.
I encourage you to try making these biscuits today and discover how easy it is to achieve bakery-quality results in your own kitchen. Share them with friends and family to spread the happiness and remember to come back for more recipes that make cooking as enjoyable as eating. This Fluffy Homemade Biscuits Recipe is one every home cook should have under their belt, bringing simple ingredients together into something truly satisfying and memorable.
Print
- Prep Time: 10 minutes
- Cook Time: 15 minutes
- Total Time: 25 minutes
- Yield: 8 servings
- Category: Biscuits & Bread
- Method: Baking
- Cuisine: American
- Diet: Vegetarian
Description
These fluffy homemade biscuits are soft, buttery, and perfectly golden. Made with simple pantry ingredients and cold buttermilk, they come together quickly and bake to a tender, flaky texture ideal for breakfast or any meal accompaniment.
Ingredients
Dry Ingredients
- 2 cups all-purpose flour
- 1 tablespoon baking powder
- 1/2 teaspoon baking soda
- 1 teaspoon sugar
- 1/2 teaspoon salt
Wet Ingredients
- 6 tablespoons unsalted butter, chilled and cubed
- 3/4 cup buttermilk, cold
Instructions
- Preheat Oven: Preheat your oven to 425°F (220°C) and line a baking sheet with parchment paper to prevent sticking and ensure even baking.
- Mix Dry Ingredients: In a large bowl, thoroughly whisk together the all-purpose flour, baking powder, baking soda, sugar, and salt to evenly distribute the leavening agents and seasoning.
- Cut in Butter: Using a pastry cutter or your fingers, cut the chilled, cubed unsalted butter into the flour mixture until it resembles coarse crumbs. This step ensures flakiness in the biscuits.
- Add Buttermilk: Make a well in the center of the dry mixture and pour in the cold buttermilk. Gently mix with a fork just until the dough comes together; avoid overmixing to keep biscuits tender.
- Knead Dough: Turn the dough onto a lightly floured surface and knead it gently 3 to 4 times, then pat it into a 1-inch thick rectangle or circle.
- Cut Biscuits: Use a biscuit cutter or a glass to cut out biscuits from the dough. Gather and re-roll the scraps as needed to use all the dough.
- Bake Biscuits: Arrange the biscuits on the prepared baking sheet with slight spacing. Bake for 12 to 15 minutes until they are puffed and golden brown on top.
- Serve Warm: Remove biscuits from the oven and serve warm with your favorite toppings such as butter, honey, or jam for a delightful treat.
Notes
- Use cold butter and buttermilk to help create flaky layers.
- Do not overmix the dough to avoid tough biscuits.
- For a sharper rise, keep baking powder and soda fresh and measure accurately.
- Leftover biscuits can be stored airtight and reheated in the oven for freshness.


