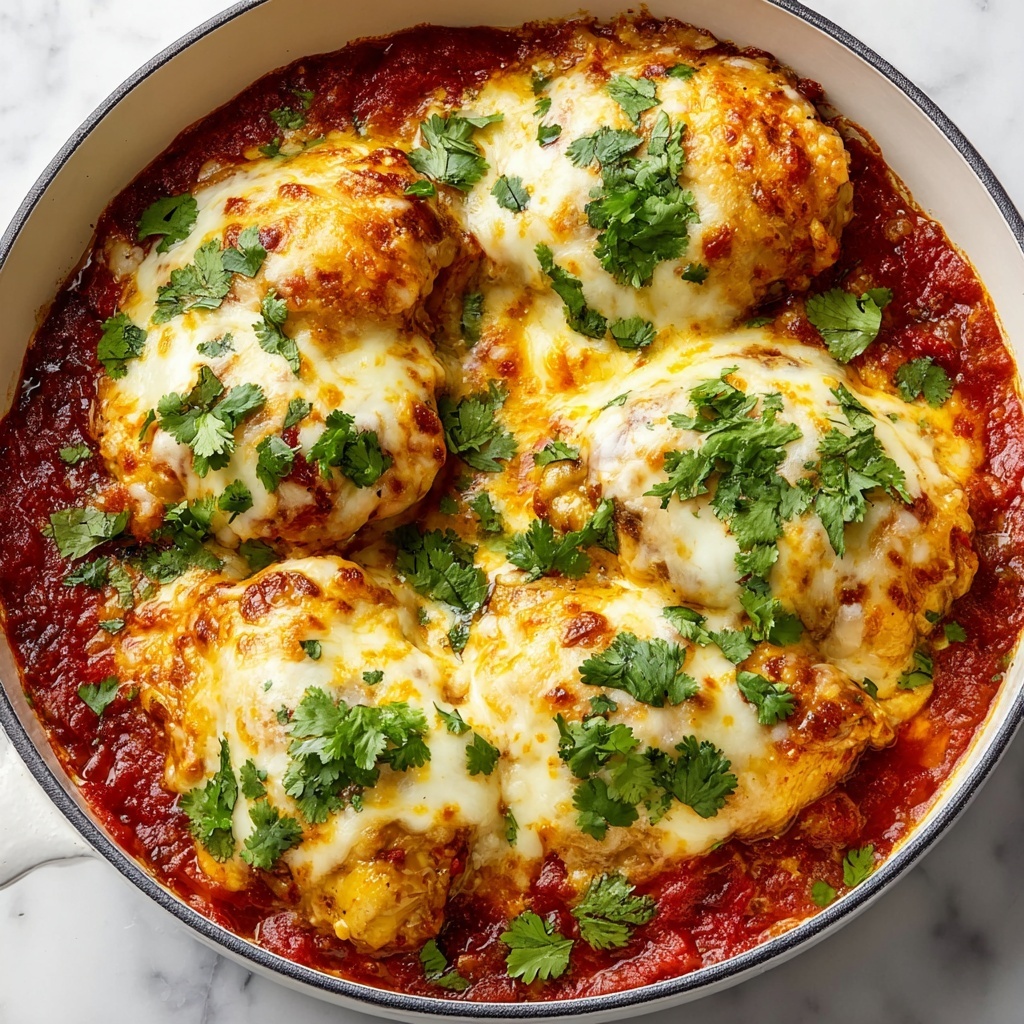
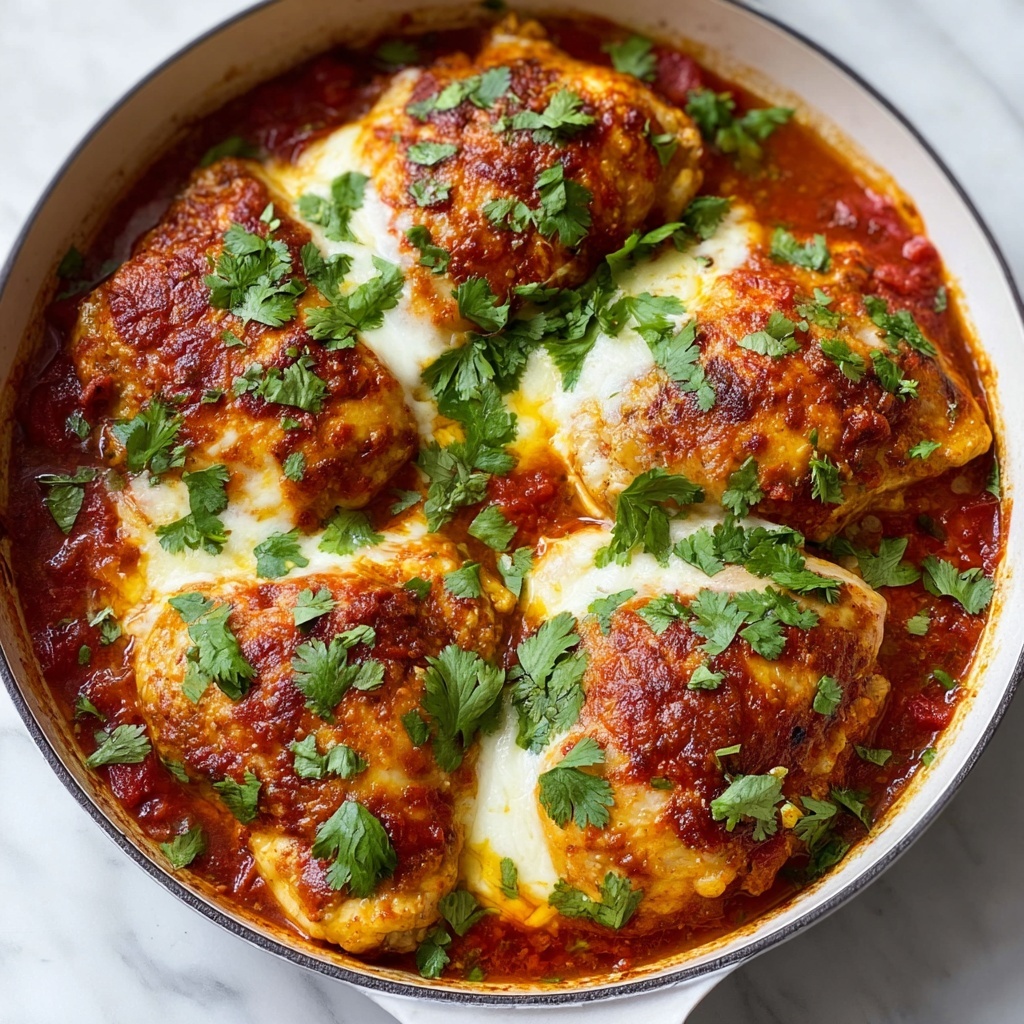
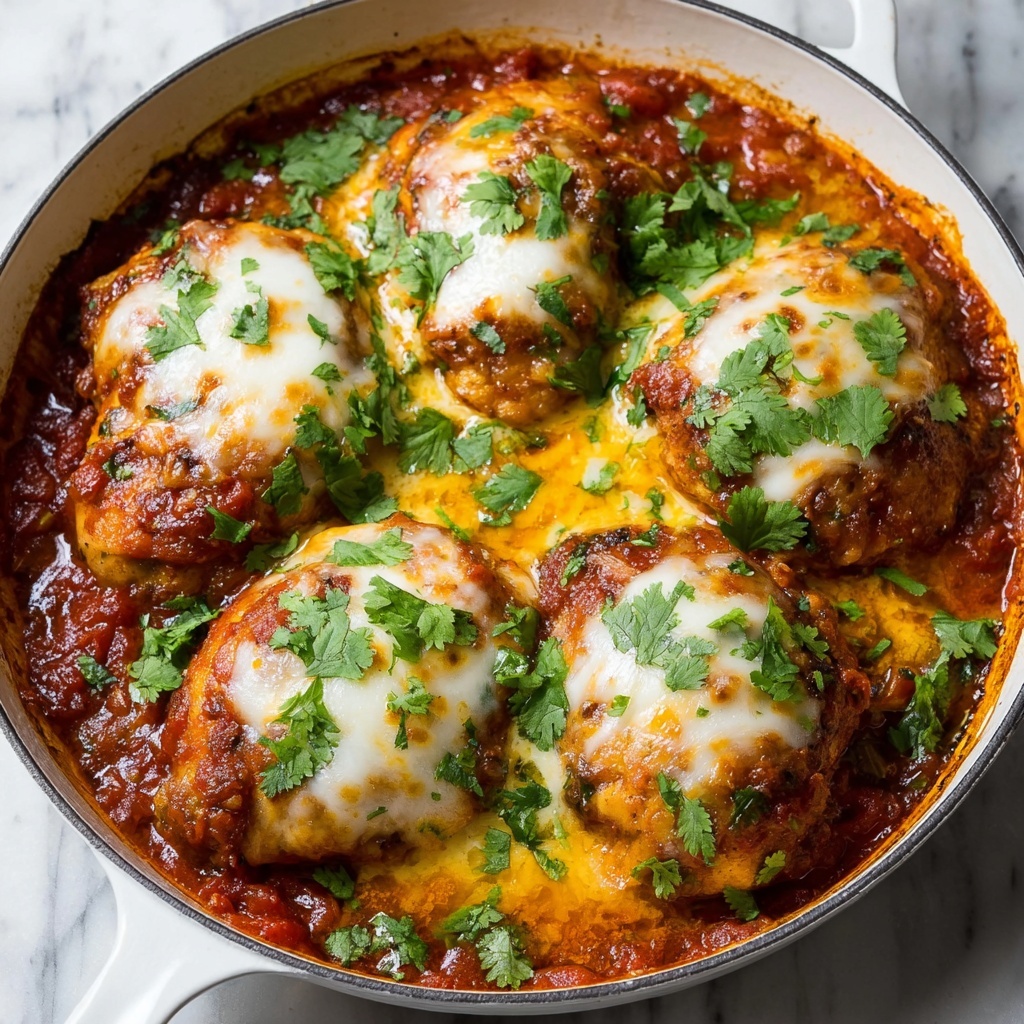
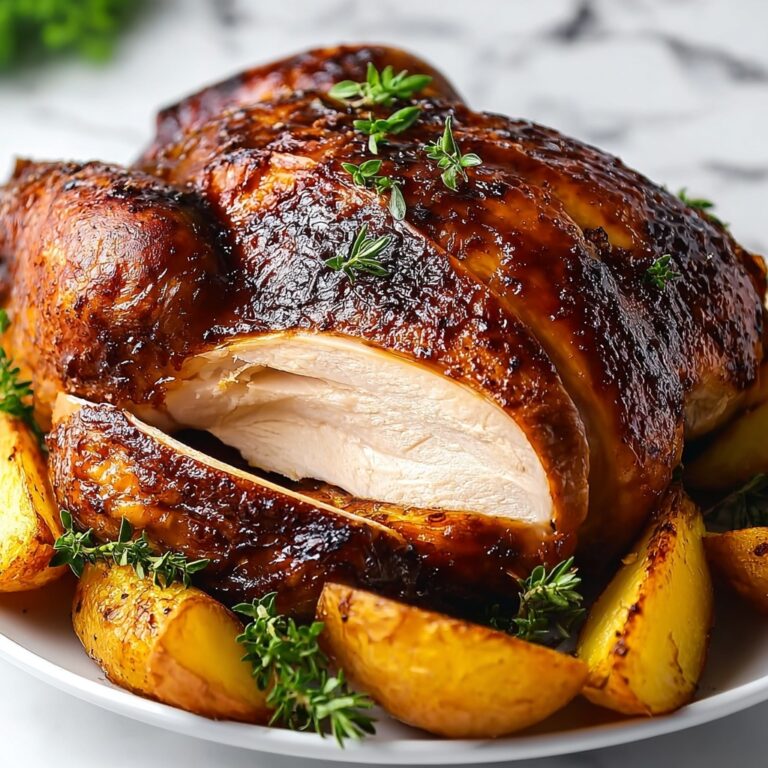
There is something incredibly comforting about a meal that comes together quickly yet manages to be deeply satisfying, flavorful, and wholesome. This Skillet Salsa Chicken Recipe is exactly that kind of dish. The combination of juicy chicken cutlets, the vibrant kick of rich salsa, and the gooey melted Mexican cheese blend creates a beautiful harmony of textures and tastes that will make you want to cook it again and again. Whether you are preparing a busy weeknight dinner or an impromptu meal for friends, this skillet chicken dish hits all the right notes with minimal fuss and maximum reward.
This style of chicken, cooked right in a skillet and topped with salsa and cheese, draws from a crossroads of culinary traditions that embrace simple ingredients elevated by straightforward techniques. It conjures images of casual family dinners where everyone gathers around the table to share food that is both homey and delicious. Salsa chicken recipes like this are beloved because they are adaptable, bringing a bit of warmth and spice reminiscent of Southwestern and Mexican influences. The process of simmering chicken in salsa and then finishing it under a broiler to melt the cheese has long been a way to turn pantry staples into a memorable meal.
When you follow this Skillet Salsa Chicken Recipe, you will discover a method that simplifies preparation while ensuring the flavors shine through with clarity. Unlike some versions that call for many additional ingredients or complicated steps, this recipe focuses on the essentials—the perfect balance of spice, moisture, and cheese that elevate the chicken without overwhelming it. You will learn how to create tender, well-seasoned chicken layered with a luscious salsa sauce right in one skillet, saving time and cleanup. This variation also cuts the chicken breasts into thinner cutlets, ensuring they cook evenly and stay juicy.
Why You’ll Love This Skillet Salsa Chicken Recipe
This recipe’s greatest strength lies in its approachable simplicity paired with satisfying results. The entire process takes just about 30 minutes, which means even the busiest cooks can put a satisfying dinner on the table without stress. The use of common ingredients in a one-skillet format keeps things tidy and efficient, making it possible to prepare a meal that tastes like it took hours of effort in a fraction of that time. You can easily multitask while the chicken bakes, freeing you up to attend to other elements of your meal or unwind after work.
Skillet Salsa Chicken is also fantastic for serving a crowd or family because it scales seamlessly. You can double or triple the amount of chicken breasts and adjust the salsa and cheese accordingly, all while sticking to the same method. This flexibility makes it a dependable choice for casual dinners, weekend get-togethers, or last-minute guests. The colorful presentation and straightforward flavors tend to appeal to a wide range of palates, from kids to adults, making it a recipe that tends to please everyone at the table.
Finally, making this dish at home offers benefits beyond simply controlling the ingredients. It lets you tailor the seasoning and salsa choice exactly to your preference, perhaps opting for a milder salsa if you prefer less heat or choosing a smoky chipotle variety for a more intense flavor. Cooking it yourself also means you avoid the additives and preservatives common in many store-bought or restaurant versions. The satisfaction of producing a wholesome, fresh meal like this Skillet Salsa Chicken Recipe for your loved ones is incomparable and something that makes dinner feel truly special.
Ingredients You’ll Need
The stars of this dish are the boneless, skinless chicken breasts, which provide a tender and lean protein base that carries the flavors beautifully. Seasoning the chicken with garlic powder and chili powder introduces earthy and piquant notes that blend perfectly with the salsa. The shredded Mexican cheese blend is essential for adding creamy, melty richness that contrasts with the zesty salsa. Another key ingredient is the jarred salsa itself—it functions as both sauce and flavor enhancer, lending moisture and complexity without requiring extra steps.
Aside from the main highlights, the recipe relies on a few pantry staples like all-purpose flour, butter, olive oil, chicken broth, and simple seasonings such as salt and pepper. These ingredients help build the cooking process from searing the chicken to making the simmering sauce that binds everything. If you cannot find flour or prefer not to use it, cornstarch or rice flour can work as a light dredge alternative to help chicken develop a slight crust. Choosing a high-quality salsa will make a big difference, so if your favorite store brand is a bit bland, try a fresh or locally produced one for an extra punch.
- 2 large boneless, skinless chicken breasts: These are the foundation of the dish and provide lean protein. When selecting chicken breasts, opt for uniform size to ensure even cooking. If you find thicker breasts, cutting them in half horizontally as described helps them cook faster and more evenly.
- ½ teaspoon garlic powder: Garlic powder adds a mild, savory depth that infuses the chicken without overpowering it. If you only have fresh garlic, use about one small minced clove per half teaspoon, sautéed briefly in the pan before adding chicken.
- ½ teaspoon chili powder: This spice provides gentle warmth and earthiness to balance the tangy salsa. Depending on your heat preference, you can adjust this slightly or substitute with smoked paprika for a smoky twist.
- Salt and pepper, to taste: Basic seasonings that enhance all the other flavors and help create a savory base. Season generously but keep in mind the salsa and broth will also add saltiness.
- All-purpose flour, for dredging: Lightly coating the chicken helps develop a subtle crust when seared, locking in juices. For gluten-free options, use rice flour or cornstarch instead.
- 1 tablespoon butter: Butter adds richness and helps achieve a golden brown crust on the chicken. Clarified butter or ghee can be used for a higher smoke point if desired.
- 1 tablespoon olive oil: Olive oil complements the butter by preventing it from burning and aids in even browning. Extra virgin olive oil works fine, but for a neutral flavor you may use vegetable or canola oil.
- ¼ cup chicken broth: This liquid deglazes the pan, lifting flavorful browned bits before the salsa is added. Low-sodium broth is a good choice if watching salt intake.
- 1 (14.5-ounce) jar salsa: The sauce base that brings tang, acidity, and additional seasoning. Choose a salsa you enjoy eating by itself for the best results—chunky or smooth styles both work.
- 1 cup shredded Mexican cheese blend: A combination of cheeses like cheddar, Monterey Jack, and queso quesadilla provides melty richness and gooey texture. Use freshly shredded cheese rather than pre-shredded for the best melt.
- Fresh cilantro, chopped (optional, for garnish): Cilantro adds a fresh, herbal brightness that contrasts with the warm spices. If you are not a fan, chopped parsley or green onions can serve as alternative garnishes.
How to Make Skillet Salsa Chicken Recipe
This Skillet Salsa Chicken Recipe combines straightforward steps, but the technique makes all the difference. You start by prepping the chicken into thin cutlets to promote even cooking and seasoning them to build layers of flavor. Searing in a hot skillet locks in juices and creates a flavorful crust. Then, using the same skillet allows you to craft a quick salsa sauce by deglazing the pan with broth and adding jarred salsa. Finally, topping the chicken with cheese and finishing it in the oven creates a melty, succulent layer that brings everything together perfectly. The seamless transition from stovetop to oven encourages retention of moisture in the chicken and intensifies the taste.
Step 1: Prep Chicken Cutlets and Season
The first step is all about preparing the chicken breasts the right way. Start by preheating your oven to 400°F (200°C), so it’s ready when you need it. Slice each chicken breast in half lengthwise to create thinner cutlets that will cook more evenly and quickly. Next, season both sides of the cutlets with garlic powder, chili powder, salt, and pepper, sprinkling evenly to cover. This seasoning mix begins to impart a nice flavor foundation to the chicken before it hits the skillet. Then, dredge each piece lightly in all-purpose flour, shaking off the excess. This coating helps the chicken develop a light crust when cooking, but be careful not to use too much flour, or you might end up with a gummy texture instead of a crisp exterior.
Step 2: Sear the Chicken in Butter and Olive Oil
Heat a large oven-safe skillet on medium-high heat and add the butter and olive oil. The combination allows the butter to brown gently without burning thanks to the oil’s higher smoke point. Once the butter has melted and begun to foam, place the chicken cutlets carefully in the pan. Cook them until they form a golden crust on each side, about 3-4 minutes per side. It’s important not to crowd the pan to maintain the heat and achieve good browning. Avoid moving the chicken too soon, or you risk the coating sticking and tearing. Once browned, remove the chicken temporarily from the skillet and set aside; they will finish cooking through later in the oven.
Step 3: Deglaze the Pan with Chicken Broth
With the chicken out of the skillet, add the ¼ cup of chicken broth to the hot pan. Using a wooden spoon or spatula, scrape the bottom of the skillet to lift the browned bits left from searing the chicken. These caramelized bits are packed with flavor and form the base of your sauce. Let the broth simmer for a minute or two until slightly reduced, which intensifies its taste while loosening any stuck-on pieces. This step is crucial because it transforms the fond into a tasty sauce foundation that will mingle with the salsa.
Step 4: Add Salsa and Simmer Gently
After the broth has reduced a bit, pour in the entire jar of your favorite salsa. Stir to combine, blending the salsa with the broth and caramelized bits. Bring the mixture to a gentle simmer and let it cook for about 5 minutes. During this time, the salsa heats through, slightly thickens, and melds flavors with the broth residue. Keep the heat moderate to avoid splattering and to keep the sauce vibrant and fresh-tasting. This simmered salsa mixture becomes the flavorful sauce that keeps the chicken moist and adds its characteristic tang.
Step 5: Return Chicken and Add Cheese
Place the seared chicken cutlets back into the skillet, nestling them into the salsa so they are partially submerged. Using a spoon, ladle some salsa over the tops of the chicken to cover evenly. Then sprinkle the shredded Mexican cheese blend generously on top of the chicken and sauce. The cheese helps tie the flavors together, creating a creamy, melty topping after baking. Because this skillet goes directly into the oven, using an oven-safe pan is important to safely cook and melt the cheese without transferring dishes.
Step 6: Bake and (Optional) Broil to Finish
Transfer the skillet into your preheated 400°F (200°C) oven. Bake for about 5-7 minutes, or until the chicken is fully cooked through and the cheese has melted beautifully. The cheese should be bubbly and soft, melding with the salsa to form a luscious topping. If you desire an extra golden and slightly crisp cheese crust, you can optionally switch the oven to broil for 2-3 minutes to brown the cheese gently. Just be sure to watch carefully to prevent burning. Once done, remove from the oven and let the skillet rest for a few minutes before serving. This resting period lets flavors settle and ensures the chicken remains juicy.
Pro Tips for the Best Skillet Salsa Chicken Recipe
Tip 1: Choose Thin, Evenly Sized Chicken Breasts
Starting with uniformly sized and adequately thin chicken breasts is key to even cooking. If your chicken breasts are thick or large, slicing them in half lengthwise helps them cook quickly and consistently, avoiding dry outs. This small prep step improves texture and helps achieve juicy results every time with this skillet method.
Tip 2: Don’t Skip Dredging in Flour
Lightly coating the chicken with flour before searing is important for developing a tasty crust that locks in juices. It helps create a slight barrier against direct heat and forms a lovely golden color when cooked in butter and oil. Be sure to shake off excess flour to prevent clumping, which can affect the sauce’s texture later.
Tip 3: Use a Good Quality Salsa
The salsa you choose for this dish profoundly influences the flavor profile. Selecting a jarred salsa you enjoy eating on its own will result in better taste and freshness. Feel free to try different types such as mild, medium, or smoky chipotle to customize the heat and aroma according to your preference.
Tip 4: Always Use an Oven-Safe Skillet
Cooking this recipe entirely in one pan works beautifully when the skillet is oven-safe. Cast iron, stainless steel, or other sturdy pans labeled safe for the oven work best to move easily from stove to oven. Avoid non-stick pans that may warp or release harmful fumes under direct heat.
Variations and Substitutions
Make It Vegetarian
If you want to turn this Skillet Salsa Chicken Recipe into a meatless meal, substituting the chicken with hearty vegetables or plant-based proteins works well. Thick slices of portobello mushrooms, zucchini, or cauliflower steaks can be seasoned and cooked in a similar manner. You could also use firm tofu or tempeh, pressing and cutting into thin slabs, then dredging and searing just like chicken. These options absorb the salsa flavors wonderfully and provide satisfying texture with less fat.
Make It Spicy
To boost the heat level, you can add diced jalapeños or serrano peppers to the salsa sauce during simmering or sprinkle crushed red pepper flakes over the chicken before baking. Another option is to use a spicy salsa variant, such as one infused with chipotle or habanero peppers. Start with about one finely chopped jalapeño or half a teaspoon crushed red pepper and adjust according to taste to avoid overwhelming the dish with too much heat.
Protein Swaps
Besides chicken breasts, this recipe adapts well to several other proteins. Thin pork cutlets or boneless pork chops may be used, keeping cook times similar to chicken to avoid toughness. Turkey cutlets provide a leaner alternative and will cook in about the same time. For seafood lovers, thick, firm fish fillets such as cod or halibut can also be prepared using this method, reducing oven time slightly to prevent overcooking. Always monitor internal temperatures to ensure safe, juicy results.
Dietary Modifications
Adapting this recipe to various dietary needs is uncomplicated. For a gluten-free version, replace the all-purpose flour with rice flour, cornstarch, or a gluten-free flour blend to dredge the chicken. To reduce sodium, choose low-sodium chicken broth and salsa varieties, and adjust salt seasoning carefully. For dairy-free diets, substitute the butter with coconut oil or avocado oil, and replace the shredded cheese with a plant-based vegan cheese that melts well, such as one made from cashews or tapioca starch.
How to Serve Skillet Salsa Chicken Recipe
Garnishes
Fresh garnishes can brighten both the appearance and flavor of skillet salsa chicken. Chopped fresh cilantro is a classic choice, adding vibrant color and a fresh herbal note that cuts through the richness. A dollop of sour cream or Greek yogurt on top adds creamy tanginess and balances the spiciness of the salsa. Thinly sliced green onions or scallions can provide a mild onion flavor and appealing green accent, making each serving look inviting and fresh.
Side Dishes
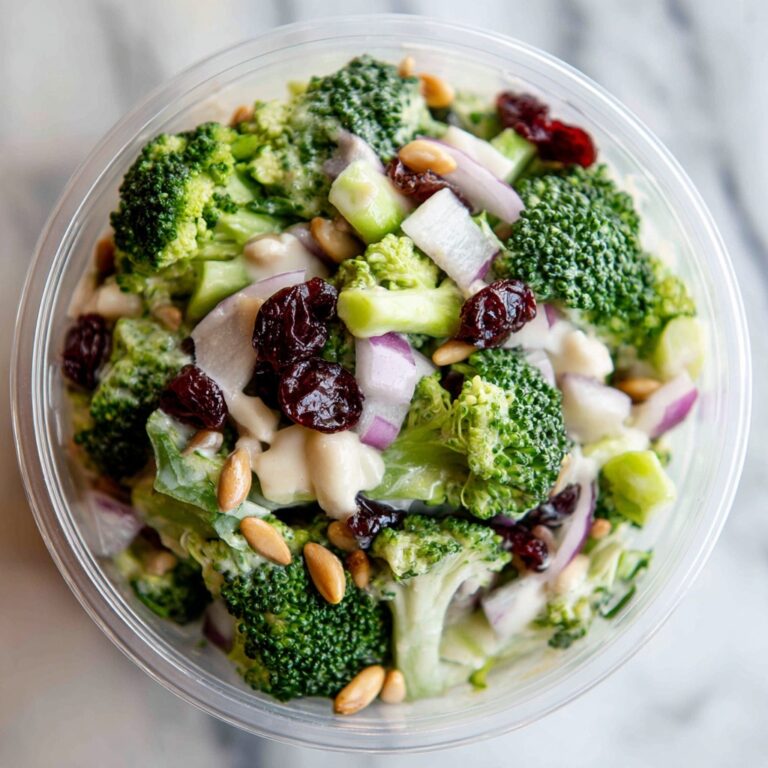
This dish pairs beautifully with a variety of side dishes that complement its bold flavors and textures. Fluffy Mexican rice or cilantro lime rice soaks up the sauce wonderfully, becoming part of the meal. Black beans or refried beans add protein and fiber along with a creamy texture contrast. Roasted or steamed vegetables, such as corn on the cob or sautéed bell peppers, contribute freshness and color to the plate. For a lighter option, a crisp green salad with citrus vinaigrette provides a refreshing counterbalance.
Creative Presentation Ideas
For a simple weeknight dinner, plate the chicken alongside steamed rice and a sprinkle of fresh cilantro for a quick and satisfying meal. When entertaining guests at a dinner party, serve the skillet chicken in the pan directly at the table with decorative lime wedges and bowls of garnishes so everyone can customize their portions. For a fun potluck dish, slice the chicken cutlets into smaller pieces, arrange on a serving platter, and serve it with warm tortillas and a selection of salsas, cheeses, and fresh veggies for build-your-own tacos.
Make Ahead and Storage
Storing Leftovers
Leftover skillet salsa chicken can be stored in an airtight container in the refrigerator for up to three days. Use a glass or BPA-free plastic container with a tight-fitting lid to help preserve freshness and prevent odors from spreading. To maintain the best texture, allow the chicken to cool slightly at room temperature before refrigerating, and keep the sauce and chicken together so the meat stays moist.
Freezing Instructions
This recipe freezes well if you want to prepare meals in advance. Allow the cooked chicken and sauce to cool completely, then transfer into a freezer-safe airtight container or heavy-duty zip-top plastic bag. Label with the date and use within 2-3 months for optimal taste. When ready to enjoy, thaw the dish overnight in the refrigerator. Avoid thawing at room temperature to minimize food safety risks.
Reheating Methods
For the best results, reheat skillet salsa chicken gently to preserve texture and flavor. On the stovetop, warm the leftovers over medium-low heat in a covered pan, stirring occasionally until heated through. In the oven, preheat to 350°F (175°C), place the chicken and sauce in an oven-safe dish, cover with foil, and bake for 15-20 minutes. When using a microwave, cover the container loosely to retain moisture and heat in short bursts, stirring in between to promote even warming without drying out the chicken.
FAQs About Skillet Salsa Chicken Recipe
Can I use frozen chicken breasts for this recipe?
It is best to use fresh or fully thawed chicken breasts for this recipe. Cooking chicken that is partially frozen can result in uneven cooking and a rubbery texture. If you only have frozen chicken, be sure to thaw it completely in the refrigerator overnight and pat dry before seasoning and cooking for the best result.
What type of salsa is best to use?
Any jarred salsa that you enjoy eating on its own works well. Mild, medium, or hot salsas can be used according to your heat preference. Chunky salsas add texture while smooth ones create a creamier sauce; either will work fine depending on your taste.
Can I make this recipe dairy-free?
Yes, you can easily make a dairy-free version by substituting the butter with olive oil or coconut oil and using a dairy-free cheese alternative that melts well. Many plant-based cheeses made from nuts or soy will provide good texture and flavor to complement the salsa and chicken.
How can I tell when the chicken is fully cooked?
The most reliable method is to use a meat thermometer inserted into the thickest part of the cutlet. The internal temperature should reach 165°F (74°C). Alternatively, you can cut into the chicken to check—it should be opaque and the juices run clear.
Is it necessary to broil the cheese at the end?
Broiling is optional and simply gives the cheese a browned, slightly crisp top that some prefer. If you skip the broil step, the cheese will still be melted and delicious. Just keep an eye on the chicken so it doesn’t overcook during this final stage.
Can this recipe be doubled or halved?
Yes, the recipe scales well. If doubling, use a larger skillet or cook in batches to avoid overcrowding. Halving the recipe works perfectly for smaller servings and reduces cooking times slightly, especially in the oven.
What are some good side dishes to serve with this chicken?
Great side options include Mexican rice, black beans, steamed vegetables like corn or bell peppers, and fresh salads with citrus vinaigrette. These sides complement the spicy, cheesy chicken and round out the meal nutritionally and visually.
Final Thoughts
This Skillet Salsa Chicken Recipe offers a wonderful balance of spice, creaminess, and comforting textures that can quickly become a favorite in your meal rotation. Its ease and flexibility make it a practical dish for busy nights but also appealing enough to serve to guests. The harmony between the lightly seasoned chicken, tangy salsa sauce, and melted cheese topping showcases how simple ingredients can come together to create a deeply satisfying dinner experience.
I encourage you to give this Skillet Salsa Chicken Recipe a try and personalize it with your favorite salsa or garnishes. Whether you cook it just for your family or share it with friends, this recipe lends itself to easy modifications and consistently rewarding results. Don’t hesitate to come back and explore more recipes that celebrate the joy of home cooking!
Print
- Prep Time: 10 minutes
- Cook Time: 20 minutes
- Total Time: 30 minutes
- Yield: 4 servings
- Category: Main Course
- Method: Baking
- Cuisine: Mexican
- Diet: Gluten Free
Description
This Skillet Salsa Chicken recipe features juicy, lightly seasoned chicken cutlets smothered in a flavorful salsa sauce and topped with melted Mexican cheese. Cooked in a skillet and finished in the oven, this easy 30-minute meal is perfect for a quick weeknight dinner, garnished with fresh cilantro for a vibrant touch.
Ingredients
Chicken
- 2 large boneless, skinless chicken breasts
- ½ teaspoon garlic powder
- ½ teaspoon chili powder
- Salt and pepper, to taste
- All-purpose flour, for dredging
Cooking
- 1 tablespoon butter
- 1 tablespoon olive oil
- ¼ cup chicken broth
- 1 (14.5-ounce) jar salsa (your favorite kind)
- 1 cup shredded Mexican cheese blend
- Fresh cilantro, chopped (optional, for garnish)
Instructions
- Prep Chicken: Cut the chicken breasts in half lengthwise to create thinner cutlets. Season each piece evenly with garlic powder, chili powder, salt, and pepper. Then dredge the chicken cutlets lightly in all-purpose flour, shaking off any excess flour to ensure a light coating.
- Cook Chicken: Heat butter and olive oil together in an oven-safe skillet over medium-high heat until melted and hot. Add the floured chicken cutlets to the skillet and cook for about 3–4 minutes on each side, or until they are lightly golden brown. Once browned, remove the chicken from the skillet and set aside.
- Make Sauce: Pour the chicken broth into the same skillet, scraping up any browned bits stuck to the pan to incorporate those flavors. Stir in the salsa and bring the mixture to a gentle simmer on the stovetop.
- Assemble and Bake: Return the browned chicken cutlets to the skillet on top of the salsa mixture. Spoon some salsa over the chicken to coat it evenly, then sprinkle the shredded Mexican cheese blend across the top. Transfer the entire skillet to a preheated oven set at 400°F (200°C) and bake for 5 to 7 minutes, or until the chicken is cooked through and the cheese has melted. For a browned cheese topping, optionally broil for an additional 1–2 minutes, watching carefully to prevent burning.
- Serve: Remove the skillet from the oven. Garnish the salsa chicken with freshly chopped cilantro if desired, then serve immediately while hot and cheesy.
Notes
- Ensure chicken cutlets are evenly thin for quick and even cooking.
- You can use any salsa flavor you prefer—mild, medium, or hot—to adjust the spiciness.
- Use an oven-safe skillet such as cast iron to transition directly from stovetop to oven.
- Do not over-broil; keep an eye on the cheese to avoid burning.
- Leftovers can be refrigerated for up to 3 days and reheated gently to preserve moisture.
