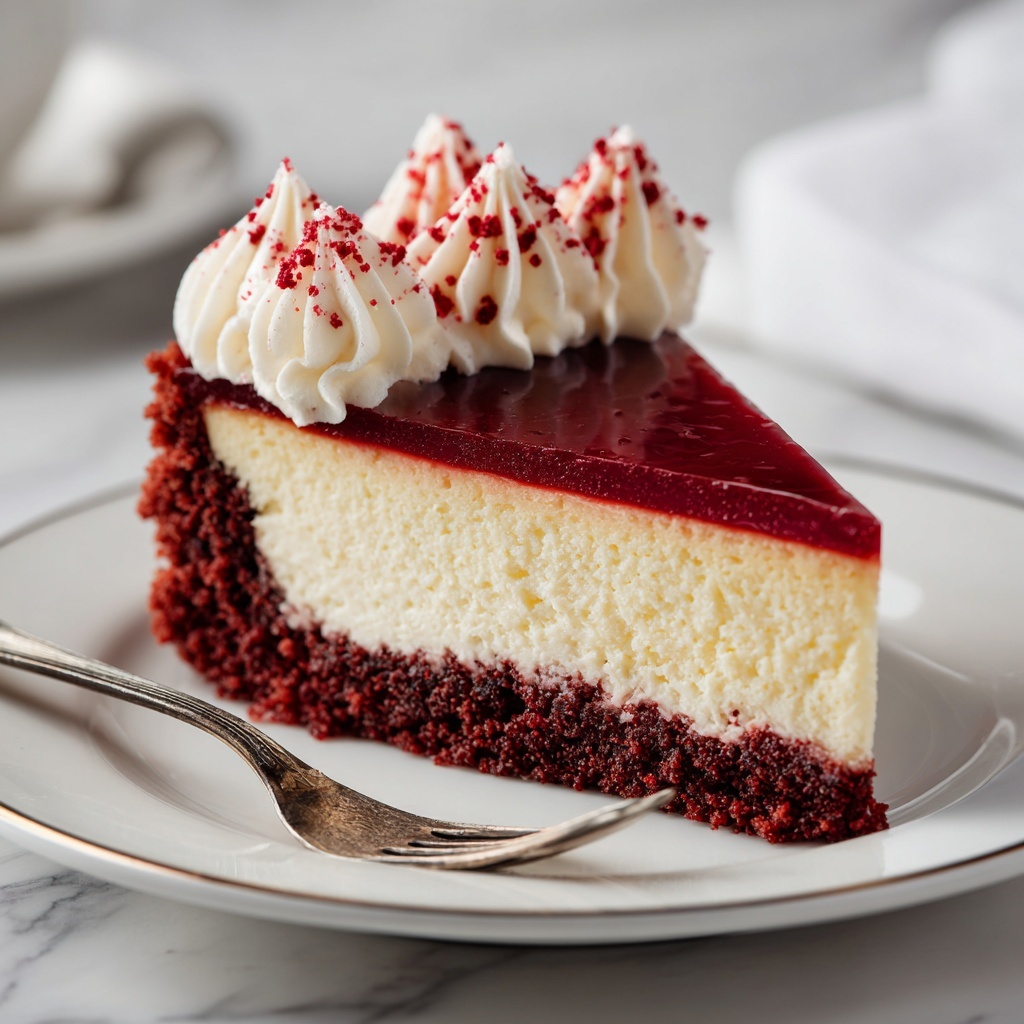
There is something truly magical about combining two beloved desserts into one showstopper, and that’s exactly what this Homemade Red Velvet Cheesecake Recipe delivers. Picture a rich, velvety red velvet cake swirling through creamy, dreamy cheesecake, all nestled on a crispy Oreo crust that adds the perfect crunch. Every slice feels like a celebration, bursting with vibrant color and layers of flavor that are both classic and surprising. Whether you’re baking for a special occasion or just craving something extraordinary, this recipe is sure to steal hearts and plate it with smiles.
Ingredients You’ll Need
Getting started with this Homemade Red Velvet Cheesecake Recipe means gathering a handful of simple but essential ingredients, each playing its part in building the cake’s luxurious texture and that unmistakable red velvet charm. From the rich cream cheese that makes the cheesecake silky smooth to the vibrant red food coloring that gives this dessert its stunning look, every item is chosen to craft a perfect balance of taste and aesthetics.
- Crushed Oreo cookies: Provides a chocolatey, crunchy base that contrasts beautifully with the creamy filling.
- Unsalted butter: Melts into the crushed cookies to help form a firm, buttery crust.
- Cream cheese (32 ounces): The star ingredient, creating a rich and creamy cheesecake filling.
- Granulated sugar: Sweetens the cheesecake perfectly without overpowering the cocoa’s subtle bitterness.
- Cocoa powder: Adds that hint of chocolate depth essential to traditional red velvet flavor.
- Sour cream: Contributes moisture and slight tang, making the texture extra smooth and tender.
- White vinegar: Enhances the red velvet’s characteristic tang and reacts with baking elements to brighten color.
- Vanilla extract: Brings warmth and rounds out the flavor beautifully.
- Red food coloring: The iconic hue that makes this cake instantly recognizable and festive.
- Large eggs: Bind the batter and provide structure while keeping it fluffy.
- Additional cream cheese (4 ounces): Used for the frosting, bringing extra creaminess and tang.
- Unsalted butter (¼ cup): Softened for a smooth, buttery frosting texture.
- Confectioners’ sugar: Sweetens the frosting and ensures it’s perfectly silky.
How to Make Homemade Red Velvet Cheesecake Recipe
Step 1: Prepare the Crust
Start by preheating your oven to 350°F (175°C) and wrapping the bottom of a 9-inch springform pan with two layers of heavy-duty aluminum foil—this waterproof shield is key to prevent water leaks later. Combine the crushed Oreo cookies with melted butter until evenly mixed, then press this mixture firmly into the bottom and up the sides of your pan. Bake the crust for 10 minutes, then let it cool completely. This simple foundation will add a crunch that perfectly balances the cheesecake’s smoothness.
Step 2: Mix the Cheesecake Batter
Lower your oven heat to 300°F (150°C) for the gentle baking needed here. Start by beating the softened cream cheese until it’s completely smooth—no lumps allowed! Gradually add sugar and cocoa powder, mixing until everything is well combined. Then, blend in the sour cream, white vinegar, vanilla extract, and that vibrant red food coloring. Carefully fold in the lightly beaten eggs one at a time to create a luscious and velvety batter that holds just the right amount of air for a tender texture.
Step 3: Bake in a Water Bath
Pour your beautiful red velvet cheesecake batter over the cooled Oreo crust in the springform pan. Now for the secret to the perfect creamy texture: place the cheesecake pan inside a larger roasting pan and add boiling water until it reaches halfway up the sides of the springform pan. This water bath provides gentle, even heat that prevents cracking. Bake for 1 hour, then turn off the oven and leave the cheesecake inside for an additional hour to set gradually. This extra step is what makes this recipe so beautifully smooth.
Step 4: Chill and Frost
After baking, let the cheesecake cool on a wire rack before transferring it into the refrigerator for at least 4 hours, or better yet, overnight. Chilling lets the flavors meld and the texture firm up perfectly. For the frosting, beat softened cream cheese and butter together until creamy, then mix in confectioners’ sugar and vanilla extract. Spread this luscious frosting over the chilled cheesecake just before serving to add a creamy, sweet finishing touch that complements every bite.
How to Serve Homemade Red Velvet Cheesecake Recipe
Garnishes
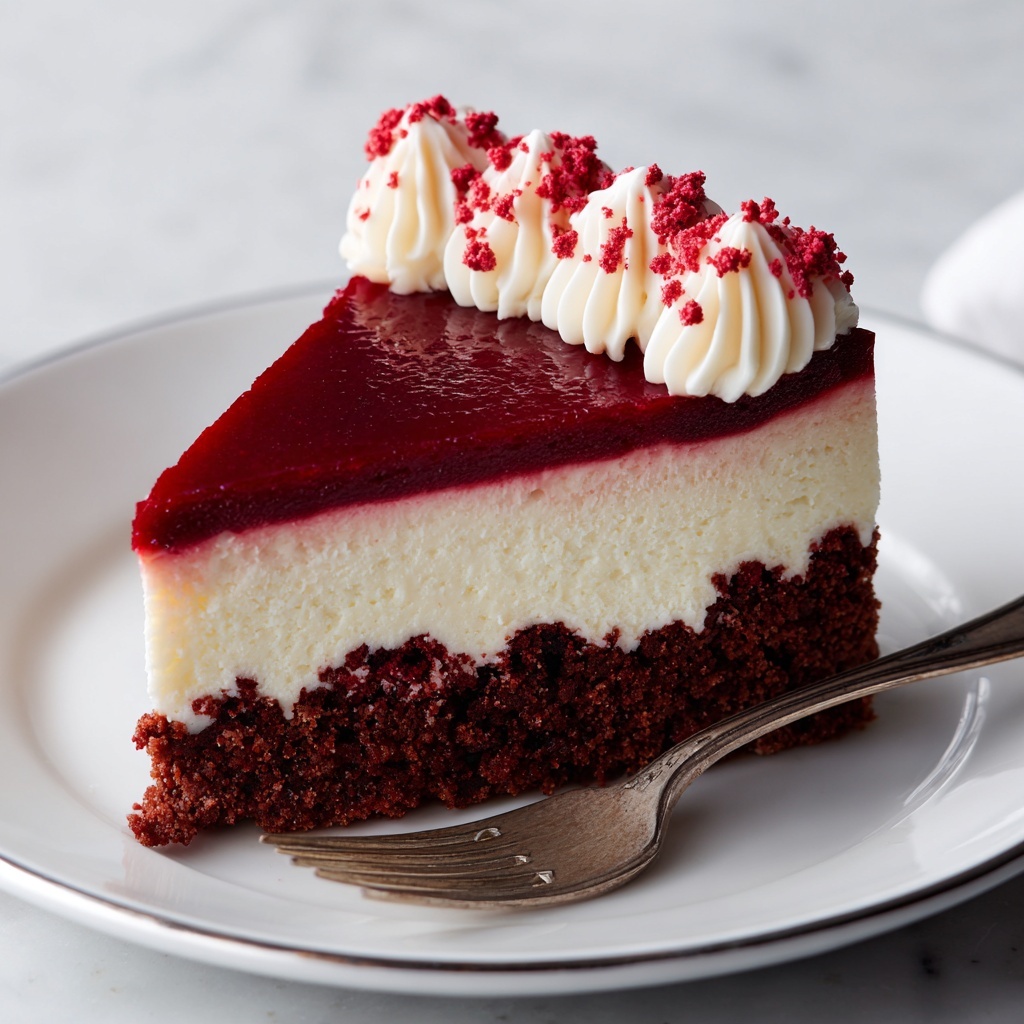
The frosting is delicious on its own, but feel free to sprinkle some crushed Oreos or a few fresh raspberries on top for a fresh burst of flavor and a bit of crunch. A light dusting of cocoa powder or some white chocolate shavings can also add elegance to each slice. These garnishes not only enhance the look but add layers of taste that delight the senses.
Side Dishes
This cheesecake shines beautifully on its own, but serving it alongside a scoop of vanilla bean ice cream or fresh whipped cream can elevate the experience even further. A cup of bold coffee or a glass of cold milk pairs perfectly, creating a comforting and indulgent dessert moment that feels like a warm hug.
Creative Ways to Present
For festive occasions, consider layering your Homemade Red Velvet Cheesecake Recipe in individual dessert jars or clear cups for a stunning presentation that highlights the cake’s vibrant colors and textures. You can also create mini cheesecakes using cupcake liners in a muffin tin, making them perfect for parties and easy sharing. No matter how you serve it, this cheesecake is sure to impress.
Make Ahead and Storage
Storing Leftovers
Keep your cheesecake covered tightly with plastic wrap or stored in an airtight container in the refrigerator. This will maintain its moisture and prevent it from absorbing other fridge odors. Properly stored, leftovers stay fresh for up to 4 days—giving you plenty of time to savor every last forkful.
Freezing
If you want to preserve your Homemade Red Velvet Cheesecake Recipe for longer, freezing is a great option. Wrap individual slices in plastic wrap and then foil or use airtight containers to prevent freezer burn. When stored properly, the cheesecake can last up to 2 months. Just be sure to thaw slowly in the refrigerator before serving to maintain its luscious texture.
Reheating
Cheesecake is best enjoyed chilled, so reheating isn’t usually recommended. However, if you prefer it at room temperature, simply let it sit out for 15 to 20 minutes before serving. This allows the flavors to come alive without compromising the smooth texture that makes this dish so beloved.
FAQs
Can I use a different cookie for the crust?
Absolutely! While Oreos add a lovely chocolate crunch, you can substitute with graham crackers, chocolate wafer cookies, or even crushed gingersnaps for a unique twist. Just be sure to mix with melted butter and press firmly for a solid crust.
Why do we use a water bath to bake the cheesecake?
The water bath provides gentle, even heat that prevents the cheesecake from cracking and helps it bake evenly. It keeps the edges from overcooking while ensuring the center sets perfectly creamy—an essential step in the Homemade Red Velvet Cheesecake Recipe.
Can I make this cheesecake without food coloring?
Yes, but the signature vibrant red color of red velvet won’t be as pronounced. You could opt for natural alternatives like beet juice for a subtle hue, though it might slightly alter the flavor and texture.
How long should I chill the cheesecake before serving?
For the best texture and flavor, refrigerate the cheesecake for at least 4 hours, ideally overnight. This resting time lets all the layers set properly and allows the flavors to meld beautifully.
Is it okay to use regular cocoa powder in the recipe?
Yes, regular unsweetened cocoa powder works perfectly. It adds the necessary chocolate depth to balance the sweetness and enhance the red velvet flavor in your cheesecake.
Final Thoughts
If you’re searching for a dessert that will wow guests and satisfy any sweet tooth, the Homemade Red Velvet Cheesecake Recipe is an unbeatable choice. Rich, creamy, vibrant, and deeply flavorful, it turns two beloved treats into one unforgettable delight. Give it a try—you might just find your new favorite indulgence to share over laughter, good company, and celebratory moments.
Print
Homemade Red Velvet Cheesecake Recipe
- Prep Time: 30 minutes
- Cook Time: 1 hour 10 minutes
- Total Time: 6 hours 42 minutes
- Yield: 12 servings
- Category: Dessert
- Method: Baking
- Cuisine: American
Description
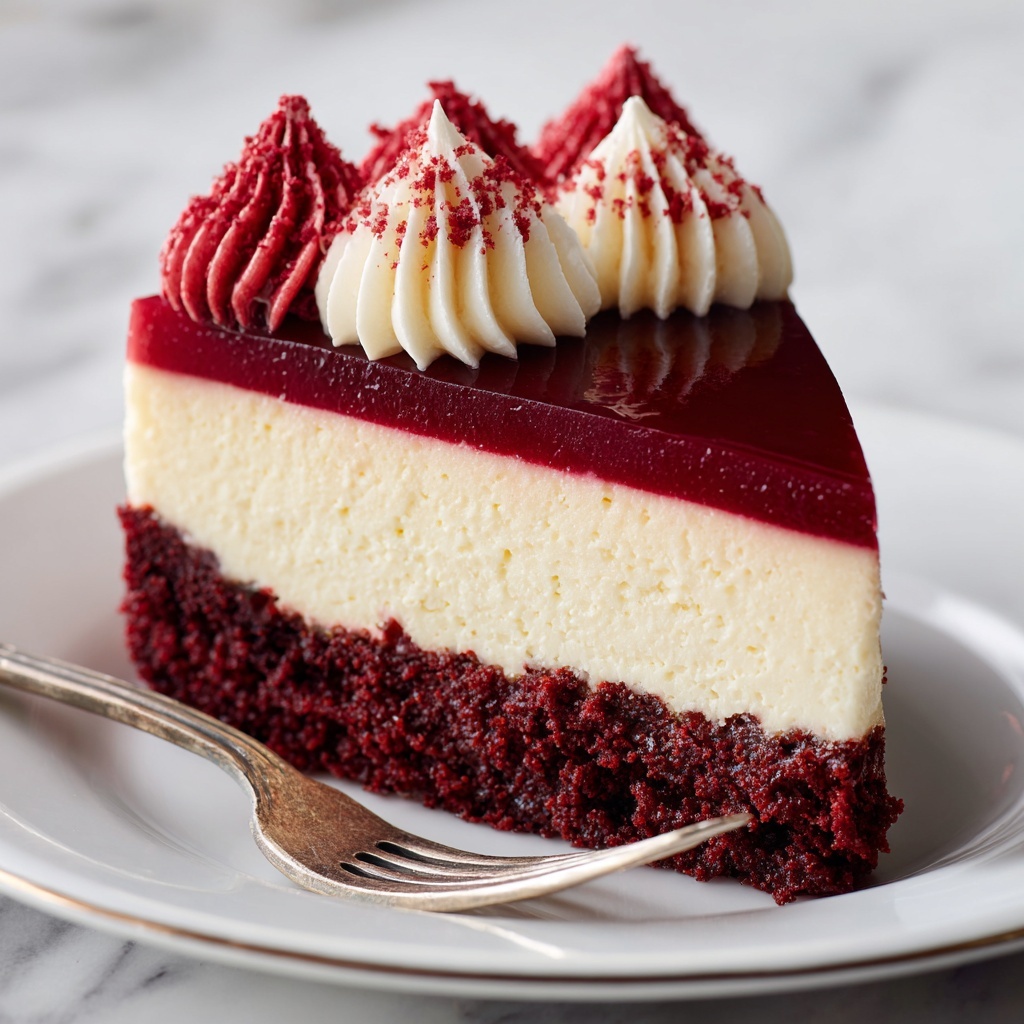
This Homemade Red Velvet Cheesecake combines the rich, creamy texture of classic cheesecake with the vibrant color and subtle cocoa flavor of red velvet cake. Featuring a buttery Oreo cookie crust and a smooth, velvety filling, it is finished with a luscious cream cheese frosting. Perfect for special occasions or as a decadent dessert to impress your guests.
Ingredients
Crust
- 2 ½ cups (250 g) crushed Oreo cookies (about 30 cookies)
- 5 tablespoons unsalted butter, melted
Cheesecake Filling
- 32 ounces (908 g) cream cheese, softened
- 1 ⅓ cups (267 g) granulated sugar
- ½ cup (42 g) cocoa powder
- 1 cup (227 g) sour cream, room temperature
- 1 tablespoon white vinegar
- 1 tablespoon vanilla extract
- 1–2 ounces red food coloring
- 4 large eggs, room temperature, lightly beaten
Frosting
- 4 ounces (113 g) cream cheese, softened
- ¼ cup (56 g) unsalted butter, softened
- 2 cups (260 g) confectioners’ sugar
- 1 teaspoon vanilla extract
Instructions
- Prepare the Oven and Pan: Preheat your oven to 350°F (175°C). Wrap the bottom of a 9-inch springform pan with two layers of heavy-duty aluminum foil to prevent water from leaking in during the water bath baking.
- Make the Crust: Mix the crushed Oreo cookies with melted butter until well combined. Press this mixture firmly into the bottom and slightly up the sides of the prepared springform pan. Bake the crust for 10 minutes, then allow it to cool.
- Prepare the Cheesecake Batter: Reduce the oven temperature to 300°F (150°C). In a large bowl, beat the 32 ounces of softened cream cheese until smooth. Add granulated sugar and cocoa powder and continue mixing. Incorporate the sour cream, white vinegar, vanilla extract, and red food coloring, blending until well combined. Gently fold in the lightly beaten eggs to keep the batter light and airy.
- Bake the Cheesecake: Pour the cheesecake batter over the cooled crust in the springform pan. Place this pan inside a larger roasting pan and fill the larger pan halfway up the sides of the springform pan with boiling water, creating a water bath to ensure even baking and prevent cracking. Bake the cheesecake for 1 hour at 300°F (150°C). After baking, turn off the oven and leave the cheesecake inside the water bath for an additional hour to gradually cool.
- Cool and Chill: Remove the cheesecake from the water bath and cool it on a wire rack. Once at room temperature, refrigerate for at least 4 hours or preferably overnight to allow it to fully set.
- Prepare the Frosting: Using a mixing bowl, beat the softened cream cheese and butter together until creamy and smooth. Gradually add the confectioners’ sugar and vanilla extract, mixing well until the frosting is fluffy.
- Frost and Serve: Once the cheesecake is fully chilled, spread the cream cheese frosting evenly over the top. Slice and serve chilled for a rich and decadent dessert experience.
Notes
- Using room temperature ingredients helps to create a smooth cheesecake batter.
- Wrapping the pan with foil prevents water seepage during the water bath baking.
- The water bath ensures gentle, even baking and reduces the risk of cracking.
- For food coloring, gel-based red coloring is preferred for vibrant color without altering batter consistency.
- Refrigerate the cheesecake overnight for best texture and flavor development.
- Leftover cheesecake should be stored covered in the refrigerator and consumed within 3-4 days.


