
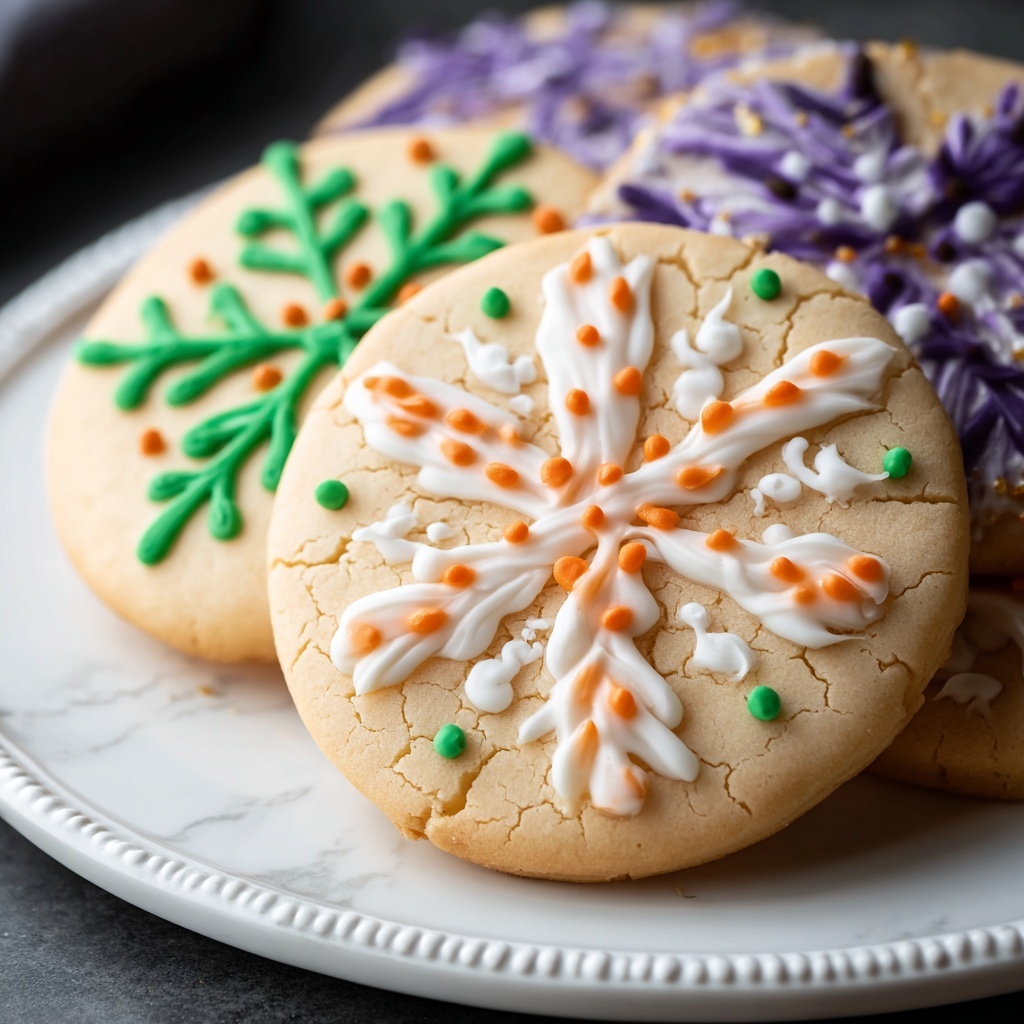
If you love festive treats that bring a burst of color and magical flavors to your gatherings, then you are absolutely going to adore this Hocus Pocus Cookies Recipe. These charming, tri-colored cookies burst with a perfect blend of buttery sweetness and the surprise crunch of white chocolate chips, all wrapped up with a sprinkle of Halloween spirit. Whether you’re baking for a spooky party or just want to add a touch of enchantment to your dessert plate, this recipe offers charm, taste, and simplicity in every bite.
Ingredients You’ll Need
Ingredients You’ll Need
Gathering the ingredients for this recipe is as fun as the baking itself. Each plays a vital role in crafting the perfect texture, richness, and vibrant colors that make these cookies so special. Here’s what you’ll need to conjure up your own batch of magic.
- 1 ½ cups butter, softened: This creates the rich, tender base for your cookie dough.
- 2 cups white sugar: Adds the essential sweetness and helps with lightness when creamed.
- 3 large eggs: Provide structure and moisture, binding everything together beautifully.
- 3 tsp vanilla extract: Infuses a warm, aromatic depth that complements the festive colors.
- 1 ½ tsp cornstarch: Keeps your cookies soft and gives them that melt-in-your-mouth quality.
- 1 ½ tsp baking soda: Works as a leavening agent to ensure perfect rise and texture.
- ¾ tsp salt: Balances the sweetness and enhances all the other flavors.
- 2 cups cake flour: Contributes to a delicate crumb and light texture.
- 2 ½ cups all-purpose flour: Adds sturdiness for rolling and shaping your magical dough.
- Orange, green, and purple gel food coloring: Vital for creating the iconic, bewitching colors that define these cookies.
- 2 cups white chocolate chips: Little pockets of creamy sweetness hidden inside each cookie.
- Halloween sprinkles: The final festive touch, adding color and playful crunch.
How to Make Hocus Pocus Cookies Recipe
Step 1: Prepare Your Space and Baking Sheet
Start by lining a baking sheet with parchment paper. This ensures your cookies bake evenly and release effortlessly, so you don’t lose any of those precious, colorful creations to the pan.
Step 2: Cream Butter and Sugar Until Fluffy
Using a stand mixer, beat the softened butter and sugar together until the mixture becomes light and fluffy. This is the secret step that makes your cookies wonderfully tender and tenderly sweet.
Step 3: Incorporate Eggs and Vanilla
Add the eggs one by one, beating well after each addition to keep that fluffy texture. Stir in the vanilla extract, which elevates the flavor and adds a warm undertone to every bite.
Step 4: Whisk Together the Dry Ingredients
In a separate bowl, combine cake flour, all-purpose flour, cornstarch, baking soda, and salt. Whisking these dry ingredients makes sure they’re evenly distributed for a consistent dough.
Step 5: Mix Dry Ingredients into Wet Mixture
Gradually add the flour mix to your creamed butter and sugar. Mixing just until combined will keep your cookies soft and prevent toughness – we want them delightfully tender, not dense!
Step 6: Divide and Color the Dough
Split the dough into three equal portions. Add orange gel to one, green to the second, and purple to the last. Knead each piece until the color is uniformly mixed throughout, creating that classic witchy vibe.
Step 7: Form and Decorate the Cookie Balls
Scoop about two teaspoons from each colored dough segment, then press them together and roll into balls. Slightly flatten each ball, roll the edges in Halloween sprinkles for that festive crunch, and press white chocolate chips into the tops for hidden bursts of creamy sweetness.
Step 8: Chill the Cookie Dough
Place the decorated dough balls in the refrigerator for 30 minutes. Chilling helps the cookies hold their vibrant shape and colors during baking.
Step 9: Bake to Perfection
Preheat your oven to 400°F (200°C). Bake the cookies for 12-14 minutes until their edges turn a lovely golden brown. Then, transfer them to a wire rack to cool, letting the magic fully set in.
How to Serve Hocus Pocus Cookies Recipe
Garnishes
To make your presentation truly spellbinding, sprinkle an extra handful of Halloween-colored sugar or edible glitter over the top just before serving. A light dusting of powdered sugar can also add a mystical frosted effect that impresses every guest.
Side Dishes
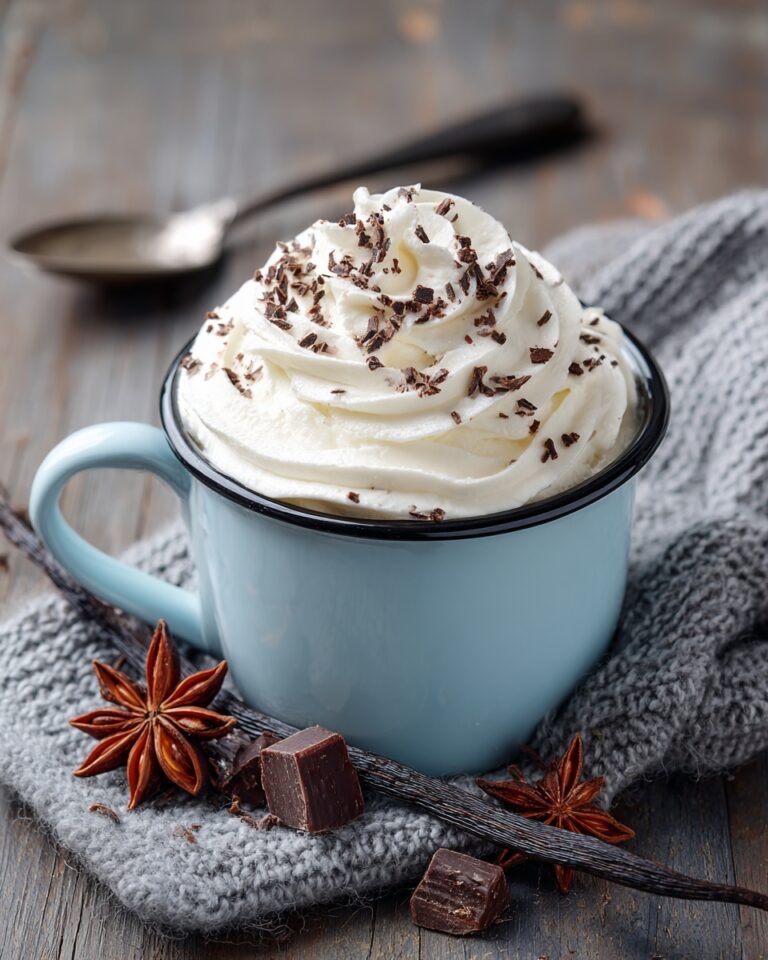
Pair these enchanting cookies with warm mulled cider or a rich hot chocolate topped with whipped cream. The warmth and spices of the drinks beautifully complement the sweet and buttery notes of the Hocus Pocus Cookies Recipe.
Creative Ways to Present
Arrange your cookies in clusters to mimic a witch’s spell circle, or stack them in alternating colors on a decorative platter. For an extra touch of whimsy, serve them alongside carved mini pumpkins or dry ice for a foggy, magical atmosphere.
Make Ahead and Storage
Storing Leftovers
Keep your leftover cookies in an airtight container at room temperature, where they’ll stay fresh and chewy for up to 5 days. Avoid stacking them too tightly to preserve their colorful decoration and sprinkle coating.
Freezing
You can freeze these cookies either before or after baking. For dough, freeze the formed balls on a tray, then transfer to a sealed container for up to 3 months. Baked cookies freeze well too — just wrap them tightly to retain freshness and thaw at room temperature.
Reheating
To revive a little warmth and fresh-baked feeling, pop your cookies in the oven at 300°F for 5 minutes. This brings back that soft texture and melts the white chocolate chips nicely, as if they just came out of the oven.
FAQs
Can I use regular food coloring instead of gel?
While regular food coloring can work, gel food coloring is recommended for this recipe because it provides more vibrant colors without making the dough too wet, ensuring the hues stay bright and bold.
How do I prevent the colors from bleeding together?
Be sure to knead each colored dough separately until well mixed and avoid over-handling the final combined cookie balls. Chilling also helps keep the colors distinct during baking.
Can I substitute white chocolate chips with another type?
Absolutely! Dark or milk chocolate chips can be used, but white chocolate really enhances the visual and flavor contrast that makes this cookie special.
What if I don’t have cake flour?
You can make a substitute by replacing 2 tablespoons of all-purpose flour per 1 cup with cornstarch. This mimics the lighter texture cake flour provides.
Are these cookies allergen-friendly?
This recipe contains butter, eggs, and wheat, so it’s not suitable for those with dairy, egg, or gluten allergies. However, with some ingredient swaps, you might adapt it for special dietary needs.
Final Thoughts
There is something undeniably joyful about baking and sharing this delightful Hocus Pocus Cookies Recipe. Not only do they bring vivid color and playful fun to your kitchen, they make any occasion feel like a celebration of magic and togetherness. I urge you to try this recipe and watch as these charming cookies create smiles, spark conversations, and fill your home with sweet enchantment.
Print
Hocus Pocus Cookies Recipe
- Prep Time: 30 minutes
- Cook Time: 14 minutes
- Total Time: 1 hour 14 minutes
- Yield: 24 servings
- Category: Dessert
- Method: Baking
- Cuisine: American
- Diet: Vegetarian
Description
These Hocus Pocus Cookies are a festive and colorful treat perfect for Halloween. Featuring a buttery, soft cookie dough divided into vibrant orange, green, and purple portions, each cookie is decorated with Halloween sprinkles and studded with creamy white chocolate chips. The cookies are lightly crisp around the edges and chewy inside, making them a fun and delicious bake for spooky celebrations.
Ingredients
Cookie Dough
- 1 ½ cups butter, softened
- 2 cups white sugar
- 3 large eggs
- 3 tsp vanilla extract
- 1 ½ tsp cornstarch
- 1 ½ tsp baking soda
- ¾ tsp salt
- 2 cups cake flour
- 2 ½ cups all-purpose flour
Decorations
- Orange, green, and purple gel food coloring
- 2 cups white chocolate chips
- Halloween sprinkles
Instructions
- Prepare Baking Sheet: Line a baking sheet with parchment paper to prevent sticking and ensure even baking.
- Cream Butter and Sugar: Using a stand mixer, beat the softened butter and white sugar together until the mixture is light and fluffy, which incorporates air for a tender cookie texture.
- Add Eggs and Vanilla: Add the eggs one at a time, mixing well after each addition to fully incorporate. Then stir in the vanilla extract for flavor.
- Combine Dry Ingredients: In a separate bowl, whisk together the cake flour, all-purpose flour, cornstarch, baking soda, and salt to evenly distribute the leavening agents and seasoning.
- Mix Dry and Wet Ingredients: Gradually add the dry flour mixture to the butter and sugar mixture, mixing until just combined to avoid overworking the dough.
- Color the Dough: Divide the dough evenly into three parts. Add green gel food coloring to one portion, orange to the second, and purple to the third. Knead each colored dough until the color is consistently blended throughout.
- Form Cookies: Scoop 2 teaspoons of each colored dough, press the pieces together, and roll them into balls. Slightly flatten each ball and roll the edges in Halloween sprinkles. Press white chocolate chips into the top of each dough ball for added sweetness and decoration.
- Chill Dough: Refrigerate the prepared dough balls for 30 minutes to firm them up, which helps maintain their shape during baking.
- Preheat Oven: Preheat your oven to 400°F (200°C) to ensure it reaches the ideal temperature for baking the cookies evenly.
- Bake Cookies: Bake the cookies for 12 to 14 minutes or until the edges turn golden brown. Remove them from the oven and allow to cool on a wire rack before serving.
Notes
- Ensure butter is softened to room temperature for easier creaming with sugar.
- Dividing and coloring the dough adds a festive touch; handle dough gently to keep colors vibrant.
- Refrigerating dough helps prevent spreading and keeps cookie shape intact.
- If white chocolate chips are not available, you can substitute with regular chocolate chips or chopped white chocolate.
- These cookies keep well in an airtight container for up to 5 days.

