
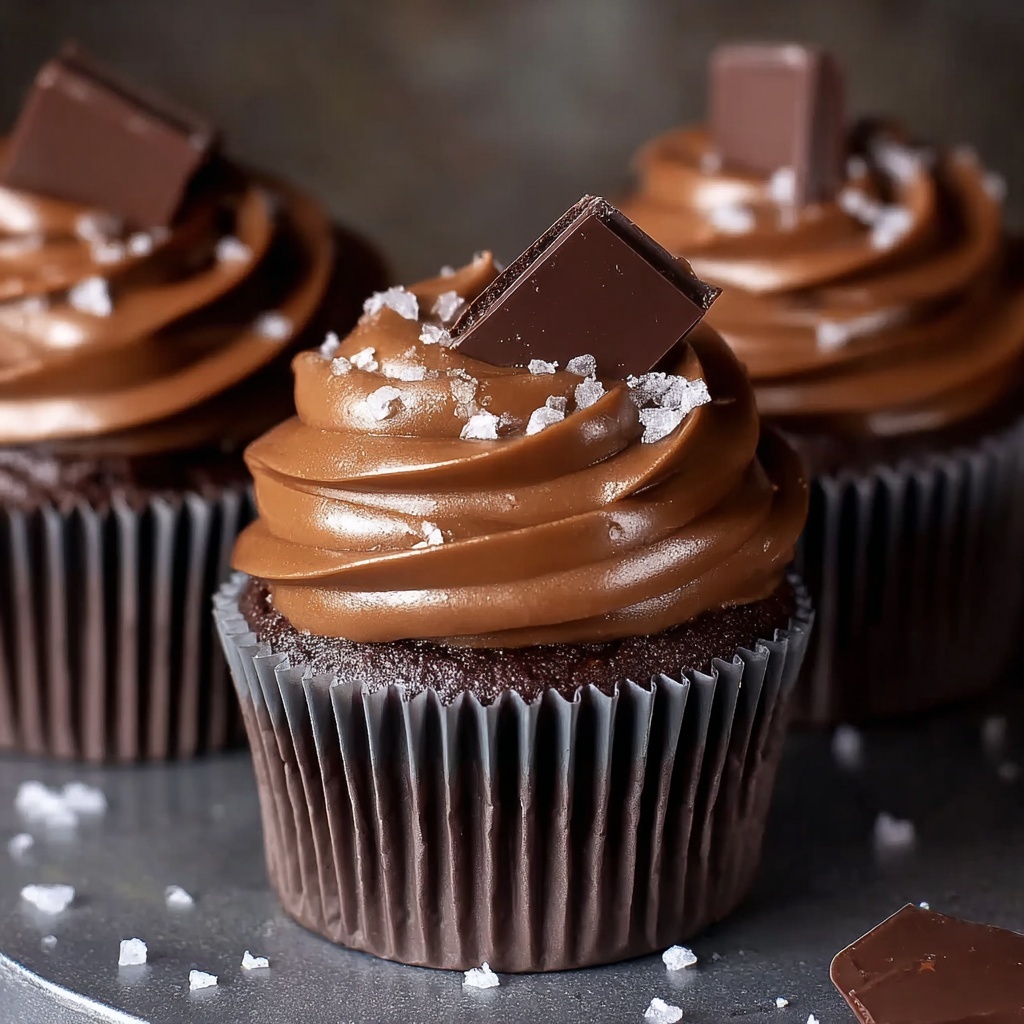
Imagine biting into a silky cloud of chocolate mousse, the creaminess melting effortlessly on your tongue. Then, your palate is unexpectedly awakened by the smooth, buttery notes of salted caramel. This contrast of textures and flavors is what makes Salted Caramel Chocolate Mousse Cups recipe so special. Each bite combines the richness of chocolate and the sweet-salty sophistication of caramel, all encased in delicate chocolate cups that add just the right amount of crunch. Whether you are celebrating a special occasion or simply craving something luxurious, these mousse cups deliver an experience that feels indulgent yet perfectly balanced.
This recipe wraps up tradition and innovation into one beautiful treat. Chocolate mousse has roots in French cuisine, where it first became popular as a light and airy dessert that could be dressed up with various flavor infusions. Incorporating salted caramel, a fairly recent sensation in dessert trends, creates a modern twist on a classic. The salted caramel invokes memories of cozy gatherings and festive moments, when a little extra sweetness accompanied by salt brings everything to life. People love this combo because it feels both familiar and exciting—comforting yet surprising in the best way.
When you make this Salted Caramel Chocolate Mousse Cups recipe, you will learn how to expertly craft chocolate cups by hand, master the subtle technique of folding whipped cream into a luscious mousse, and create a homemade salted caramel that gleams with depth and warmth. This version stands out because it balances exact timing and layering to ensure every texture and flavor sing in harmony. Homemade versions always win when it comes to freshness, control of sweetness, and the satisfaction of knowing exactly what goes into your dessert. By following this detailed recipe, you will deliver a dessert that’s elegant, decadent, and truly memorable.
Why You’ll Love This Salted Caramel Chocolate Mousse Cups Recipe
One of the greatest pleasures of this Salted Caramel Chocolate Mousse Cups recipe is how approachable it is in practice. The components come together with manageable steps that don’t require hours of complicated technique, but the overall impression feels like something crafted by a professional pastry chef. This recipe guides you through melting chocolate to make the cups, preparing a silky mousse, and making homemade salted caramel—all of which can be accomplished in under eight hours including chilling time. Your time investment promises a treat that is worth every minute, impressing friends and family effortlessly.
This recipe is perfect for pleasing a crowd because it serves six generous portions, and each cup is a perfect individual dessert that can be presented stunningly. It’s a great choice for holiday celebrations, dinner parties, or even as a special weekend treat. The handcrafted nature shows care and attention, making guests feel truly special. Plus, these cups are the kind of dessert that sparks conversation because of their layers of flavor and textures, allowing hosts and guests alike to savor every moment of the experience.
Making Salted Caramel Chocolate Mousse Cups at home also means you control every aspect of the recipe—quality of chocolate, sweetness level, and saltiness of the caramel. You can choose dark, milk, or semi-sweet chocolate based on personal preference, and even adjust the caramel to be more or less salty. This versatility means you can tailor it perfectly to your palate or that of your guests. Home preparation simply can’t be matched by store-bought desserts, where ingredients and customization are limited. The feeling of pride and joy in serving your own creation elevates any occasion.
Ingredients You’ll Need
The hero ingredients in this Salted Caramel Chocolate Mousse Cups recipe are undoubtedly the chocolate, egg yolks, heavy cream, and salted butter. The chocolate is the foundation—it provides not only the flavor but the structural integrity for the cups and the mousse. Choosing good quality chocolate, whether chips or chopped bars, will ensure a rich taste and a smooth finish to your dessert. The egg yolks create the creamy, custard-like base for the mousse, lending it body and richness without heaviness, while the heavy cream brings lightness when whipped and folded into the mixture. Salted butter adds depth and helps build the signature salted caramel flavor, balancing the sweetness beautifully.
In addition to these standout components, the recipe depends on pantry staples such as granulated sugar, light corn syrup, vanilla extract, and a small pinch of salt. Granulated sugar sweetens both the mousse and the caramel and needs to be handled carefully when caramelizing. Light corn syrup is crucial in the caramel-making process because it inhibits crystallization, creating that smooth, velvety texture. Vanilla extract ties the ingredients together, bringing warmth and complexity to both the mousse and the caramel. If you can’t find light corn syrup, a substitution with a mild honey or glucose syrup works but may subtly alter the texture.
- Chocolate chips or chopped chocolate (1 cup + 1 cup): These handle dual roles as the base for the chocolate cups and the melted chocolate in the mousse. Using high-quality chocolate ensures a luscious finish; premium brands with a higher cocoa content typically yield deeper flavor.
- Egg yolks (4): Provide richness and creaminess to the mousse base. Room temperature yolks blend more smoothly and help prevent curdling during cooking.
- Granulated sugar (¼ cup + ½ cup): Sweetens the mousse and caramel. When cooking sugar for caramel, watch carefully for color change to avoid burning.
- Heavy cream (2 cups): Divided usage for both mousse and caramel. Make sure it is cold for whipping the mousse to reach stiff peaks effectively.
- Vanilla extract (2 teaspoons total): Enhances all components with aromatic flavor. Pure vanilla extract is preferred over imitation for better taste.
- Salt (⅛ teaspoon + ¼ teaspoon): Critical in balancing sweetness and accentuating chocolate and caramel flavors. Using kosher or sea salt adds a subtle texture contrast.
- Light corn syrup (2 tablespoons): Helps achieve caramel’s texture by preventing sugar crystallization. If unavailable, substitute with honey but adjust heat carefully during cooking.
- Salted butter (3 tablespoons): Adds creaminess and saltiness to the caramel, enhancing flavor complexity. Unsalted butter can be used but add a pinch of extra salt.
- Chocolate curls or shavings: Optional but perfect for garnish, bringing an elegant finishing touch that invites guests to admire the dessert before tasting.
- Coarse salt: For finishing touch on the caramel drizzle, the coarse texture provides a crunchy contrast and highlights saltiness.
How to Make Salted Caramel Chocolate Mousse Cups Recipe
This recipe is a real joy because it breaks down into distinct components that can be managed easily and assembled into a stunning final product. The secret to success lies not just in each individual step but in carefully timing the chilling and handling transitions. This layered dessert requires patience as each part cools or sets, yet the preparation time is straightforward and enjoyable. The melding of chocolate texture, creamy mousse, and smooth caramel creates a truly indulgent treat that shines at any event.
Step 1: Forming the Chocolate Cups
Begin by melting 1 cup of chocolate chips or chopped chocolate in the microwave. Use 50% power and heat in 30-second increments, stirring thoroughly between each to prevent burning. The objective here is to get smooth, fluid chocolate that will coat the muffin liners evenly. Spread about 1 ½ tablespoons of this melted chocolate inside each muffin liner, pushing it up the sides to create a thick coating that will harden into your cup. This step matters because a thin or uneven layer will crack or become fragile, so take your time spreading it carefully. Place the coated liners in a cool spot or the refrigerator to harden completely before peeling away the liners gently. Avoid rushing this or exposing the cups to warmth prematurely to maintain their shape and sturdiness.
Step 2: Preparing the Chocolate Mousse Base
Next, whisk together the four egg yolks and ¼ cup granulated sugar in a bowl until the mixture is smooth and pale. This combination is the rich custard base that gives the mousse its velvety texture. Meanwhile, in a saucepan, heat 1 cup of heavy cream with 1 teaspoon vanilla extract and ⅛ teaspoon salt over medium heat until hot but not boiling; you should see steam rising and tiny bubbles forming around the edges. Slowly whisk about half of this hot cream into the yolk mixture to temper it—this prevents the eggs from scrambling. This step is crucial because uneven temperature can cause curdling. Pour the combined mixture back into the saucepan and cook over low heat, stirring constantly until it thickens and reaches 170°F on a thermometer. Patience here is essential; too high a temperature will break the custard, too low and it won’t set properly.
Step 3: Melting the Remaining Chocolate into the Custard
Once your custard is thickened, remove it from heat and stir in the remaining 1 cup of chocolate chips or chopped chocolate until melted and smooth. This incorporation transforms the custard into a rich chocolate mousse base, providing that deep cocoa intensity. After mixing thoroughly, chill this mixture in the refrigerator for 1 to 2 hours. Cooling at this stage allows it to set and become firm enough to gently fold with whipped cream. A common mistake here is rushing the chilling process or folding while the mousse is too warm, which can result in a runny texture.
Step 4: Whipping and Folding the Cream
While the chocolate custard chills, whip the remaining 1 cup of heavy cream to stiff peaks using a hand or stand mixer. The stiff peaks are important because they give the mousse its light, airy quality and structure. Carefully fold the whipped cream into the chilled chocolate mixture using a spatula. Folding should be gentle and deliberate, preserving the air bubbles instead of stirring vigorously. This technique makes the mousse uniquely fluffy yet creamy. Overfolding can deflate the mixture, leading to a denser finish, so take your time performing this step with patience.
Step 5: Crafting the Salted Caramel
For the caramel, combine ½ cup granulated sugar and 2 tablespoons light corn syrup in a saucepan over medium heat. Stir gently until the sugar dissolves, then allow it to cook without stirring until it turns a dark amber color. This color signals caramelization, providing complex, rich flavors. Be attentive here as the sugar can quickly go from perfectly caramelized to burnt. Once the desired color is reached, carefully add 3 tablespoons salted butter and ⅓ cup heavy cream; the mixture will bubble vigorously. Stir continuously until smooth, then remove from heat and stir in ¼ teaspoon salt and 1 teaspoon vanilla extract. Set aside to cool slightly while retaining pourable consistency. This homemade caramel adds the salty-sweet contrast that defines this recipe.
Step 6: Assembling the Mousse Cups
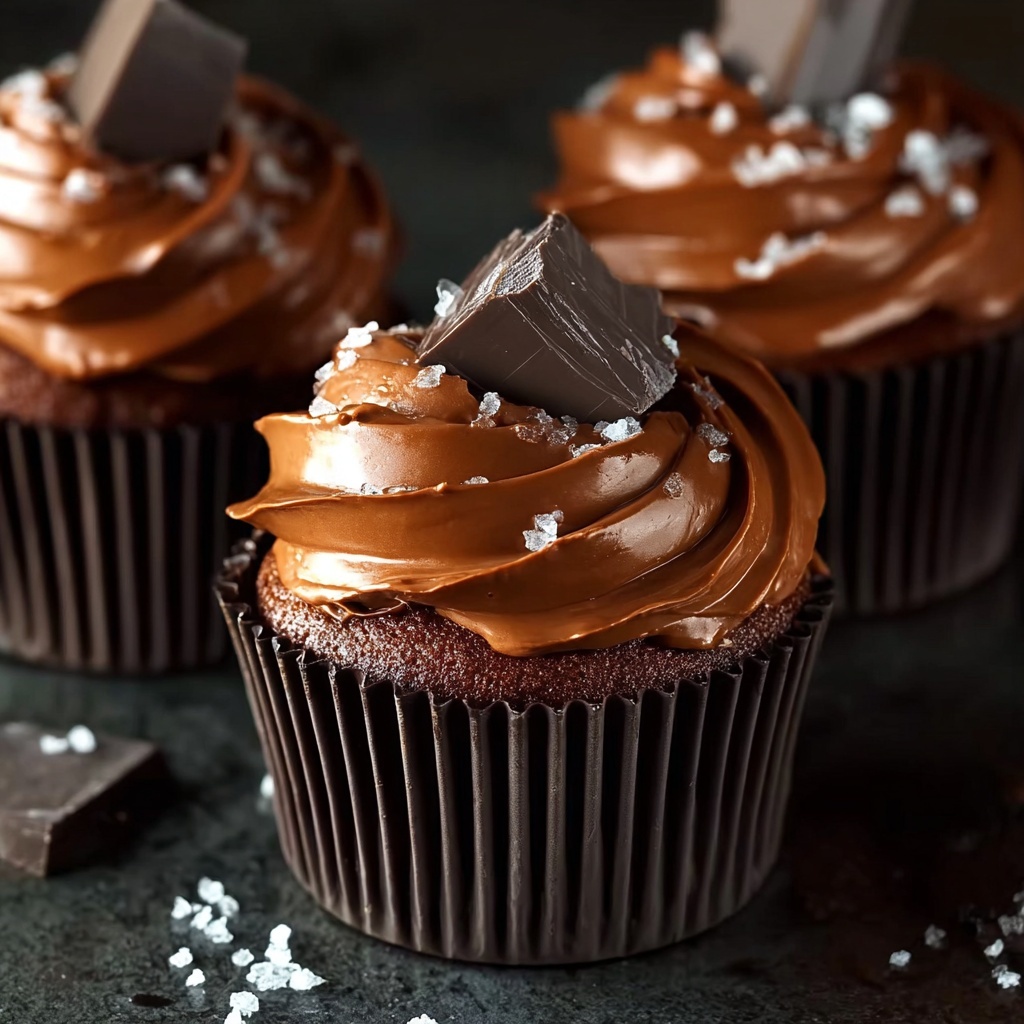
Now the fun part: assembly. Spoon a layer of the salted caramel into the hardened chocolate cups, just enough to coat the bottom. Follow this with a generous scoop of the chocolate mousse, filling each cup almost to the top. Drizzle additional caramel over the mousse to create rich ribbons of flavor. Finish by sprinkling coarse salt and chocolate curls or shavings on top. The coarse salt brings out the saltiness of the caramel and intensifies the chocolate, while the curls elevate the presentation. Refrigerate the assembled cups for at least 4 hours to fully set before serving. The patience here pays off with a dessert that impresses in look and taste.
Pro Tips for the Best Salted Caramel Chocolate Mousse Cups Recipe
Tip 1: Temper the Egg Yolks Properly
Tempering eggs prevents scrambling when adding hot cream to the yolks and is key for a smooth custard base. Begin by whisking hot cream slowly into the yolks while constantly stirring, then return the mixture to low heat. This controlled process produces a silky mousse rather than scrambled eggs mixed into the custard.
Tip 2: Use a Thermometer for Precise Cooking
Investing in a reliable kitchen thermometer is wise because knowing when your custard reaches exactly 170°F ensures perfect thickening. Going above this temperature risks curdling, while undercooking leaves a runny mousse. Accuracy here creates the foundation for luscious texture.
Tip 3: Chill the Mousse Sufficiently Before Folding
Allowing the chocolate custard to chill for 1-2 hours before folding in whipped cream is important for stability. If the base is too warm, the folded mousse can collapse and lose its airy texture. Planning ahead with this chill time guarantees a light, fluffy mousse.
Tip 4: Be Careful During Caramelization
Caramelizing sugar requires attention because the difference between perfect caramel and burnt sugar is seconds. Use a heavy-bottomed saucepan, watch the color carefully, and remove from heat as soon as a deep amber hue appears. This control leads to a rich caramel without bitterness.
Variations and Substitutions
Make It Vegetarian
Since this recipe uses egg yolks for the mousse base, making it vegetarian depends on whether one includes eggs in their diet. For those who avoid eggs, a great alternative is to substitute the yolks with avocado or silken tofu to maintain creaminess, though the texture will shift somewhat. Using aquafaba (the liquid from canned chickpeas) whipped to stiff peaks can replicate the foaminess, but the flavor will need boosting with extra cocoa powder. These swaps keep your mousse vegetarian while giving a unique twist on the classic texture.
Make It Spicy
To introduce some heat to this dessert, consider adding a pinch of cayenne pepper or chili powder (about 1/8 teaspoon) to the melted chocolate before forming the cups or folding the mousse. Alternatively, infuse the caramel with a small piece of fresh ginger or a dash of ground cinnamon and cayenne during cooking. Start with small amounts and adjust to taste to ensure the spice complements rather than overwhelms. This addition gives a warming kick that contrasts beautifully with the sweetness and creaminess.
Protein Swaps
While this dessert does not feature protein in a traditional savory sense, egg yolks provide structure and richness. For those sensitive to eggs or seeking alternatives, try using full-fat Greek yogurt for a different tangy creaminess or mascarpone cheese folded with melted chocolate to increase protein content while maintaining smooth texture. Vegan protein powders can be integrated with careful adjustments, though these require balancing moisture levels. Each swap affects the mousse’s body and flavor, so experiment to find the approach that suits you best.
Dietary Modifications
This recipe can be adapted for gluten-free diets easily since none of the ingredients contain gluten. For low-sodium needs, reduce the added salt in the mousse and caramel but keep a little in the caramel to maintain balance. To make it dairy-free, substitute heavy cream with canned coconut cream or a blend of cashew cream, and use dairy-free chocolate. For the butter in the caramel, a plant-based butter alternative works well. These modifications enable a wider range of dietary preferences to enjoy this dessert without losing essential flavors.
How to Serve Salted Caramel Chocolate Mousse Cups Recipe
Garnishes
Garnishing these mousse cups elevates the presentation and adds textural contrasts. Chocolate curls or shavings lend sophistication and invite indulgence. A sprinkle of coarse salt on top provides crunchy pops of saltiness that enhance the caramel and chocolate layers. A small pinch of edible gold leaf or a sprinkle of crushed toasted nuts, such as hazelnuts or almonds, can add a final touch of elegance and crunch, delighting the senses visually and texturally.
Side Dishes
Pairing these Salted Caramel Chocolate Mousse Cups with fresh fruit, such as sliced strawberries or raspberries, cuts through the richness with refreshing acidity. A simple nut biscotti complements the creamy texture with a crisp bite, perfect for dipping. Lightly brewed coffee or espresso balances the sweetness with its bold bitterness, creating a harmonious finish. For a more festive occasion, serve with a glass of sparkling wine to cleanse the palate between decadent bites.
Creative Presentation Ideas
For a casual weeknight treat, serve the mousse cups on a simple dessert plate with a dusting of cocoa powder and fresh raspberries on the side. For an elegant dinner party, place each cup on a mirrored tray garnished with edible flowers and gold dust for a shimmering effect. At a potluck, present the cups nestled in a rustic wooden box lined with parchment paper and label each flavor variation if making different versions, making them easy to grab and enjoy while mingling. Each presentation style suits the occasion and invites guests to savor the experience.
Make Ahead and Storage
Storing Leftovers
Store any leftover mousse cups in an airtight container in the refrigerator to preserve freshness and texture. Glass containers with tight-fitting lids work best as they help prevent odors from other foods absorbing into the dessert. These cups keep well for up to 3 days, but for best results, consume within 24-48 hours when the mousse is at its creamiest. Avoid stacking to protect the delicate chocolate cups and garnishes.
Freezing Instructions
Freezing these mousse cups can be challenging due to the creamy texture and chocolate layers, but it is possible with care. Place the prepared cups on a baking sheet lined with parchment to freeze individually for a few hours until solid. Once frozen, transfer them gently to a freezer-safe airtight container, spacing them to avoid sticking. Keep frozen for up to 1 month. To thaw, move cups to the fridge overnight and avoid room temperature thawing to preserve texture and prevent condensation from making the chocolate soggy.
Reheating Methods
This dessert is best served chilled, so reheating is generally not recommended. However, if you desire a slightly softer texture, remove the mousse cups from the fridge 15-20 minutes before serving. For slight warming, place cups in an oven preheated to 200°F for 5 minutes, watching carefully to avoid melting the chocolate cups. Avoid microwave reheating as it can cause separation and ruin the mousse texture. The stovetop is not applicable here since it is a fully assembled cold dessert.
FAQs About Salted Caramel Chocolate Mousse Cups Recipe
Can I make the chocolate cups ahead of time?
Yes, you can prepare the chocolate cups ahead of time and store them in an airtight container at room temperature for up to 2 days. Making them in advance gives you more flexibility in assembling the dessert later. Just be sure to handle them gently to avoid cracks or breakage before filling.
Is it safe to use raw egg yolks in this mousse recipe?
This recipe cooks the egg yolks gently with hot cream to create a custard, so the eggs are partially cooked through. Reaching a temperature of 170°F ensures safety by reducing the risk of harmful bacteria. If you have concerns, you can use pasteurized eggs, which are widely available and safe for recipes requiring minimal cooking.
Can I use dark chocolate instead of milk or semi-sweet?
Absolutely, using dark chocolate will give your mousse a richer and more intense chocolate flavor. Keep in mind that dark chocolate is less sweet, so you may want to adjust the sugar levels slightly according to your taste. Using a chocolate between 60-70% cocoa is a good balance for most palates.
What is the purpose of the light corn syrup in the caramel?
Light corn syrup prevents the sugar from crystallizing during caramelization, which helps produce a smooth, glossy caramel sauce. Without it, your caramel might become grainy or hard when cooled. If you do not have corn syrup, substituting honey is possible but requires careful monitoring during cooking for a consistent texture.
How long should I chill the mousse before assembling?
The mousse base should be chilled for 1 to 2 hours until set and firm but still pliable for folding. This chilling time stabilizes the custard and allows it to incorporate whipped cream without collapsing. Rushing this step can compromise the mousse’s airy texture.
Can I make this dessert vegan?
This recipe as written is not vegan because it contains egg yolks, heavy cream, and butter. To adjust for a vegan diet, you would need to swap those ingredients with alternatives like coconut cream, avocado, or silken tofu base, and use dairy-free chocolate and plant-based butter. These changes might alter the texture and flavor but can still yield a tasty dessert.
What’s the best way to melt chocolate without burning it?
Melting chocolate in the microwave at 50% power in short 30-second increments is a safe method. Stirring between intervals evenly distributes heat and prevents hot spots that cause burning. Alternatively, melting chocolate over a double boiler on gentle heat also allows precise control to avoid overheating.
Final Thoughts
This Salted Caramel Chocolate Mousse Cups recipe is a wonderful addition to your dessert repertoire. Its balance of silky mousse, rich chocolate cups, and buttery salted caramel creates a layered experience that appeals to all senses. The process of making it from scratch transforms simple ingredients into something special that feels worth celebrating. It’s a dessert suited for both casual indulgence and elegant dinner parties, capable of becoming a cherished household favorite you return to on many occasions.
I encourage you to try this Salted Caramel Chocolate Mousse Cups recipe and enjoy both the journey and the result. Don’t hesitate to share your creations with friends and family or come back for more recipes that put love and care into every dish. Once you’ve experienced how rewarding it is to make and serve this mousse, you may find it becoming a recipe you want to make time and again.
Print
- Prep Time: 40 minutes
- Cook Time: 25 minutes
- Total Time: 7 hours 5 minutes
- Yield: 6 servings
- Category: Dessert
- Method: Stovetop
- Cuisine: American
- Diet: Vegetarian
Description
Delight in these elegant Salted Caramel Chocolate Mousse Cups featuring rich chocolate shells filled with luscious chocolate mousse and topped with a decadent salted caramel drizzle. Perfect for impressing guests or indulging in a sophisticated homemade dessert.
Ingredients
Chocolate Cups
- 1 cup (6 oz) chocolate chips or chopped chocolate
- Muffin liners (jumbo or regular)
Chocolate Mousse
- 4 egg yolks
- ¼ cup granulated sugar
- 2 cups heavy cream, divided
- 1 teaspoon vanilla extract
- ⅛ teaspoon salt
- 1 cup chocolate chips or chopped chocolate (dark, milk, or semi-sweet)
Salted Caramel
- ½ cup granulated sugar
- 2 tablespoons light corn syrup
- 3 tablespoons salted butter
- ⅓ cup heavy cream
- ¼ teaspoon salt
- 1 teaspoon vanilla extract
Toppings
- Chocolate curls or shavings
- Coarse salt (e.g., kosher salt)
Instructions
- Prepare the Chocolate Cups: Melt 1 cup (6 oz) of chocolate chips or chopped chocolate in the microwave at 50% power, stirring every 30 seconds until smooth. Line a muffin tin with muffin liners. Spoon 1 ½ tablespoons of melted chocolate into each liner, spreading it up the sides to form a thick coat. Let the chocolate harden completely, then gently peel away the liners and set the cups aside.
- Make the Chocolate Mousse: Whisk 4 egg yolks and ¼ cup granulated sugar together until smooth. In a saucepan, heat 1 cup of heavy cream with 1 teaspoon vanilla extract and ⅛ teaspoon salt until hot but not boiling. Gradually whisk half of the hot cream into the egg mixture, then pour everything back into the saucepan. Cook over low heat, stirring constantly until thickened to 170°F. Remove from heat and stir in 1 cup chocolate chips until melted and smooth. Chill the mixture for 1-2 hours. Then whip the remaining 1 cup of heavy cream to stiff peaks and gently fold it into the chilled chocolate mixture.
- Make the Salted Caramel: In a saucepan, cook ½ cup granulated sugar and 2 tablespoons light corn syrup over medium heat, stirring gently until reaching a dark amber color. Carefully add 3 tablespoons salted butter and ⅓ cup heavy cream, then stir in ¼ teaspoon salt and 1 teaspoon vanilla extract. Continue stirring until smooth, then remove from heat and set aside.
- Assemble the Mousse Cups: Spoon a layer of the salted caramel into each chocolate cup, followed by a layer of the chocolate mousse. Add another drizzle of salted caramel on top, then garnish with coarse salt and chocolate curls or shavings.
- Chill and Serve: Refrigerate the assembled mousse cups for at least 4 hours to set before serving.
Notes
- The chocolate shells can be made ahead and stored in a cool place until ready to use.
- For a smoother caramel, ensure sugar does not burn and stir carefully when adding butter and cream.
- Use a candy thermometer to monitor the temperature when cooking the cream and egg mixture for mousse to avoid curdling.
- Whipping the remaining heavy cream to stiff peaks ensures a light, airy mousse texture.
- Adjust salt amount on top according to taste preference to balance the sweetness.


