If you are searching for a truly standout pickle that captures that perfect balance of boldness and crunch, look no further. The Ultimate Dill Pickle Recipe for Bold, Crunchy Flavor Recipe delivers everything you crave in a tangy pickle with a fresh punch of dill, a satisfying snap in every bite, and an irresistible depth of flavor that comes from a simple yet precise blend of spices and herbs. Whether you are a pickle purist or an adventurous snacker, this recipe transforms humble cucumbers into vibrant, crave-worthy delights that brighten up sandwiches, salads, or just your snack bowl.
Ingredients You’ll Need
Getting ready to make these pickles is refreshingly straightforward. The ingredients are thoughtfully chosen to highlight the crisp cucumbers while layering in those classic pickle flavors. Each element plays a crucial role, from the tangy vinegar base to the aromatic dill that defines this recipe’s character.
- 8–10 small pickling cucumbers (about 4 inches each): Fresh, firm cucumbers provide the essential crisp texture that makes these pickles so addictive.
- 4 cups water: Dilutes the vinegar slightly to balance sharpness and ensure perfect pickling.
- 2 cups white vinegar: The acidic backbone that preserves and sharpens the flavor of the pickles.
- 3 tablespoons kosher salt: Essential for drawing out moisture and enhancing flavor without overpowering.
- 1 tablespoon sugar (optional, for balance): A touch of sweetness smooths the tang and rounds out the taste beautifully.
- 6 cloves garlic, smashed: Adds a bold, aromatic punch and depth to each bite.
- 1 tablespoon black peppercorns: Offers a warm, peppery note that complements the vinegar’s sharpness.
- 1 teaspoon mustard seeds: Brings a subtle earthiness and crunchy texture contrast.
- 1/2 teaspoon red pepper flakes (optional, for spice): A little kick of heat for those who like their pickles with attitude.
- 4–6 fresh dill sprigs: The star herb that imparts that unmistakable fresh, grassy dill flavor.
How to Make The Ultimate Dill Pickle Recipe for Bold, Crunchy Flavor Recipe
Step 1: Prepare Your Cucumbers
Start by washing your pickling cucumbers thoroughly. The key to crisp pickles lies partly in trimming the blossom end—the part opposite the stem—since it contains enzymes that can cause sogginess. By snipping that off, you’ll keep your pickles delightfully crunchy for much longer.
Step 2: Make the Brine
In a medium saucepan, combine the water, white vinegar, kosher salt, and sugar if you’re using it. Bring this mixture to a boil while stirring to dissolve the salt completely. Once boiled, remove it from the heat and let it cool slightly so it’s warm but not hot when poured over the cucumbers. This step is essential to infuse flavor evenly while avoiding cooked cucumbers.
Step 3: Layer the Jars
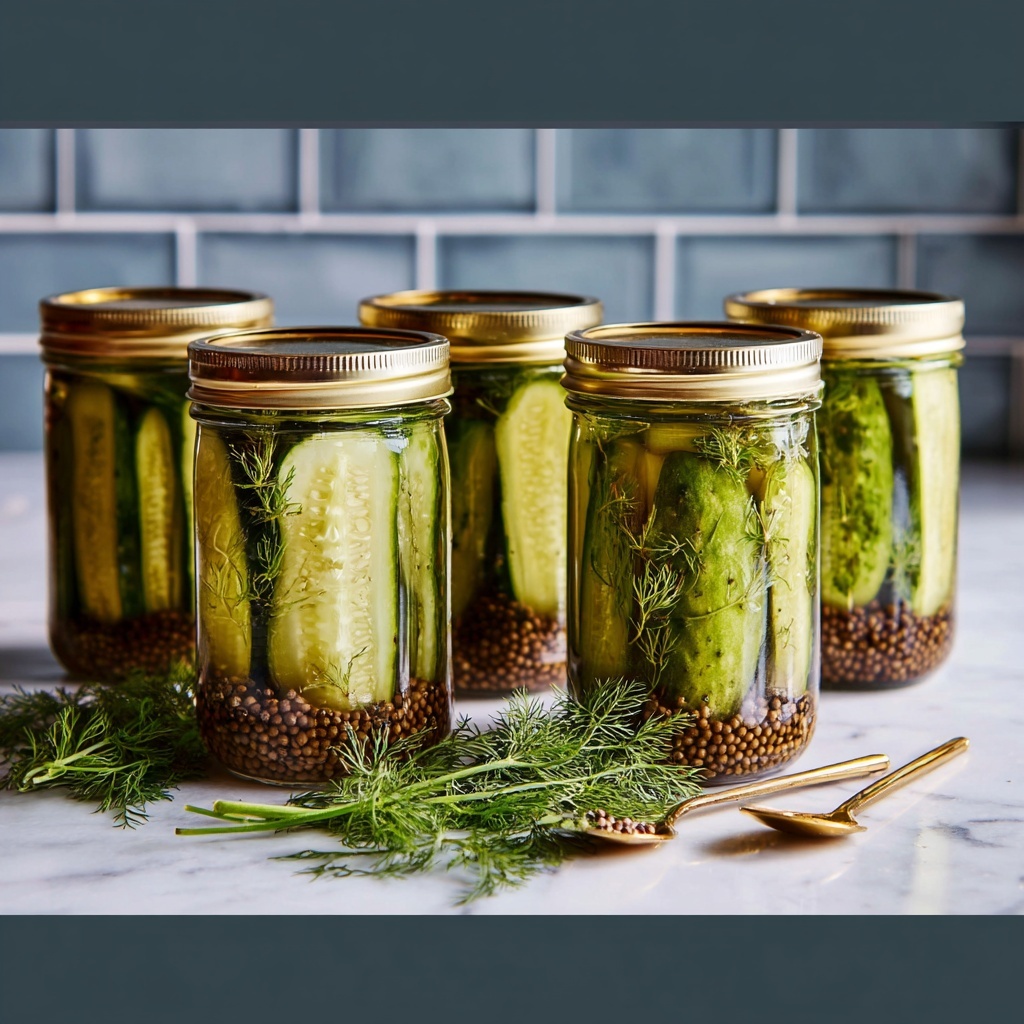
In sterilized jars, carefully arrange your cucumbers along with the smashed garlic cloves, black peppercorns, mustard seeds, red pepper flakes if desired, and those glorious fresh dill sprigs. Layering the ingredients thoughtfully ensures every bite carries a burst of flavor and aroma.
Step 4: Pour the Brine
Pour your warm brine gently over the cucumbers and spices until the jars are nearly full, leaving about half an inch of headspace at the top. This space allows for proper sealing and expansion if the pickles ferment slightly.
Step 5: Seal and Refrigerate
Seal your jars tightly and refrigerate them. Patience here is a virtue: let the pickles sit for at least 24 to 48 hours to develop their signature zing and crunch. The longer they sit, the more the flavors deepen, but resist the urge to dive in too soon!
Step 6: Enjoy and Store
Your pickles will stay fresh and flavorful in the refrigerator for up to two months. Keep them chilled and tightly sealed to enjoy that uniquely bold taste every time you pop one out.
How to Serve The Ultimate Dill Pickle Recipe for Bold, Crunchy Flavor Recipe
Garnishes
Sprinkle freshly chopped dill or a small pinch of red pepper flakes over sliced pickles for an extra burst of herbal aroma and heat. It makes a fun and attractive garnish if you’re serving these at a party or picnic.
Side Dishes
These pickles are the perfect crunchy sidekick to rich and savory dishes like burgers, grilled cheeses, or hearty sandwiches. They also shine alongside classic deli platters or in a vibrant potato salad where their acidity cuts through creamy textures.
Creative Ways to Present
Try chopping these dill pickles finely and mixing them into homemade tartar sauce or deviled eggs for a fresh twist. They can also add an exciting crunch when diced into potato salad or sprinkled over a creamy soup for texture and zing.
Make Ahead and Storage
Storing Leftovers
Keep your pickles stored in their brine inside sealed jars in the refrigerator where they will retain their crispness and bold flavor for up to two months. Be sure to use clean utensils each time to prevent contamination.
Freezing
Freezing pickles is not recommended since it compromises their crisp texture and usually results in soggy, less appealing results. This recipe is best enjoyed fresh and refrigerated.
Reheating
Because these pickles are intended to be eaten cold or at room temperature, reheating is unnecessary. Their brightness and crunch come through best with no heat applied, making them perfect right from the fridge.
FAQs
Can I adjust the spice level?
Absolutely! You can easily tailor the heat by increasing or omitting the red pepper flakes. For a milder pickle, leave them out; for a punchier bite, add a bit more.
Why do I trim off the blossom ends of cucumbers?
The blossom end contains enzymes that can cause pickles to become soft or mushy over time. Trimming them helps keep your pickles crunchy and fresh longer.
How long do I need to wait before eating these pickles?
While you can taste them after 24 hours, the flavor really deepens and improves after 48 hours in the refrigerator. Patience rewards you with the boldest, crunchiest results!
Can I use regular table salt instead of kosher salt?
It’s best to stick with kosher salt because it dissolves evenly and doesn’t contain additives that could cloud your brine or alter taste. If using table salt, reduce the amount slightly as it’s denser.
What if I don’t have fresh dill sprigs?
Fresh dill is best for authentic flavor, but if you’re in a pinch, dried dill weed can substitute. Use about one-third the amount since dried herbs are more concentrated.
Final Thoughts
Making The Ultimate Dill Pickle Recipe for Bold, Crunchy Flavor Recipe feels like unlocking a secret to homemade goodness that never gets old. Each crunchy bite bursts with vibrant dill, garlic, and spice notes that elevate your snacking experience or meal accompaniments. So go ahead—gather your ingredients, follow these easy steps, and prepare to impress yourself (and everyone lucky enough to get a taste) with pickles that truly bring boldness and crunch to every bite.
Print
The Ultimate Dill Pickle Recipe for Bold, Crunchy Flavor Recipe
- Prep Time: 10 minutes
- Cook Time: 10 minutes
- Total Time: 20 minutes
- Yield: 4 servings
- Category: Pickling
- Method: No-Cook
- Cuisine: American
- Diet: Gluten Free
Description
This Ultimate Dill Pickle Recipe yields bold, crunchy pickles with a perfect balance of tangy, salty, and slightly spicy flavors. Easy to make at home, these refrigerator pickles soak in a flavorful brine of vinegar, garlic, dill, and spices, delivering a crisp and refreshing snack or condiment that enhances any meal.
Ingredients
Vegetables
- 8–10 small pickling cucumbers (about 4 inches each)
Brine
- 4 cups water
- 2 cups white vinegar
- 3 tablespoons kosher salt
- 1 tablespoon sugar (optional, for balance)
Spices and Herbs
- 6 cloves garlic, smashed
- 1 tablespoon black peppercorns
- 1 teaspoon mustard seeds
- 1/2 teaspoon red pepper flakes (optional, for spice)
- 4–6 fresh dill sprigs
Instructions
- Prepare Cucumbers: Wash cucumbers thoroughly under cold water to remove any dirt. Trim off the blossom ends carefully to help keep the pickles crisp throughout the pickling process.
- Make Brine: In a medium saucepan, combine water, white vinegar, kosher salt, and sugar if using. Bring the mixture to a boil, stirring occasionally until the salt and sugar fully dissolve. Remove the brine from heat and allow it to cool slightly to a warm temperature.
- Pack Jars: Sterilize your pickling jars by washing them in hot, soapy water and rinsing well. In each jar, layer the cucumbers, smashed garlic cloves, black peppercorns, mustard seeds, optional red pepper flakes, and fresh dill sprigs evenly.
- Add Brine: Carefully pour the warm brine over the layered cucumbers and spices in the jars, leaving about half an inch of headspace at the top to allow for expansion.
- Seal and Refrigerate: Seal the jars tightly with lids and place them in the refrigerator. Let the pickles sit for at least 24 to 48 hours to develop a deep, bold flavor before eating.
- Storage: Keep the pickles refrigerated, where they can remain fresh and crunchy for up to 2 months.
Notes
- Trimming the blossom ends of cucumbers is key to maintaining crispness in the pickles.
- Sugar is optional and added only if you prefer a slight sweetness to balance the acidity.
- For spicier pickles, increase the amount of red pepper flakes or add fresh chili slices.
- Sterilizing jars helps extend shelf life and prevent spoilage.
- This recipe creates quick refrigerator pickles; it does not involve traditional canning or long-term shelf storage outside the fridge.
