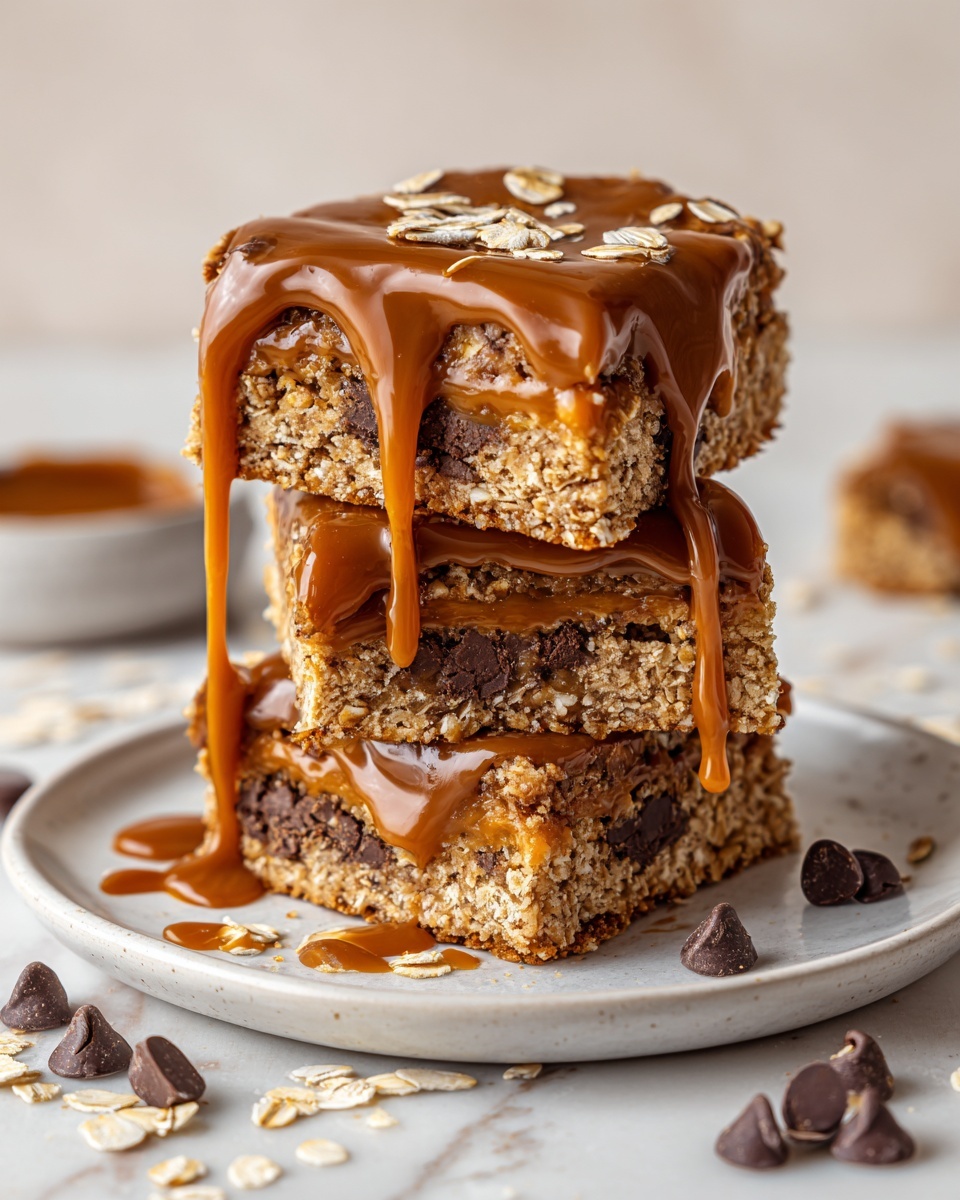
There is something truly magical about the combination of rich chocolate, buttery oats, and luscious caramel that makes Salted Caramel Chocolate Oat Bars Recipe an absolute showstopper. These bars capture that perfect balance of sweet, salty, and gooey in every bite, making them a beloved treat that feels both indulgent and comforting. Whether you’re craving a dessert for your next gathering or a snack that satisfies your sweet tooth with a homemade touch, this recipe delivers just that with its layered textures and heavenly flavors.
Ingredients You’ll Need
Don’t be intimidated by the layers; the ingredients for the Salted Caramel Chocolate Oat Bars Recipe are simple and straightforward, yet each one plays a crucial role in creating that perfect taste and texture. From the golden melted butter that brings richness to the mix, to the wholesome oats that add chewiness and nutty flavor, every element is essential.
- Salted butter, 3/4 cup melted: Provides a rich, creamy base and keeps the oat crust moist and tender.
- Brown sugar, 2/3 cup packed: Adds deep caramel notes and sweetness that pairs perfectly with the oats.
- Vanilla extract, 1 tablespoon: Enhances the overall flavor with a warm, sweet aroma.
- All-purpose flour, 1 1/4 cups: Gives structure to the oat layers and helps bind everything together.
- Rolled oats, 1 1/4 cups: Adds texture and a wholesome, chewy bite that complements the caramel.
- Baking soda, 1 teaspoon: Helps the oat crust rise slightly and stay light instead of dense.
- Salt, 1/2 teaspoon divided: Balances the sweetness and enhances the salted caramel flavor.
- Caramel squares, 40 pieces: The star ingredient creating that ooey-gooey, melt-in-your-mouth caramel layer.
- Heavy cream, 1/3 cup: Combines with caramel for a silky, smooth filling.
- Semi-sweet chocolate chips, 1 1/2 cups: Adds rich pockets of chocolate flavor and pairs brilliantly with the salted caramel.
How to Make Salted Caramel Chocolate Oat Bars Recipe
Step 1: Prepare the Pan
Start by preheating your oven to 350 degrees Fahrenheit (177 degrees Celsius). Line an 8×8 inch baking pan with parchment paper and grease it lightly to prevent sticking. This step is key for easy removal of your bars once baked and ensures the caramel layer doesn’t stick to the pan.
Step 2: Make the Cookie Mixture
In a large microwave-safe bowl, melt the salted butter. Whisk in the brown sugar and vanilla extract until the mixture becomes smooth and glossy. This base is where all the buttery sweetness begins and gets incorporated with the oats and flour to make the perfect crust and topping.
Step 3: Combine Dry Ingredients
Add the all-purpose flour, rolled oats, baking soda, and half of the salt to the butter mixture. Using a pastry cutter or fork, mix everything together until crumbly but evenly combined. This crumbly texture is essential for both the base and the topping layers, offering a buttery crispness once baked.
Step 4: Form the Base
Press about half of this oat mixture firmly and evenly into the bottom of your prepared pan. This forms a sturdy yet tender crust that will hold up under the caramel and chocolate layers. Bake this crust for 10 minutes until it’s slightly set and starting to turn golden.
Step 5: Prepare the Caramel Filling
While your crust bakes, combine the caramel squares, heavy cream, and the remaining salt in a large microwave-safe bowl. Heat the mixture in the microwave on high for one minute, then stir. Repeat heating for another minute and stir until you get a smooth, velvety caramel sauce. Be careful not to overheat to avoid the caramel from seizing.
Step 6: Layer the Chocolate
Right after removing the crust from the oven, sprinkle the semi-sweet chocolate chips evenly over the hot crust. The warmth will begin to melt the chocolate slightly, preparing the perfect sticky layer for the caramel on top.
Step 7: Add the Caramel Layer
Pour the warm, silky caramel sauce evenly over the layer of chocolate chips, making sure it covers all the chocolate completely. The combination of the melted chocolate and caramel will create a luscious filling that is the heart of these bars.
Step 8: Top with Remaining Crust
Sprinkle the remaining oat mixture over the caramel layer, gently pressing it down to create a rustic, crumbly topping. This last bit adds that signature oat crunch and completes the texture contrast with the smooth caramel and melted chocolate.
Step 9: Bake the Bars
Return the pan to the oven and bake for another 15 minutes or until the top is lightly browned and set. This baking step ensures the bars hold their shape while the edges crisp up beautifully.
Step 10: Cooling and Slicing
Remove the pan and place it on a wire rack to cool completely. For perfectly clean bars and to keep the caramel from oozing out, let the pan sit at room temperature overnight or chill it in the fridge for at least 3 hours before slicing. Then cut into 16 squares and serve!
How to Serve Salted Caramel Chocolate Oat Bars Recipe

Garnishes
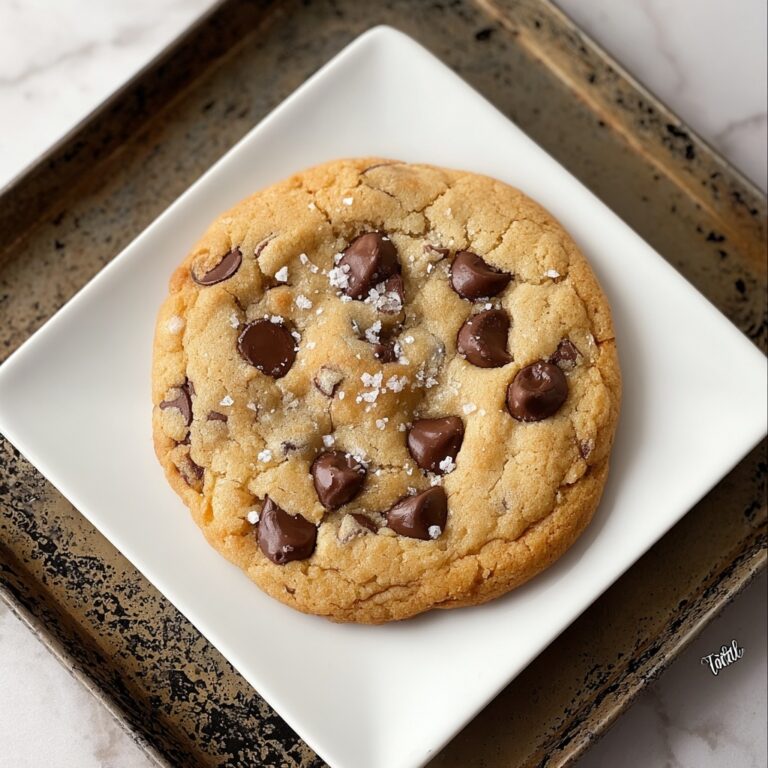
A light sprinkle of flaky sea salt over the top just before serving can really elevate these bars, enhancing the salted caramel flavor even more. For an extra touch, add a drizzle of melted chocolate or a scattering of chopped nuts like pecans for added texture and nutty flavor.
Side Dishes
These bars are a perfect pairing with a scoop of vanilla ice cream or a dollop of whipped cream. Fresh berries, such as raspberries or strawberries, also complement the rich flavors by adding a refreshing brightness that balances the indulgence.
Creative Ways to Present
Think beyond just serving the bars on a plate. Present these with a rustic wooden board or in a glass jar layered with crumbled bars and cream for a fun parfait. Wrapping individual bars in parchment and tying them with twine also makes a charming gift or party favor.
Make Ahead and Storage
Storing Leftovers
Salted Caramel Chocolate Oat Bars Recipe keeps beautifully at room temperature in an airtight container for up to 3 days. For longer freshness, store them in the refrigerator, tightly wrapped to maintain moisture balance and prevent the caramel from getting too sticky.
Freezing
You can freeze these bars for up to 2 months. Cut them into squares, wrap each piece individually in plastic wrap, and store in a freezer container or bag. Thaw at room temperature before enjoying to bring back their chewy, gooey goodness.
Reheating
If you like your bars warm, gently reheat them in the microwave for 10-15 seconds or in a low oven until soft. This helps revive the ooey caramel and melty chocolate layers, recapturing that freshly baked magic.
FAQs
Can I use light brown sugar instead of dark brown sugar?
Absolutely! Light brown sugar will still give you a delicious caramel flavor, though slightly milder than dark brown sugar. It won’t change the texture much, so feel free to use what you have.
Is there a gluten-free option for the flour?
Yes, you can substitute all-purpose flour with a gluten-free all-purpose blend that includes xanthan gum for structure. Make sure the oats are certified gluten-free as well to keep it safe for gluten sensitivities.
Can I use store-bought caramel sauce instead of caramel squares?
You can, but caramel squares melted with heavy cream give a richer, more controlled caramel layer that sets nicely in bars. Store-bought sauces may make the filling softer or more runny, so adjust chilling time accordingly.
What’s the best way to keep the oat topping crispy?
Baking the bars until the oat topping is lightly browned is key. Also, letting the bars cool completely and storing them properly in an airtight container will help maintain the crisp texture.
Can I add nuts or other mix-ins to the bars?
Definitely! Chopped pecans, walnuts, or even toasted coconut can add great texture and flavor. Just sprinkle them with the oats when layering or incorporate them in the oat mixture before baking.
Final Thoughts
If you’re craving a treat that perfectly blends sweet, salty, chewy, and gooey textures, the Salted Caramel Chocolate Oat Bars Recipe will quickly become a favorite in your kitchen. Easy enough to make at home, yet impressive enough to wow friends and family, these bars truly bring comfort and indulgence in every bite. Give it a try and watch how quickly they disappear—this recipe is pure deliciousness you’ll want to share again and again!
Print
Salted Caramel Chocolate Oat Bars Recipe
- Prep Time: 20 minutes
- Cook Time: 25 minutes
- Total Time: 3 hours 40 minutes
- Yield: 16 servings
- Category: Dessert
- Method: Baking
- Cuisine: American
Description
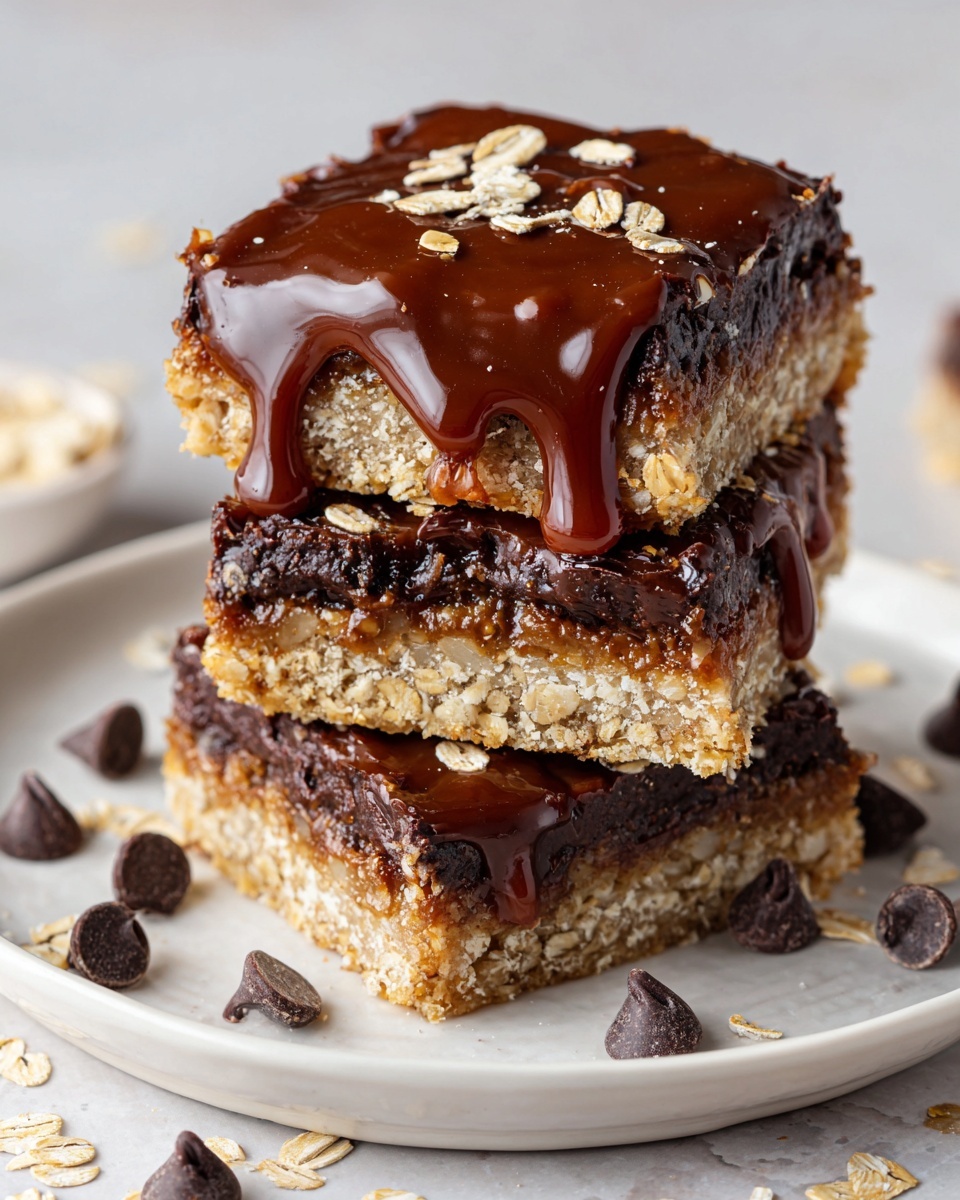
These Carmelitas are decadent bars made with a buttery oat crust layered with melting caramel and chocolate chips. Perfectly baked until golden and set, they offer a delightful combination of chewy oats, creamy caramel, and rich chocolate. Ideal for dessert or a sweet snack, they require some patience for cooling but reward with irresistible, gooey goodness in every bite.
Ingredients
Base and Topping
- 3/4 cup salted butter, melted
- 2/3 cup brown sugar, packed
- 1 tablespoon vanilla extract
- 1 1/4 cup all-purpose flour
- 1 1/4 cup rolled oats or old fashioned oats
- 1 teaspoon baking soda
- 1/2 teaspoon salt, divided
Caramel Filling
- 40 caramel squares
- 1/3 cup heavy cream
Chocolate Layer
- 1 1/2 cup semi-sweet chocolate chips
Instructions
- Prepare the Pan: Preheat your oven to 350°F (177°C). Line and grease an 8×8 inch baking pan, ideally with parchment paper to prevent sticking and ease removal of the bars.
- Make the Cookie Mixture: In a large microwave-safe bowl, melt the butter. Whisk in the brown sugar and vanilla extract until the mixture is well combined and smooth.
- Combine Dry Ingredients: Add the flour, oats, baking soda, and 1/4 teaspoon of salt to the butter mixture. Use a pastry cutter or fork to blend everything together until crumbly and thoroughly incorporated.
- Form the Base: Press about half of this oat mixture evenly into the bottom of the prepared baking pan to create the crust. Bake it in the oven for 10 minutes until it is slightly set but not browned.
- Prepare the Caramel Filling: While the crust bakes, place the caramel squares, heavy cream, and the remaining 1/4 teaspoon of salt into a large microwave-safe bowl. Heat on high power for 1 minute, stir, then heat for an additional minute and stir again until the caramel mixture is completely melted and smooth. Be careful not to overheat to avoid caramel seizing.
- Layer the Chocolate: Once the crust has finished baking, immediately sprinkle the semi-sweet chocolate chips evenly over the hot crust to allow slight melting.
- Add the Caramel Layer: Pour the warm caramel sauce evenly over the chocolate chips layer, spreading gently to cover the entire surface.
- Top with Remaining Crust: Sprinkle the remaining oat mixture over the caramel. Gently press or tap it down with your hand to form a uniform topping.
- Bake the Bars: Return the pan to the oven and bake for another 15 minutes or until the top is lightly browned and fully set.
- Cooling and Slicing: Remove the baking pan to a wire rack and allow the bars to cool completely. For best results, let the bars set at room temperature overnight or chill in the refrigerator for at least 3 hours. This helps the caramel set firmly and ensures clean, neat slices when cutting into squares.
Notes
- Using parchment paper in the pan is recommended to prevent caramel from sticking and to make removal easier.
- Make sure caramel is fully melted and smooth before pouring; overheating can cause it to seize.
- Cooling is critical; cutting too soon will cause caramel to ooze and bars to fall apart.
- These bars can be stored in an airtight container for up to 5 days at room temperature or refrigerated for longer freshness.
- You can substitute semi-sweet chocolate chips with milk or dark chocolate depending on preference.


