
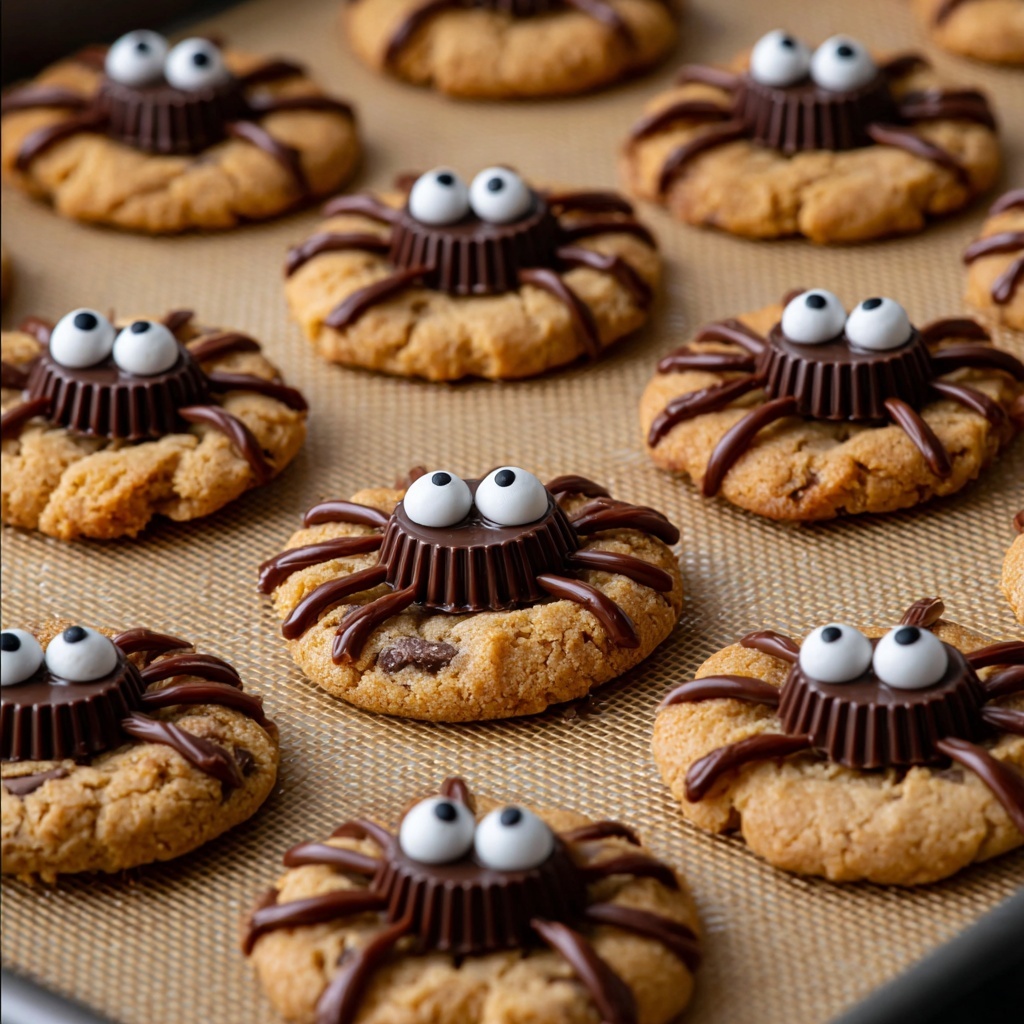
If you’re looking for a fantastically fun and delicious treat that’s perfect for any occasion, the Peanut Butter Spider Cookies Recipe is an absolute delight. These cookies combine the rich creaminess of peanut butter with the gooey goodness of mini Reese’s Peanut Butter Cups, all topped with quirky chocolate spider legs and candy eyes. Not only do they taste amazing, but their whimsical spider appearance makes them a big hit with kids and adults alike. Whether it’s for a festive Halloween party or just a playful sweet snack, this recipe captures both imagination and flavor spectacularly.

Ingredients You’ll Need
To make these Peanut Butter Spider Cookies, you don’t need a long list of fancy ingredients. Each one plays a crucial role in creating the perfect balance of flavor, texture, and visual charm. From creamy peanut butter to the magical mini Reese’s Cups, every element is essential and easy to find.
- Unsalted butter (½ cup/113g, room temperature): Adds richness and softness to the cookie dough for that perfect tender bite.
- Brown sugar (½ cup/107g): Brings moisture plus a deep caramel flavor to complement peanut butter’s richness.
- Granulated sugar (⅓ cup/66g): Balances sweetness and helps the cookies spread nicely in the oven.
- Creamy peanut butter (¾ cup/201g, not natural): The star ingredient, lending that classic, luscious peanut taste.
- Large egg (1): Binds all the ingredients together and provides structure.
- Vanilla extract (1 tsp): Enhances the overall flavor with a warm, sweet aroma.
- All-purpose flour (1 ½ cups/180g): Forms the base of the dough, providing stability.
- Baking soda (1 tsp): Helps the cookies rise and develop a tender crumb.
- Baking powder (½ tsp): Works alongside baking soda to give just the right lift.
- Salt (½ tsp): Balances sweetness and sharpens flavors.
- Granulated sugar (for rolling): Creates a delightful sweet crust and slight crunch on the outside.
- Mini Reese’s Peanut Butter Cups (24): The charming spider body centers that make this cookie unforgettable.
- Semi-sweet chocolate chips (½ cup/85g): Melted to craft spider legs and adhere candy eyes.
- Neutral oil (½ tsp, optional): Keeps the melted chocolate smooth and glossy.
- Candy eyeballs: Adds personality and spooky fun to each spider.
How to Make Peanut Butter Spider Cookies Recipe
Step 1: Prep the Candy and Oven
Start by unwrapping about 24 mini Reese’s Cups and pop them into the freezer. This little trick ensures they keep their shape when pressed into the hot cookies later on. Meanwhile, preheat your oven to 350ºF to get things warmed up and ready.
Step 2: Cream the Butter and Sugars
In a mixing bowl, combine the softened butter, brown sugar, and granulated sugar. Beat these together with an electric mixer for about a minute until the mixture turns smooth and fluffy. This step helps incorporate air, giving your cookies a light texture.
Step 3: Add the Peanut Butter, Egg, and Vanilla
Next, add the creamy peanut butter, one large egg, and vanilla extract into the sugar and butter mixture. Beat everything together for less than a minute until it’s all beautifully combined, creating a thick, luscious dough base.
Step 4: Mix in Dry Ingredients
Incorporate the flour, baking soda, baking powder, and salt to the wet ingredients. Use a spatula or mixer on low speed to combine, but be careful not to overmix; overdoing it can make the cookies tough. Your dough should be just combined and a little thick.
Step 5: Form and Bake the Cookies
Use a small cookie scoop or tablespoon to form uniform balls of dough. Roll each ball between your hands to smooth them out, then roll in granulated sugar for a sparkling crust. Place the sugared dough balls 2 to 3 inches apart on a silicone-lined baking sheet. Bake for 8 to 11 minutes or until the edges crack and turn a lovely golden color.
Step 6: Add the Reese’s Cups
Remove the cookies from the oven and gently press a frozen mini Reese’s Cup right into the center of each warm cookie. Let the cookies cool on the baking sheet for 15 to 20 minutes before transferring to a cooling rack. This rest time helps the Reese’s Cup hold its shape without melting or sinking.
Step 7: Melt the Chocolate for the Legs
In a microwave-safe bowl, combine the semi-sweet chocolate chips plus optional neutral oil. Microwave at 50% power for 3 minutes, stirring every minute to ensure smooth melting. Once melted, pour the chocolate into a squeeze bottle or a sandwich bag with the tip cut off for precise decorating.
Step 8: Create the Spider Legs and Eyes
Use the melted chocolate to draw four spider legs on each side of the mini Reese’s Cups—this is where your artistic side gets to shine! Then, attach the candy eyeballs to the Reese’s Cup using a dab of melted chocolate on the back. Allow everything to set before moving the cookies to your serving platter.
How to Serve Peanut Butter Spider Cookies Recipe
Garnishes
Sprinkle a pinch of flaky sea salt on top just before serving to contrast the sweetness, or dust lightly with powdered sugar for a whimsical, frosty effect. Adding extra candy eyeballs around the platter can amp up the spooky fun and make the presentation truly pop.
Side Dishes
Serve these Peanut Butter Spider Cookies alongside a cold glass of milk to balance the richness or pair with a scoop of vanilla ice cream for a decadent dessert experience. For a party spread, they’re fantastic with a hot chocolate bar, too.
Creative Ways to Present
Arrange the cookies on a dark-colored plate to make their little “spiders” stand out vividly. You could also place them on edible “webs” made from spun sugar or shredded coconut dyed black for a Halloween twist. If you’re gifting, pack them in clear cellophane bags tied with spider-themed ribbons to delight friends and family.
Make Ahead and Storage
Storing Leftovers
After baking, store your Peanut Butter Spider Cookies in an airtight container at room temperature. They’ll stay fresh and chewy for up to 5 days, allowing you to enjoy these treats without rushing.
Freezing
You can freeze the unbaked dough shaped into balls in a sealed container or bag for up to 3 months. When ready to bake, just thaw slightly and follow the baking steps. Baked cookies can also be frozen, but note that the mini Reese’s Cups and candy eyes may lose some of their firmness.
Reheating
If you prefer your cookies warm, just pop one or two in the microwave for 10 to 15 seconds. This will soften the peanut butter and chocolate, giving you that just-baked cozy feeling without sacrificing taste.
FAQs
Can I use natural peanut butter for this recipe?
Natural peanut butter is usually oilier and less sweet, which can change the texture and flavor of the cookies. For the best results in the Peanut Butter Spider Cookies Recipe, creamy, non-natural peanut butter is recommended to achieve the perfect consistency and sweetness.
What if I don’t have mini Reese’s Peanut Butter Cups?
If you can’t find mini Reese’s Cups, you could substitute with other bite-sized peanut butter chocolates or even small peanut butter-filled candies. Just be sure they’re small enough to press into the cookie centers without overpowering the dough.
Can I make the cookie dough ahead of time?
Absolutely! You can prepare the dough a day ahead and store it covered in the fridge. Bring it to room temperature before rolling and baking. The slight chill also helps reduce spreading, which keeps the cookie shape perfect.
Are these cookies gluten-free?
The traditional recipe uses all-purpose flour, which contains gluten. To make a gluten-free version, try substituting with a gluten-free flour blend that works well for baking, but keep in mind texture and rise may vary slightly.
How do I keep the chocolate from smudging on the legs?
To prevent smudging, make sure the melted chocolate isn’t too warm when piping the legs, and allow ample time for the chocolate to set completely before moving the cookies. Placing the tray in the fridge for a few minutes can help speed up this process.
Final Thoughts
This Peanut Butter Spider Cookies Recipe is more than just a cookie—it’s a joyful experience that combines playful creativity with irresistible flavor. Whether you’re baking with kids, preparing for a party, or just craving a delicious peanut butter treat, these spiders will bring smiles and scrumptious bites to any table. Give this recipe a try and watch your friends and family fall in love bite by bite!
Print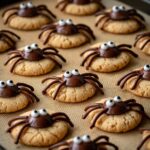
Peanut Butter Spider Cookies Recipe
- Prep Time: 10 minutes
- Cook Time: 11 minutes
- Total Time: 26 minutes
- Yield: 24 cookies
- Category: Dessert
- Method: Baking
- Cuisine: American
Description
Peanut Butter Spider Cookies are a fun and festive treat featuring a soft peanut butter cookie base topped with mini Reese’s Peanut Butter Cups, decorated to look like spiders with melted chocolate legs and candy eyeballs. These cookies combine creamy peanut butter flavor with sweet chocolate and playful presentation, perfect for Halloween or any playful occasion.
Ingredients
Cookie Dough
- ½ cup (113g) unsalted butter (1 stick, room temperature)
- ½ cup (107g) brown sugar
- ⅓ cup (66g) granulated sugar
- ¾ cup (201g) creamy peanut butter (not natural)
- 1 large egg
- 1 tsp vanilla extract
- 1 ½ cups (180g) all purpose flour
- 1 tsp baking soda
- ½ tsp baking powder
- ½ tsp salt
- Granulated sugar (for rolling the cookies)
Decorations
- About 24 mini Reese’s Peanut Butter Cups
- ½ cup (85g) semi-sweet chocolate chips (for melting)
- ½ tsp neutral oil (for melting chocolate)
- Candy eyeballs
Instructions
- Prep the Reese’s and Oven: Unwrap approximately 24 mini Reese’s Peanut Butter Cups and place them in a bowl. Freeze them to help maintain their shape when added to the warm cookies. Preheat your oven to 350ºF (175ºC).
- Mix the Butter and Sugars: In a mixing bowl, combine the butter, brown sugar, and granulated sugar. Use an electric mixer to beat the mixture for about 1 minute until it becomes smooth and fluffy.
- Add Peanut Butter, Egg, and Vanilla: Incorporate the creamy peanut butter, egg, and vanilla extract into the butter mixture. Beat again for less than 1 minute until combined.
- Combine Dry Ingredients: Add the all-purpose flour, baking soda, baking powder, and salt to the wet ingredients. Mix on low speed or fold in with a spatula just until all ingredients are combined, taking care not to over mix.
- Form and Bake Cookies: Use a small cookie scoop or a tablespoon to scoop out tablespoon-sized portions of dough. Roll each into a uniform ball, then roll them in granulated sugar. Arrange the cookie dough balls 2-3 inches apart on a silicone-lined baking sheet. Bake for 8-11 minutes or until the cookie edges start to crack and turn golden.
- Add Reese’s Cups and Cool: When the cookies come out of the oven, immediately press a frozen mini Reese’s Peanut Butter Cup into the center of each cookie. Let the cookies cool on the baking sheet for 15-20 minutes before transferring them to a cooling rack to solidify and prevent the Reese’s pieces from sinking.
- Melt Chocolate for Legs: Place the semi-sweet chocolate chips and neutral oil in a microwave-safe bowl. Microwave at 50% power for 3 minutes, stirring every minute until fully melted and smooth. Transfer the melted chocolate to a squeeze bottle or a plastic sandwich bag with a small corner cut off.
- Decorate with Legs and Eyes: Using the melted chocolate, draw 4 spider legs on each side of the Reese’s cup to create a spider effect. Dip a small amount of melted chocolate on the back of each candy eyeball and attach them to the Reese’s cup. Allow the chocolate to set completely before moving the cookies to a serving platter.
Notes
- Freezing the Reese’s Peanut Butter Cups before adding them to the cookies helps keep their shape and prevents melting.
- Do not over mix the dough after adding the flour to avoid tough cookies.
- Allow cookies to cool before moving to avoid the Reese’s sinking or breaking shape.
- Use a squeeze bottle or a plastic bag with a small cut for precise chocolate leg piping.
- These cookies can be stored in an airtight container at room temperature for up to 3 days.


