Description
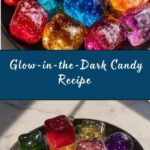
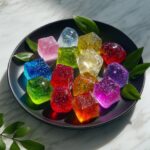
Northern Lights Candy Glow is a vibrant, glowing hard candy recipe that combines colorful food dyes with tonic water to create a luminous treat. This visually stunning candy is perfect for parties and special occasions, offering a fun and sweet experience with a glowing effect under UV light. The candy is made by boiling a sugar syrup to the hard crack stage, then dividing and coloring the syrup before letting it cool and harden.
Ingredients
Scale
For the Candy Syrup
- 1 cup sugar
- 1/4 cup corn syrup
- 1/4 cup water
- 1/2 teaspoon baking soda
- 1/2 teaspoon citric acid
- 1/2 teaspoon lemon extract
For Coloring and Glow Effect
- 1/4 teaspoon blue food coloring
- 1/4 teaspoon green food coloring
- 1/4 teaspoon yellow food coloring
- 1/4 teaspoon red food coloring
- 1/4 teaspoon tonic water (for glowing effect)
Instructions
- Prepare the Baking Sheet: Line a baking sheet with parchment paper or a silicone baking mat to prevent sticking and set it aside while you prepare the candy syrup.
- Cook the Sugar Mixture: In a medium saucepan, combine sugar, corn syrup, and water. Stir over medium heat until all sugar is dissolved. Then increase heat and bring to a boil without stirring for 5-7 minutes until the mixture reaches the hard crack stage, about 300°F (150°C), using a candy thermometer to monitor.
- Add the Baking Soda and Citric Acid: Remove the syrup from heat and carefully stir in the baking soda and citric acid. The mixture will bubble up, so handle with caution.
- Add the Flavors and Colors: Divide the hot syrup carefully into separate heat-resistant bowls. Add lemon extract to all portions. Add one food coloring per bowl, along with a teaspoon of tonic water to create the glowing effect, then stir gently to combine.
- Pour the Candy: Quickly pour each colored syrup onto the prepared baking sheet, arranging separate sections for each color. Work fast as the syrup will harden quickly.
- Break into Pieces: Allow the candy to cool and harden at room temperature for 20-30 minutes. Once hardened, break the candy into bite-sized pieces and store them in an airtight container to maintain freshness. The candies will glow when exposed to UV light or due to the tonic water content.
Notes
- Use a candy thermometer to ensure the syrup reaches the hard crack stage for proper candy texture.
- Be cautious when adding baking soda and citric acid as the mixture will bubble up vigorously.
- Tonic water contains quinine which fluoresces under UV light, giving the candy its glowing effect.
- Store the candy in an airtight container to prevent moisture absorption and stickiness.
- This candy is best enjoyed fresh but can be stored for up to two weeks.