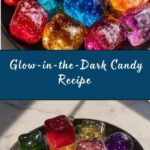
If you’ve ever dreamed of tasting a candy as magical and vibrant as the shimmering Aurora Borealis itself, then the Northern Lights Candy Glow Recipe is exactly what you’ve been waiting for. This dazzling homemade treat combines the sweet bite of classic hard candy with a captivating glow that truly brings your dessert table to life. Bursting with vivid colors and a zesty lemon spark, this recipe transforms simple candy into an enchanting spectacle, making it the perfect centerpiece for everything from festive parties to unforgettable gift-giving moments.
Ingredients You’ll Need
The beauty of the Northern Lights Candy Glow Recipe lies in its simplicity. Each ingredient plays a crucial role in building the candy’s texture, dazzling colors, and that unique glowing effect, so getting them right is key to your masterpiece.
- 1 cup sugar: The foundation of every candy, providing sweetness and structure.
- 1/4 cup corn syrup: Keeps the sugar from crystallizing, ensuring a smooth, glossy finish.
- 1/4 cup water: Helps dissolve the sugar evenly for perfect caramelization.
- 1/2 teaspoon baking soda: Creates light bubbles that give the candy a beautiful texture and slight fluffiness.
- 1/2 teaspoon citric acid: Adds a tangy kick that balances the sweetness.
- 1/2 teaspoon lemon extract: Infuses a refreshing citrus aroma and flavor to brighten every bite.
- 1/4 teaspoon blue food coloring: Brings a cool, cosmic hue to the candy’s spectrum.
- 1/4 teaspoon green food coloring: Adds a vivid, glowing emerald tint reminiscent of northern skies.
- 1/4 teaspoon yellow food coloring: Lights up the candy with a warm, sunny glow.
- 1/4 teaspoon red food coloring: Infuses a passionate pop of color that rounds out the palette.
- 1/4 teaspoon tonic water (for glowing effect): This secret ingredient contains quinine, which gives the candy that mesmerizing fluorescent glow under UV light.
How to Make Northern Lights Candy Glow Recipe
Step 1: Prepare Your Baking Sheet
Start by lining a baking sheet with parchment paper or a silicone baking mat. This simple step is essential because it prevents the candy from sticking, making your life easier when it’s time to break it into those colorful, star-like shards.
Step 2: Cook the Sugar Mixture
In a medium saucepan, combine the sugar, corn syrup, and water. Stir gently over medium heat until the sugar dissolves completely, setting the stage for a perfect candy base. Then crank up the heat and let the mixture boil without stirring, monitoring with a candy thermometer until it hits the hard crack stage — about 300°F or 150°C. This precise temperature ensures your candy will harden perfectly with that satisfying snap.
Step 3: Add Baking Soda and Citric Acid
Remove your syrup from the heat and quickly stir in the baking soda and citric acid. Watch as the mixture bubbles up like a magical potion, creating tiny textures that make the candy more interesting to bite into. This fizzing action is crucial for the candy’s light and airy texture.
Step 4: Divide, Color, and Add Glow
Immediately pour the syrup into several separate small bowls. In each bowl, add the lemon extract alongside a few drops of one food coloring for that brilliant hue—blue, green, yellow, and red. Don’t forget the tonic water! Stir it all together so each batch glows brilliantly under UV light, capturing the vibrant dance of Northern Lights in every piece.
Step 5: Pour and Cool
Quickly pour each colored syrup section onto your prepared baking sheet, keeping the colors distinct but close enough to blend visually, like waves of shimmering light. Allow the candy to cool and harden at room temperature—about 20 to 30 minutes. This is the moment the magic sets, transforming liquid brightness into solid beauty.
Step 6: Break into Pieces
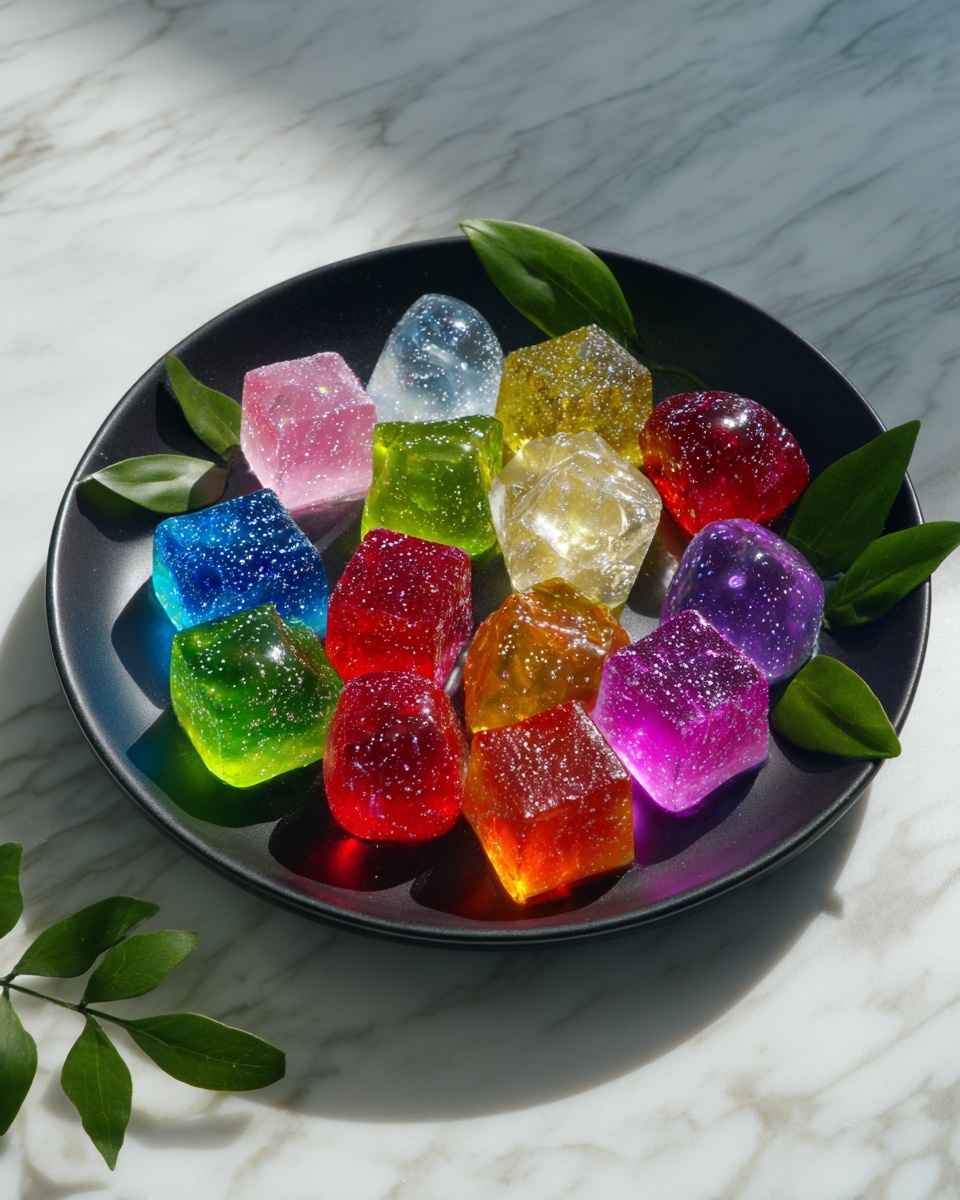
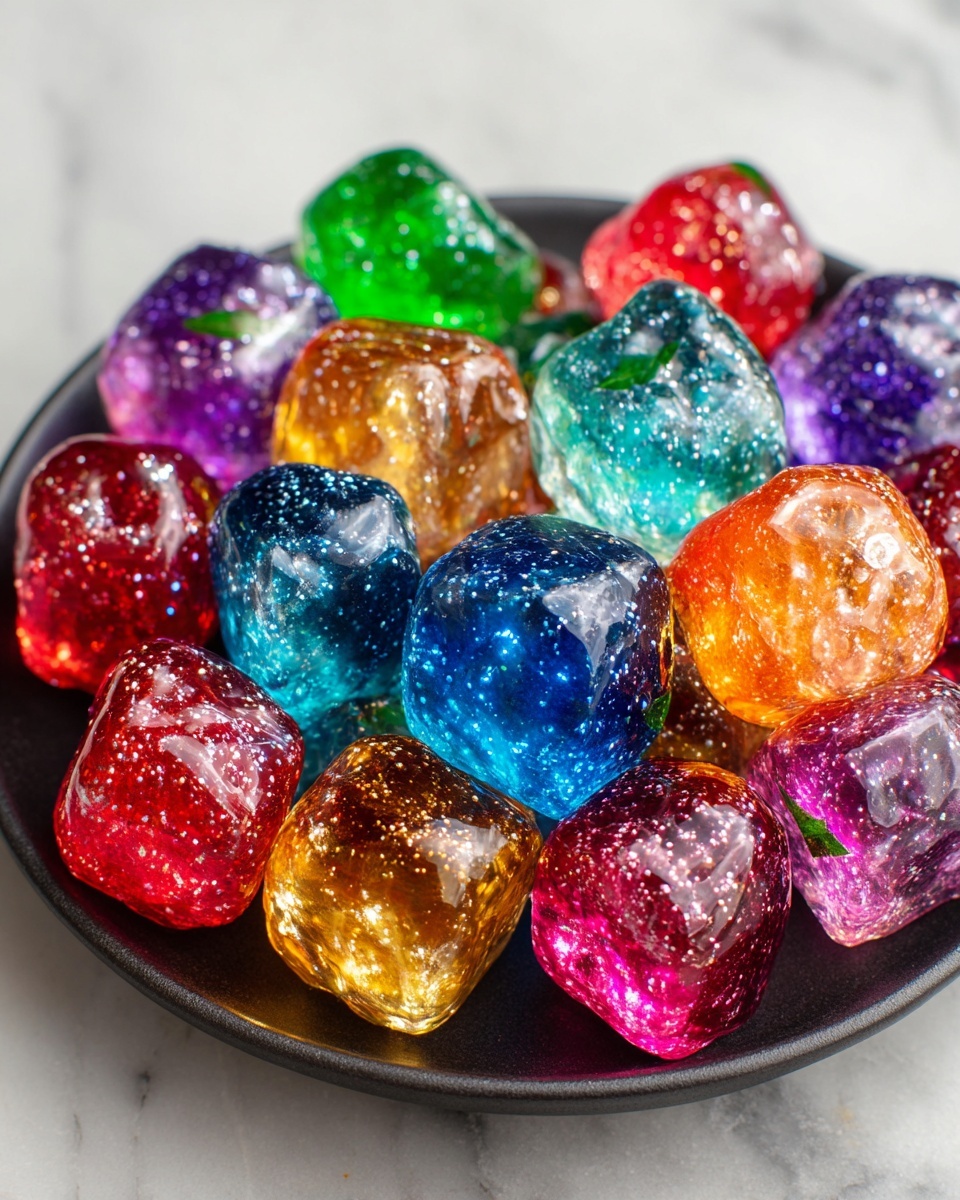
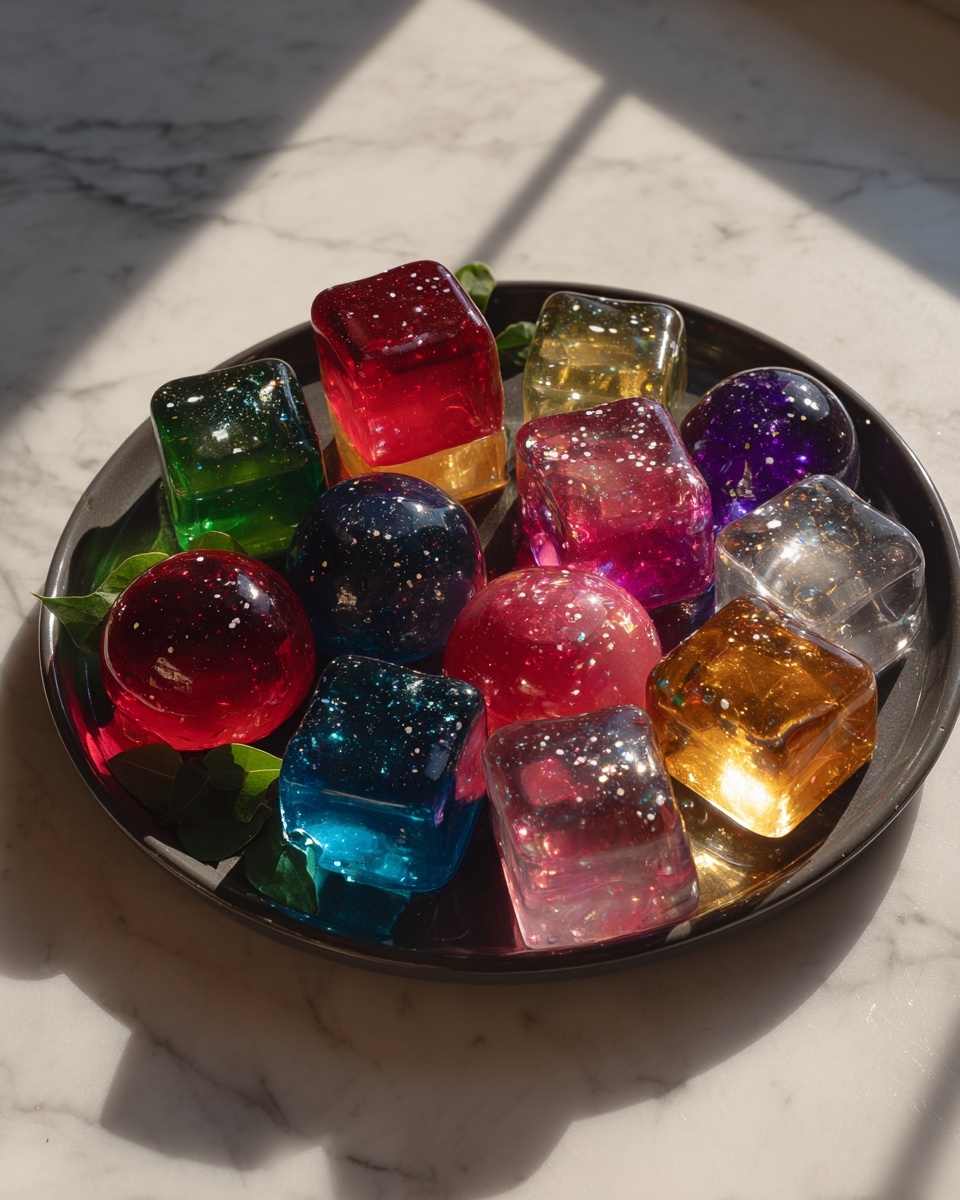
Once fully hardened, lift the candy sheet and gently break it into chunks, revealing a rainbow of glowing gems. Store them in an airtight container to keep their glow and crunch just right for whenever you want to dazzle friends and family with your incredible Northern Lights Candy Glow Recipe.
How to Serve Northern Lights Candy Glow Recipe
Garnishes
Add extra flair by sprinkling edible glitter or fine sugar crystals around the candy pieces when serving. The sparkles mimic the starry sky, elevating the glowing effect for a truly celestial display. You can also pair small sprigs of fresh mint or edible flowers for a fresh and artistic touch.
Side Dishes
This candy pairs beautifully with light desserts like lemon sorbet or fresh fruit salads, enhancing the citrus notes while offering a playful contrast in textures. For a party twist, serve alongside sparkling beverages or tonic water-based cocktails to highlight the glowing quinine inside the candy itself.
Creative Ways to Present
Presentation is half the fun with the Northern Lights Candy Glow Recipe. Try serving the candy on black or deep blue plates to amplify the luminous colors, or place pieces inside clear glass jars illuminated by UV LED lights for an unforgettable glowing centerpiece. You might even wrap small portions in translucent paper with fairy lights woven around for gifting—everyone will think these treats are magical.
Make Ahead and Storage
Storing Leftovers
Store your leftover candy in an airtight container at room temperature to maintain crunch and prevent humidity from dulling the glow. Avoid refrigeration, which can cause condensation and sticky textures. Kept properly, the candy will stay fresh and glowing for several weeks.
Freezing
While it’s not typically recommended to freeze hard candy like this because it can become sticky when thawed, you can freeze it wrapped securely in parchment and foil if necessary. When ready to enjoy, let it come back to room temperature fully before unwrapping to avoid moisture buildup.
Reheating
This candy is best enjoyed as is, so reheating isn’t advisable since it will melt the glow and lose that satisfying crunch. Instead, focus on making a fresh batch of the Northern Lights Candy Glow Recipe for each special occasion to keep that vibrant magic intact.
FAQs
What makes the Northern Lights Candy Glow Recipe glow?
The candy’s glow comes from tonic water, which contains quinine, a natural compound that fluoresces under UV light. Adding just a small amount to each colored batch ensures your candy will light up wonderfully when exposed to blacklight or similar UV sources.
Can I use other food colorings for this recipe?
Absolutely! You can experiment with any high-quality liquid or gel food coloring to craft your own vibrant palette. Just remember to use food-safe colors that won’t alter the hardening process or flavor.
Is the candy safe to eat for children?
Yes, the candy is safe for children. The amount of tonic water used is very small and completely safe, but if you prefer, you can omit tonic water to skip the glowing effect and still enjoy the delicious candy.
How long does the candy keep its glow?
The glow effect will last as long as the quinine from the tonic water remains intact. Stored properly in a cool, dry place, the candy can maintain its glowing property for weeks, especially when exposed to UV light during serving.
Can I make this candy in different shapes?
Definitely! Instead of pouring the syrup flat onto a baking sheet, you can pour it into silicone molds before it hardens. This way, your Northern Lights Candy Glow Recipe takes on fun shapes and becomes even more enchanting to eat or gift.
Final Thoughts
I cannot recommend enough giving the Northern Lights Candy Glow Recipe a try, especially when you want to wow your friends and family with something truly out of this world. It’s a delightful blend of easy-to-find ingredients, simple techniques, and mesmerizing results that bring a party to life or make a special moment glow in every possible way. Once you taste the zesty brightness paired with that enchanting glow, I guarantee this recipe will become a treasured favorite you’ll be eager to share again and again.
Print
Northern Lights Candy Glow Recipe
- Prep Time: 5 minutes
- Cook Time: 20 minutes
- Total Time: 25 minutes
- Yield: 10 servings
- Category: Candy
- Method: Stovetop
- Cuisine: American
Description
Northern Lights Candy Glow is a vibrant, glowing hard candy recipe that combines colorful food dyes with tonic water to create a luminous treat. This visually stunning candy is perfect for parties and special occasions, offering a fun and sweet experience with a glowing effect under UV light. The candy is made by boiling a sugar syrup to the hard crack stage, then dividing and coloring the syrup before letting it cool and harden.
Ingredients
For the Candy Syrup
- 1 cup sugar
- 1/4 cup corn syrup
- 1/4 cup water
- 1/2 teaspoon baking soda
- 1/2 teaspoon citric acid
- 1/2 teaspoon lemon extract
For Coloring and Glow Effect
- 1/4 teaspoon blue food coloring
- 1/4 teaspoon green food coloring
- 1/4 teaspoon yellow food coloring
- 1/4 teaspoon red food coloring
- 1/4 teaspoon tonic water (for glowing effect)
Instructions
- Prepare the Baking Sheet: Line a baking sheet with parchment paper or a silicone baking mat to prevent sticking and set it aside while you prepare the candy syrup.
- Cook the Sugar Mixture: In a medium saucepan, combine sugar, corn syrup, and water. Stir over medium heat until all sugar is dissolved. Then increase heat and bring to a boil without stirring for 5-7 minutes until the mixture reaches the hard crack stage, about 300°F (150°C), using a candy thermometer to monitor.
- Add the Baking Soda and Citric Acid: Remove the syrup from heat and carefully stir in the baking soda and citric acid. The mixture will bubble up, so handle with caution.
- Add the Flavors and Colors: Divide the hot syrup carefully into separate heat-resistant bowls. Add lemon extract to all portions. Add one food coloring per bowl, along with a teaspoon of tonic water to create the glowing effect, then stir gently to combine.
- Pour the Candy: Quickly pour each colored syrup onto the prepared baking sheet, arranging separate sections for each color. Work fast as the syrup will harden quickly.
- Break into Pieces: Allow the candy to cool and harden at room temperature for 20-30 minutes. Once hardened, break the candy into bite-sized pieces and store them in an airtight container to maintain freshness. The candies will glow when exposed to UV light or due to the tonic water content.
Notes
- Use a candy thermometer to ensure the syrup reaches the hard crack stage for proper candy texture.
- Be cautious when adding baking soda and citric acid as the mixture will bubble up vigorously.
- Tonic water contains quinine which fluoresces under UV light, giving the candy its glowing effect.
- Store the candy in an airtight container to prevent moisture absorption and stickiness.
- This candy is best enjoyed fresh but can be stored for up to two weeks.
