Description
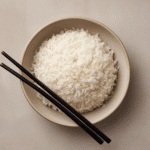
Learn how to use the Instant Pot rice setting to cook perfect white rice every time with minimal effort.
Ingredients
Units
Scale
- 1 cup white rice (e.g., Jasmine or Basmati)
- 1 cup water
- 1/2 teaspoon salt (optional)
- 1 teaspoon oil or butter (optional)
Instructions
- Rinse the rice under cold water until the water runs clear to remove excess starch.
- Add the rinsed rice to the Instant Pot inner pot.
- Pour in 1 cup of water, and add salt and oil or butter if desired.
- Close the lid, ensure the valve is set to ‘Sealing’.
- Press the ‘Rice’ button on the Instant Pot. This setting automatically sets the cooking time (usually around 12 minutes at low pressure).
- Allow the pressure to release naturally for 10 minutes after cooking ends, then quick release any remaining pressure.
- Open the lid, fluff the rice with a fork, and serve.
Notes
- The ‘Rice’ button is calibrated for white rice only. For brown rice, use the ‘Manual’ or ‘Pressure Cook’ setting instead.
- Use equal parts rice and water for firmer rice; use slightly more water for softer rice.
- Rinsing is key to preventing sticky rice.
Nutrition
- Serving Size: 1 cup cooked rice
- Calories: 205
- Sugar: 0g
- Sodium: 293mg
- Fat: 1g
- Saturated Fat: 0.3g
- Unsaturated Fat: 0.7g
- Trans Fat: 0g
- Carbohydrates: 45g
- Fiber: 0.6g
- Protein: 4g
- Cholesterol: 0mg