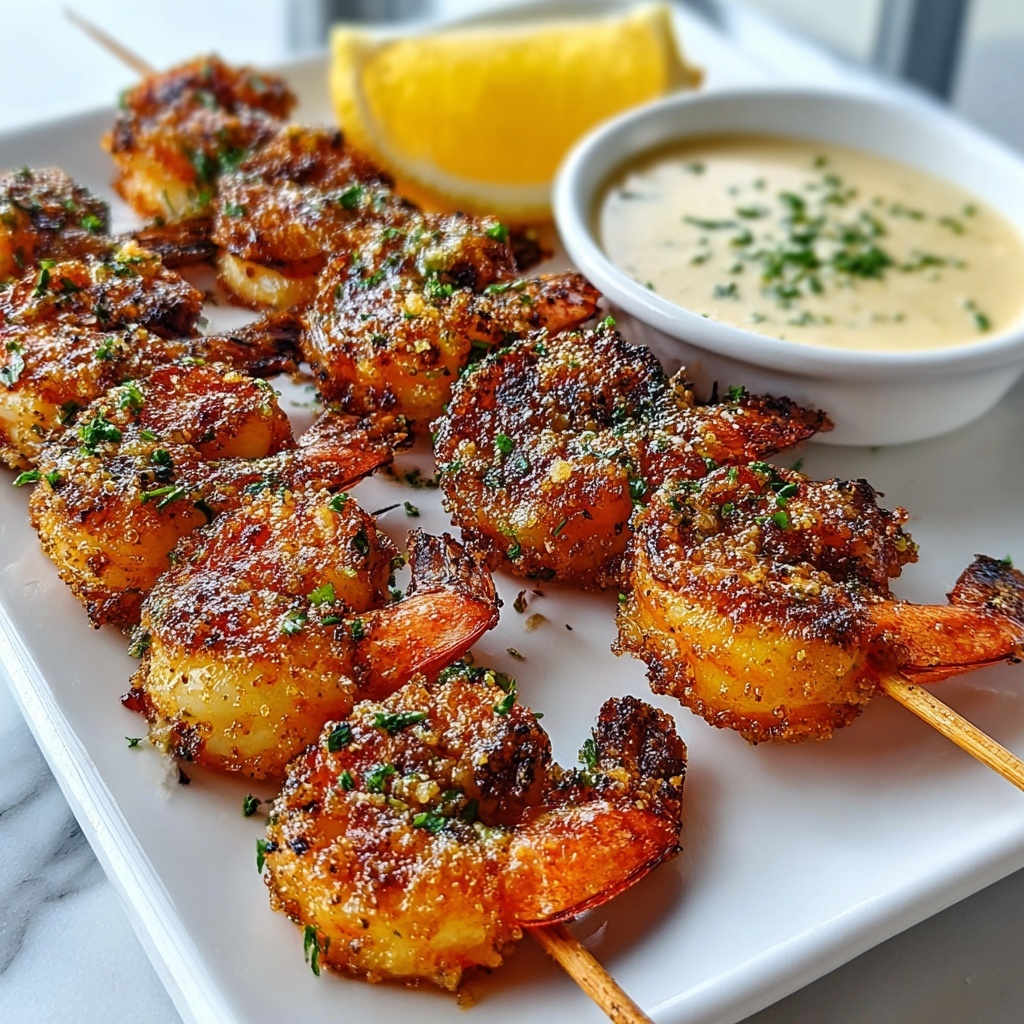
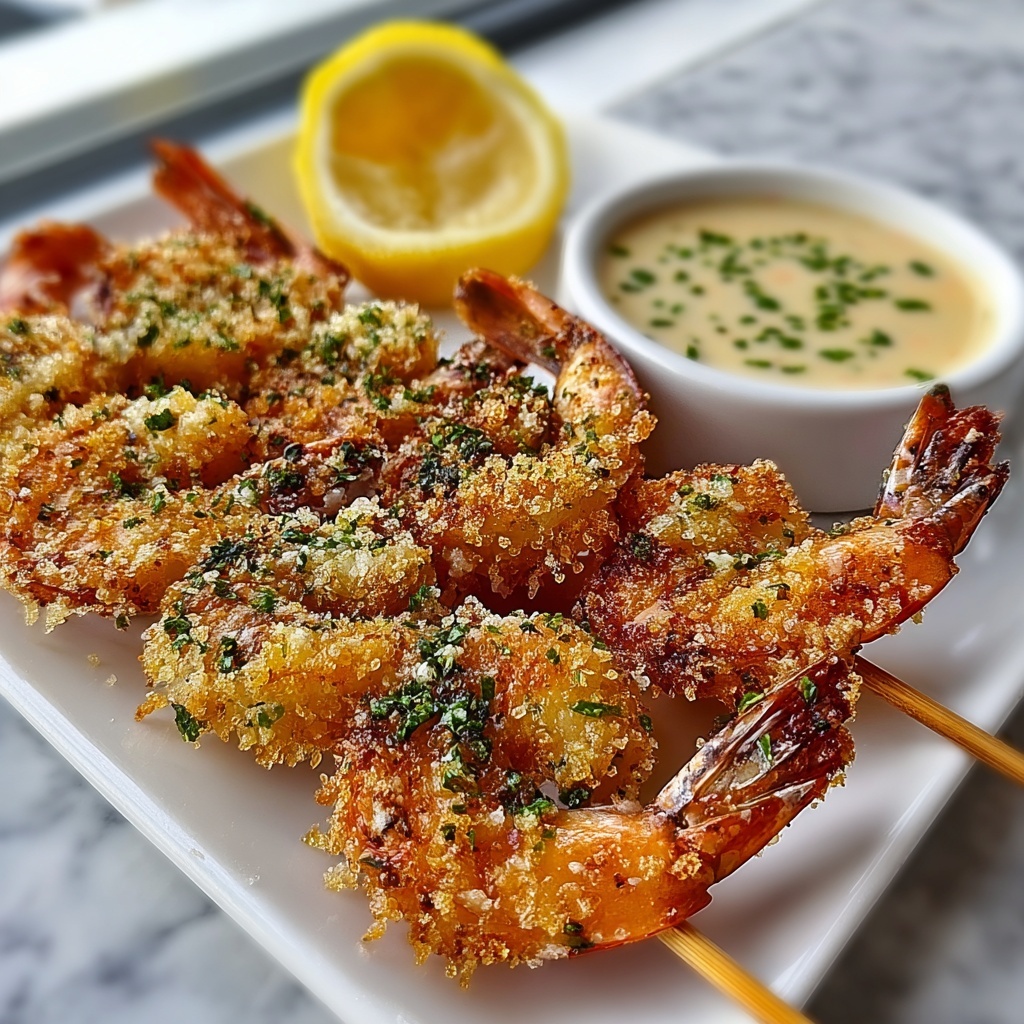
If you love bold, savory bites bursting with flavor, then you are in for a treat with this Garlic Parmesan Shrimp Skewers Recipe. Imagine perfectly juicy shrimp coated in a garlicky, cheesy crust with a subtle smoky kick, grilled or broiled to juicy perfection. This dish is not only quick to whip up but utterly impressive, making it a fantastic go-to for casual dinners or special gatherings. Once you try these skewers, tossed in fresh parsley and served with bright lemon wedges, you will see why they become an instant favorite in your recipe collection.

Ingredients You’ll Need
Gathering the right ingredients for these skewers is refreshingly simple, yet each component plays its part beautifully to create that irresistible combination of flavors and textures. Fresh shrimp offer a tender base, while garlic, Parmesan, and smoked paprika build a rich, aromatic crust.
- 1 lb large shrimp (16–20 count): The star of the dish, offering sweet and tender seafood goodness.
- 2 tablespoons olive oil: Helps coat the shrimp and allows the Parmesan to stick perfectly.
- 4 garlic cloves minced: Adds pungent warmth and depth to every bite.
- 1/2 cup grated Parmesan cheese: Creates a crispy, savory crust with a nutty flavor.
- 1/2 teaspoon smoked paprika: Sprinkles smoky complexity complementing the shrimp.
- 1/4 teaspoon crushed red pepper flakes (optional): For a mild heat kick that livens things up.
- 2 tablespoons chopped fresh parsley: Adds a fresh, herbaceous note and vibrant color.
- 1/4 teaspoon salt: Enhances all other flavors subtly but effectively.
- 1/4 teaspoon black pepper: Gives a mild spicy edge and balances the richness.
- Lemon wedges for serving: The perfect bright finish that cuts through the richness.
How to Make Garlic Parmesan Shrimp Skewers Recipe
Step 1: Prep Your Skewers and Oven
Start by soaking your wooden skewers in water for at least 20 minutes to prevent them from burning while broiling. While those soak, preheat your broiler to high and line a baking sheet with foil for easy cleanup. A light brush or spray of olive oil on the foil will keep the shrimp from sticking and help maintain the gorgeous crust we’re after.
Step 2: Season Your Shrimp
In a large bowl, toss the shrimp with olive oil, minced garlic, smoked paprika, salt, and black pepper. This step infuses them with deep layers of flavor, making sure every bite sings. The olive oil also helps hold everything together when we add the cheese next.
Step 3: Coat with Parmesan Cheese
Sprinkle the grated Parmesan over your seasoned shrimp and toss gently to coat. The cheesy layer is what gives these skewers their addictive crispy texture and rich umami punch. Be gentle when tossing so the shrimp don’t get mushy but are evenly covered with the cheese.
Step 4: Thread the Shrimp onto Skewers
Carefully thread 4–5 shrimp onto each skewer, making sure to pierce through both thick and thinner parts of the shrimp to keep them securely in place. This helps with even cooking and makes them easy to flip later.
Step 5: Broil Until Perfect
Place the shrimp skewers on your prepared baking sheet in a single layer. Broil for 2 to 3 minutes on each side, watching closely until the shrimp turn bright pink and the Parmesan crust develops a gorgeous golden brown color. This quick cook time ensures shrimp remain juicy and tender, without drying out.
Step 6: Garnish and Serve Immediately
Once they’re out of the oven, sprinkle the skewers generously with fresh parsley for a pop of color and herbaceous freshness. Serve them up immediately with lemon wedges on the side for squeezing just the right amount of zesty brightness over the cheesy garlic shrimp.
How to Serve Garlic Parmesan Shrimp Skewers Recipe
Garnishes
Fresh parsley is the classic garnish that adds a lovely green contrast and fresh flavor. A squeeze of lemon just before eating lifts the entire dish, balancing the richness of the Parmesan and garlic with its tartness. If you’re feeling adventurous, a sprinkle of extra red pepper flakes or a drizzle of garlic butter can elevate each skewer even more.
Side Dishes
Garlic Parmesan Shrimp Skewers pair wonderfully with light, fresh sides. Think crisp green salads, roasted vegetables, or even a fluffy lemon herb rice. For something heartier, a creamy pasta or garlic mashed potatoes would complement the bold flavors while keeping the meal satisfying.
Creative Ways to Present
For a party or family meal, serve these skewers on a large wooden board with a bowl of garlic aioli or your favorite dipping sauce in the center. You could even slice some toasted baguette for guests to make mini shrimp sandwiches with. If you want to add a little flair, garnishing with edible flowers or colorful microgreens makes the dish shine on any table.
Make Ahead and Storage
Storing Leftovers
If you have leftovers, store the cooked garlic Parmesan shrimp skewers in an airtight container in the refrigerator. They will stay fresh for up to 2 days, making for a quick, protein-packed snack or meal addition.
Freezing
While best enjoyed fresh, you can freeze cooked shrimp skewers wrapped tightly in plastic wrap and foil, or in a freezer-safe container for up to one month. To prevent sogginess, avoid freezing any fresh herbs or lemon wedges along with them.
Reheating
Reheat the skewers gently in a low oven or toaster oven at 300°F until warmed through to keep the shrimp tender and the Parmesan coating crisp. Avoid microwaving as it can make the shrimp rubbery and the coating soggy.
FAQs
Can I use frozen shrimp for this Garlic Parmesan Shrimp Skewers Recipe?
Absolutely! Just be sure to fully thaw and pat the shrimp dry before seasoning to ensure the best texture and flavor.
Is it better to grill or broil these shrimp skewers?
Both methods work beautifully. Broiling is quick and easy for indoor cooking, while grilling adds a lovely charred flavor that enhances the smoky paprika.
Can I make this recipe spicy?
Yes! Increase the crushed red pepper flakes to add more heat, or add a dash of cayenne pepper for an extra kick without overpowering the garlic and Parmesan flavors.
What can I substitute for Parmesan cheese?
Pecorino Romano is a great substitute with a similar salty, nutty flavor. For a milder option, shaved Asiago can work well too.
How long do the skewers take to cook?
Broiling takes just about 4 to 6 minutes in total, flipping halfway through, until the shrimp are pink and the coating is golden and crispy.
Final Thoughts
This Garlic Parmesan Shrimp Skewers Recipe is a game-changer for anyone who loves quick, flavorful meals that impress. It’s simple enough for a weeknight dinner but special enough to serve guests. I truly hope you give it a try and fall in love with this perfect blend of garlic, cheese, and shrimp as much as I have. Happy cooking and even happier eating!
Print
Garlic Parmesan Shrimp Skewers Recipe
- Prep Time: 10 minutes
- Cook Time: 6 minutes
- Total Time: 16 minutes
- Yield: 12 servings
- Category: Appetizer
- Method: Broiling
- Cuisine: American
Description
Garlic Parmesan Shrimp Skewers are a quick and flavorful appetizer perfect for any occasion. Juicy large shrimp are marinated in a mixture of olive oil, garlic, smoked paprika, and Parmesan cheese, then broiled to a golden perfection. These skewers are garnished with fresh parsley and served with zesty lemon wedges for an irresistible bite.
Ingredients
Shrimp and Marinade
- 1 lb large shrimp (16–20 count)
- 2 tablespoons olive oil
- 4 garlic cloves, minced
- 1/2 teaspoon smoked paprika
- 1/4 teaspoon crushed red pepper flakes (optional)
- 1/4 teaspoon salt
- 1/4 teaspoon black pepper
Coating and Garnish
- 1/2 cup grated Parmesan cheese
- 2 tablespoons chopped fresh parsley
- Lemon wedges for serving
Additional
- 4–6 wooden skewers (soaked in water for 20 minutes)
- Nonstick spray or olive oil for greasing the baking sheet
Instructions
- Prepare Skewers and Oven: Soak 4–6 wooden skewers in water for 20 minutes to prevent burning during cooking. Preheat your broiler to high and line a baking sheet with foil. Lightly grease the foil with nonstick spray or olive oil to prevent sticking.
- Marinate the Shrimp: In a large mixing bowl, toss the shrimp with olive oil, minced garlic, smoked paprika, salt, black pepper, and crushed red pepper flakes if using, ensuring each shrimp is evenly coated with the marinade.
- Add Parmesan Cheese: Sprinkle the grated Parmesan cheese over the marinated shrimp and gently toss again to create an even coating. The olive oil helps the cheese adhere well to the shrimp.
- Thread Shrimp onto Skewers: Thread 4 to 5 shrimp onto each soaked wooden skewer, piercing through the thick and thin ends of the shrimp to hold them securely in place.
- Broil the Skewers: Place the skewers on the prepared baking sheet in a single layer. Broil them for about 2 to 3 minutes on each side, or until the shrimp turn pink and opaque and the Parmesan cheese forms a golden crust.
- Garnish and Serve: Remove the shrimp skewers from the oven, sprinkle fresh chopped parsley over them, and serve immediately with lemon wedges alongside your preferred dipping sauces.
Notes
- Soaking the wooden skewers in water is essential to prevent them from catching fire under the broiler.
- If you don’t have a broiler, you can grill the skewers on medium-high heat for 2-3 minutes per side.
- Adjust the amount of crushed red pepper flakes to your preferred spice level or omit for a milder flavor.
- Serve with a side of garlic aioli or cocktail sauce for extra flavor.
- Use fresh shrimp for the best taste and texture; if using frozen, thaw thoroughly before marinating.


