
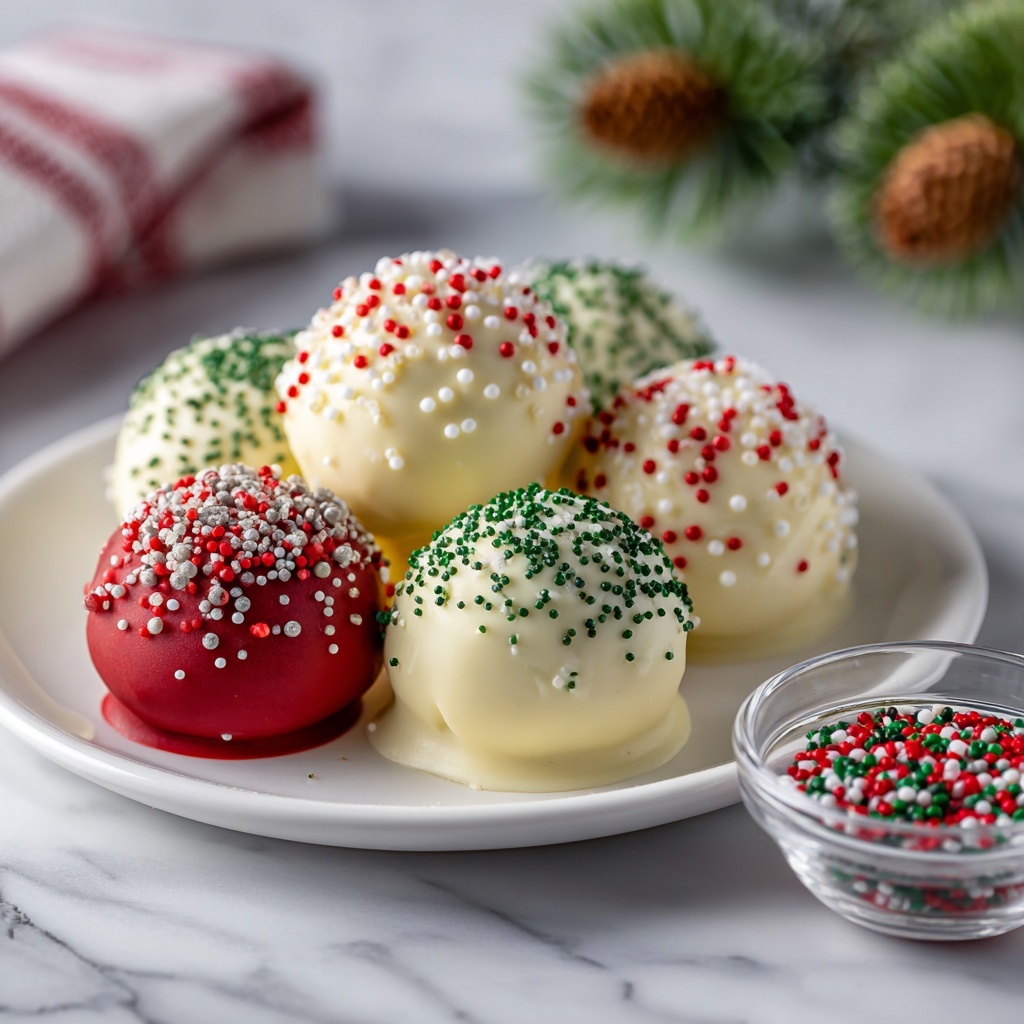
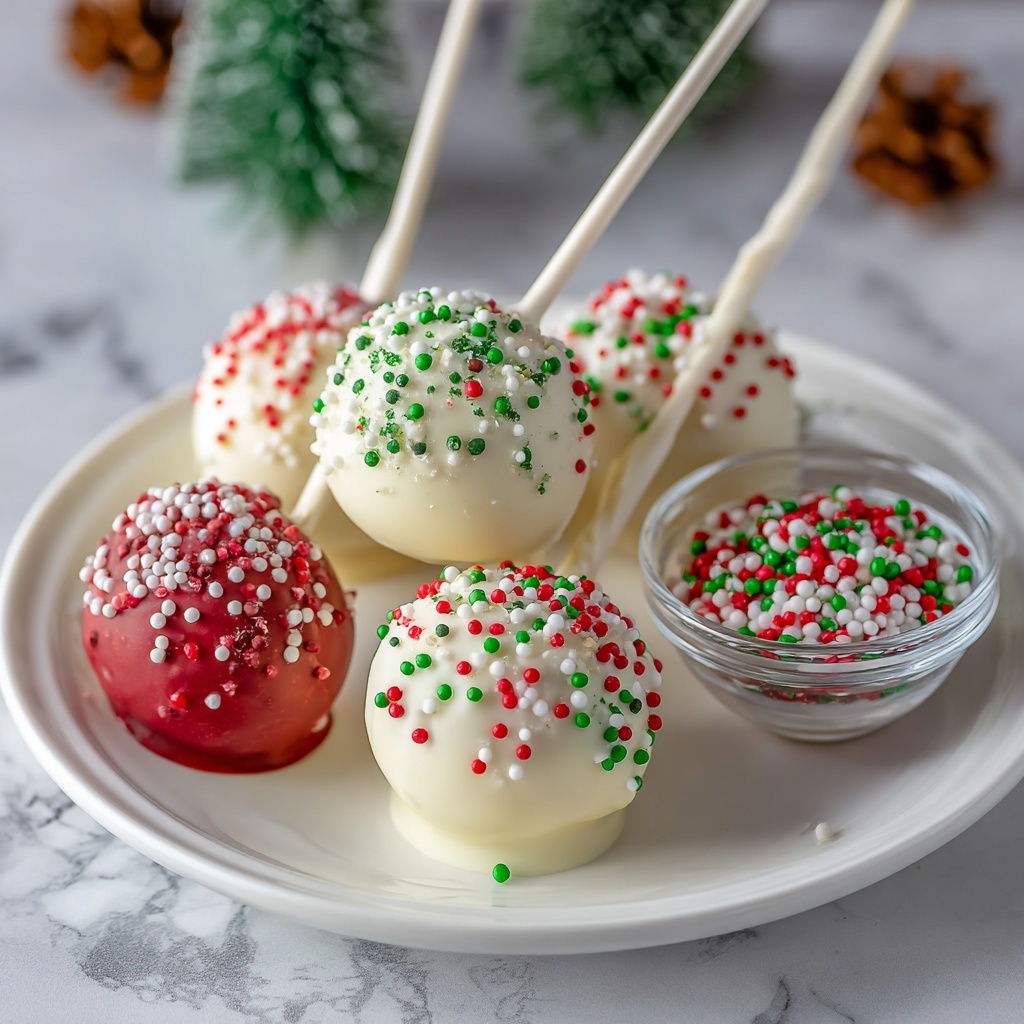
If you’re looking for a festive, fun, and absolutely delightful holiday treat, this Easy Christmas Cake Pops Recipe is just what you need! These bite-sized wonders bring together moist vanilla cake and sweet frosting, all wrapped in colorful candy melts and topped with cheerful sprinkles—perfect for sharing with loved ones or brightening up any holiday dessert table. Whether you’re a seasoned baker or a newbie, these pops are straightforward to make and absolutely irresistible to eat.
Ingredients You’ll Need
Gathering the right ingredients is key to making these cake pops utterly amazing. Each component plays a vital role in the flavor, texture, and festive look, yet everything remains simple and easy to find.
- Vanilla cake mix: This forms the soft, fluffy base that gives the cake pops their tender crumb and sweet vanilla flavor.
- Vanilla icing: Acts as the perfect binder to keep the crumbled cake together while adding extra sweetness and moisture.
- White candy melts: These create a smooth, glossy coating that’s easy to dip the pops into and perfect for decorating.
- Red candy melts: Adds a vibrant pop of traditional Christmas color to contrast with the white coating beautifully.
- Festive sprinkles: The final touch that brings texture and holiday cheer with fun colors and shapes.
How to Make Easy Christmas Cake Pops Recipe
Step 1: Prepare the Vanilla Cake
Start by mixing the vanilla cake mix according to the package instructions. Beat together the cake mix with water, vegetable oil, and eggs in a large bowl until smooth. Pour the batter into a greased 9×9-inch pan or two 8×8-inch round pans and bake at 350°F until a toothpick inserted in the center comes out clean. This classic moist vanilla cake will be the delicious base every bite is built on.
Step 2: Crumble and Combine with Frosting
Once the cake is completely cooled, crumble it finely using a fork right in the baking dish or transfer to a large bowl. Stir in the vanilla icing thoroughly until the cake crumbs stick together well. Cover the mixture with plastic wrap and chill it in the freezer until firm—this helps make rolling the cake balls much easier.
Step 3: Shape into Balls
Use a cookie scoop or your hands to roll the chilled mixture into even-sized balls, about the size of a ping pong ball. Keeping them consistent in size helps with even coating and a pretty presentation. Place them on a large baking sheet and freeze again until solid. Cold cake balls are far easier to handle and keep their shape beautifully.
Step 4: Insert Sticks and Chill
Melt the candy melts in a microwave or double boiler. Dip the tip of each lollipop stick into the melted chocolate then insert it about halfway into each frozen cake ball. Return the coated balls to the freezer to let the chocolate set, securing the sticks snugly in each pop.
Step 5: Coat and Decorate
Dip each cake pop into the melted white or red candy melts, using a spoon if needed to evenly coat and swirl off any excess chocolate. While the coating is still soft, sprinkle on festive sprinkles to add sparkle and holiday flair. Stand the pops upright in a styrofoam block or cardboard box to let the coating harden completely.
How to Serve Easy Christmas Cake Pops Recipe
Garnishes
A sprinkle of colored holiday confetti or small edible glitter stars can instantly jazz up these cake pops. You can also drizzle contrasting colored candy melts over them for delightful stripes or swirls, making each pop feel like a tiny winter masterpiece.
Side Dishes
Serve these pops alongside warm hot cocoa or a spiced holiday punch. Their creamy sweetness pairs wonderfully with the warmth and spice of traditional holiday drinks, creating a balanced and festive treat experience.
Creative Ways to Present
Arrange your cake pops in mason jars filled with colorful holiday-themed sand or sugar for a charming centerpiece. Wrapping each pop in cellophane tied with festive ribbons also makes for adorable edible gifts your friends and family will love showing off and indulging in.
Make Ahead and Storage
Storing Leftovers
Keep leftover cake pops in an airtight container and store them in the refrigerator. They will stay fresh and delicious for up to 5 days, making it easy to prepare them in advance for your holiday gatherings.
Freezing
These cake pops freeze wonderfully! Arrange them on a tray to freeze solid, then transfer to a freezer-safe container. When well wrapped and stored this way, they can last for up to 2 months without losing their taste or texture.
Reheating
Since these treats are served cold, reheating isn’t necessary. Simply remove from the freezer or fridge a few minutes before serving to take the chill off, so the flavors shine through perfectly.
FAQs
Can I use homemade cake instead of a box mix?
Absolutely! Homemade vanilla cake works beautifully in this recipe and adds a lovely personal touch. Just be sure it’s completely cooled before crumbling.
What can I substitute for candy melts?
If candy melts aren’t available, white and red chocolate chips or melting chocolate can work as alternatives, though candy melts tend to provide a smoother, shinier finish.
How can I make the cake pops more festive?
Try adding crushed peppermint or a pinch of cinnamon in the cake mixture. Also, experiment with different colored sprinkles or edible glitter for holiday sparkle.
What should I do if my cake balls don’t stick to the sticks?
Dip the stick in melted chocolate before inserting into the cake ball and ensure the cake balls are fully chilled. This chocolate acts like glue to keep everything in place.
Can kids help make these cake pops?
Definitely! Kids especially love rolling the cake balls and decorating with sprinkles. It’s a fun and safe kitchen activity during the holiday season.
Final Thoughts
Making this Easy Christmas Cake Pops Recipe is a truly joyful holiday activity that fills your kitchen with sweet aromas and festive spirit. These pops are as fun to make as they are to eat, guaranteed to become a classic celebration treat you’ll want to share year after year. Give them a try—you might just find a new holiday favorite!
Print
Easy Christmas Cake Pops Recipe
- Prep Time: 40 minutes
- Cook Time: 30 minutes
- Total Time: 1 hour 40 minutes
- Yield: 18 servings
- Category: Desserts
- Method: Baking
- Cuisine: American
Description
These Easy Christmas Cake Pops are a fun and festive holiday treat made from moist vanilla cake mixed with creamy vanilla icing, coated in colorful candy melts, and decorated with festive sprinkles. Perfect for parties, holiday gift-giving, or a delightful seasonal dessert that is simple to prepare and sure to impress.
Ingredients
Cake and Frosting
- 1 box vanilla cake mix (e.g., Betty Crocker)
- Ingredients required by cake mix (water, vegetable oil, eggs) as per package directions
- 1/3 cup vanilla icing (e.g., Betty Crocker)
Coating and Decoration
- 1/2 bag white candy melts (12 oz)
- 1/2 bag red candy melts (12 oz)
- Festive sprinkles
- Lollipop sticks
Instructions
- Prepare the Cake Batter: Follow the package directions to prepare the vanilla cake batter by beating the cake mix with water, vegetable oil, and eggs in a large mixing bowl until smooth.
- Bake the Cake: Pour the batter into a greased 9×9-inch baking dish or two 8×8-inch round cake pans. Bake at 350°F (175°C) until a toothpick inserted in the center comes out clean, about 25-30 minutes. Let the cake cool completely.
- Crumble and Mix: Once cooled, crumble the cake thoroughly using a fork into a large bowl or the baking dish itself. Stir in the 1/3 cup vanilla icing until evenly combined. Cover with plastic wrap and freeze until chilled and firm.
- Form Cake Balls: Using a cookie scoop and your hands, portion and roll the chilled mixture into even balls about the size of a ping pong ball. Place them on a large baking sheet.
- Freeze Cake Balls: Freeze the cake balls until they are very firm, which will make them easier to dip and shape.
- Refine Shape: Give the frozen balls a second gentle roll by hand to smooth out any imperfections, then arrange them back on the baking sheet.
- Prepare Candy Melts: Melt the white and red candy melts separately in the microwave or using a double boiler until smooth.
- Insert Sticks: Dip the tip of each lollipop stick into melted candy, then insert it into each frozen cake ball to secure. Place the sticks with cake balls back into the freezer to set.
- Coat Cake Pops: Dip each cake pop into the melted candy coating, or spoon the candy over the balls and twirl to evenly coat, allowing excess to drip off onto parchment paper.
- Decorate and Set: Immediately decorate the coated cake pops with festive sprinkles. Stand them upright in a styrofoam block or a sturdy cardboard box to allow the coating to harden completely. Once set, your festive cake pops are ready to serve or gift!
Notes
- Freezing the cake mixture and formed balls is key to shaping and coating the pops easily without crumbling.
- Using a cookie scoop helps ensure uniform size for even baking and consistent cake pops.
- If candy melts become too thick, add a small amount of vegetable oil or shortening to thin them for easier dipping.
- Store finished cake pops in an airtight container in the refrigerator for up to 5 days.
- Allow cake pops to come to room temperature before serving for the best flavor and texture.


