“`html
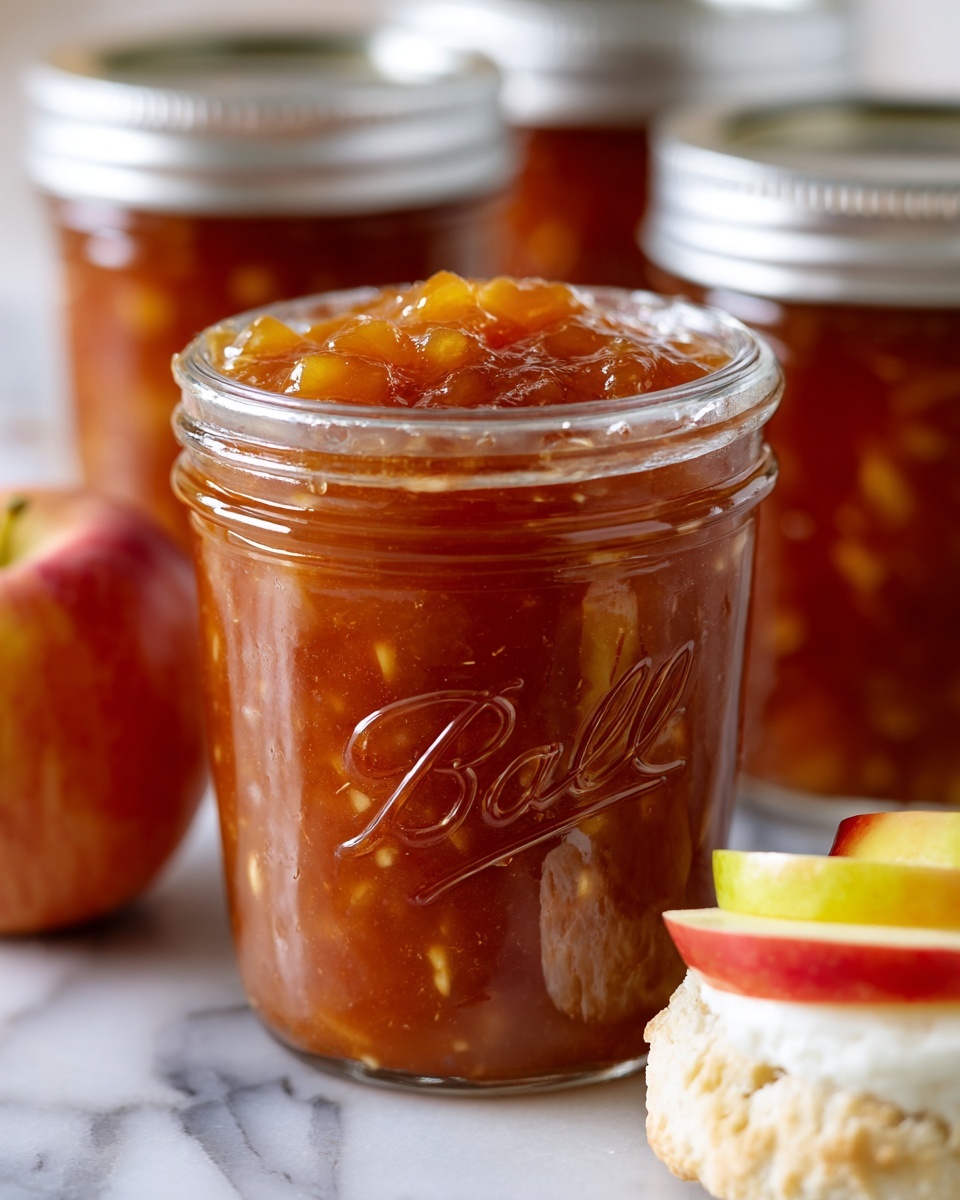
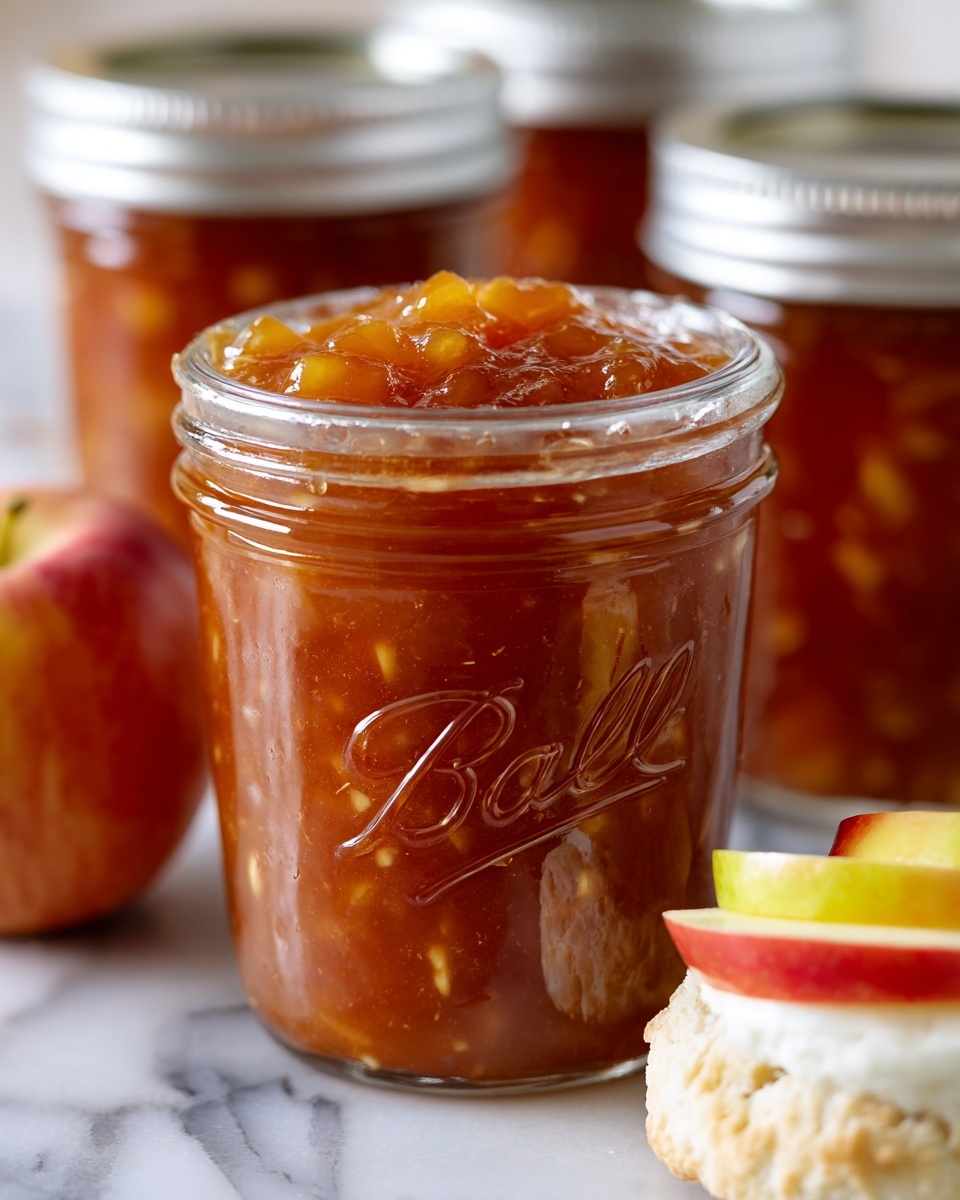
If you’ve ever wanted to capture the cozy, spiced flavors of fall in a jar, this Canning Apple Butter Recipe is exactly what you need. It transforms simple apples into a luscious, deeply flavorful spread with warm notes of cinnamon, nutmeg, and cloves. Making your own apple butter not only fills your kitchen with an irresistible aroma but also provides a versatile treat that’s perfect for breakfasts, snacks, or gifts. Whether you’re an experienced canner or trying your hand at preserving for the first time, this recipe walks you through every step to create a rich, velvety apple butter that lasts throughout the seasons.

Ingredients You’ll Need
Getting the ingredients right is the first step to making a truly memorable apple butter. The beauty of this recipe lies in the simple yet thoughtfully chosen ingredients that build layers of flavor and silky smooth texture.
- 6 lbs apples (Fuji, Gala, or Honeycrisp): These sweet, crisp apples provide the perfect balance of natural sugars and tartness that’s essential for a rich apple butter.
- 2 cups granulated sugar: Adds sweetness and helps with preserving the apple butter’s smooth consistency.
- 1 cup brown sugar, packed: Brings a deep, caramel-like flavor that complements the spices beautifully.
- 1 tablespoon ground cinnamon: Warms up the apple butter with classic spice that’s key to the fall feel.
- ½ teaspoon ground nutmeg: Adds a subtle nutty, aromatic depth that’s perfect for apple spreads.
- ½ teaspoon ground cloves: Introduces a hint of bold, warm spice that balances sweetness.
- ¼ teaspoon salt: Enhances all the flavors and prevents the sweetness from feeling one-dimensional.
- 1 tablespoon vanilla extract: Stirred in at the end to add a smooth, fragrant finish.
- ½ cup apple cider (optional): Boosts flavor complexity and helps achieve a luscious texture.
How to Make Canning Apple Butter Recipe
Step 1: Prepare the Apple Butter
Start by peeling, coring, and chopping your apples into chunks. Place these apples in a large slow cooker along with both sugars, cinnamon, nutmeg, cloves, salt, and apple cider if you’re using it. Stir everything together to distribute the spices evenly. Cover your slow cooker and let it work its magic on low heat for 10 to 12 hours. Along the way, give it a stir now and then so the mixture cooks evenly and doesn’t stick to the bottom. You’ll know it’s ready when the apples are tender and the color turns a deep, golden brown.
Step 2: Blend the Apple Mixture
Once the cooking is complete, it’s time to create that smooth, luscious texture we all love in apple butter. Using an immersion blender, puree the apple mixture right in the slow cooker until it’s silky smooth. If you find the apple butter too thin for your liking, simply continue cooking it uncovered for an extra hour or two until it thickens to a luscious spread. Stir in the vanilla extract at this stage, which adds a beautiful fragrant layer and rounds out the flavors perfectly.
Step 3: Prepare for Canning
Before filling your jars, sterilize them along with their lids by boiling in water for 10 minutes. This crucial step ensures your apple butter will stay fresh and safe to enjoy for months to come. Keep the jars warm to prevent cracking when you fill them with hot apple butter.
Step 4: Fill and Process Jars
Ladle the piping hot apple butter into the sterilized jars, leaving about ¼ inch of headspace to allow for expansion. Wipe the rims clean with a warm, damp cloth to prevent sealing issues. Secure the lids and screw on the rings fingertip-tight, making sure not to overtighten. Next, submerge the jars in a boiling water bath for 10 minutes, ensuring there’s at least an inch of water covering the jar tops—adjust the timing if you’re at a higher altitude. This water bath process seals your jars and preserves that amazing flavor inside.
Step 5: Cool and Store
After processing, carefully remove the jars and set them on a towel or rack to cool undisturbed. As they cool, listen for that satisfying “pop” sound, which indicates a proper seal. Double-check the seals by pressing the lid center; it should not flex up and down. Store your jars in a cool, dark place where they can keep for up to a year—perfect for enjoying the taste of fall anytime you want.
How to Serve Canning Apple Butter Recipe
Garnishes
Apple butter is wonderfully versatile on its own, but adding a few garnishes can take it to the next level. Freshly chopped nuts like pecans or walnuts sprinkle in some delightful crunch, while a dollop of whipped cream or a drizzle of honey can add that little extra bit of indulgence. A light dusting of cinnamon on top also nicely echoes the warm spices in the apple butter.
Side Dishes
This apple butter shines when paired with simple, comforting sides. Spread it thickly on crusty bread, warm biscuits, or fluffy pancakes for an easy, scrumptious breakfast. It also pairs beautifully with sharp cheeses such as cheddar, or alongside roasted pork for a sweet-savory balance that’s just irresistible.
Creative Ways to Present
If you’re serving apple butter at a gathering or gifting it, presentation matters. Try layering it in small jars with layers of cream cheese or mascarpone to create parfaits. Or use it as a glaze on roasted vegetables or meats. It also makes a brilliant swirl in oatmeal or yogurt bowls—play around with different presentations and watch your guests fall in love with this homemade treat.
Make Ahead and Storage
Storing Leftovers
If you happen to have leftover apple butter after opening, store it in the refrigerator in a tightly sealed container. It should stay fresh for about 2 to 3 weeks. Always use a clean spoon to scoop to avoid contamination and keep it tasting fresh.
Freezing
Though canning is the key preservation method here, you can also freeze apple butter. Use freezer-safe containers or heavy-duty freezer bags, leaving some room for expansion. Frozen apple butter keeps well for up to 6 months and is perfect for quick thawing when needed.
Reheating
To warm apple butter for easy spreading or cooking, simply microwave it for short bursts, stirring in between, or gently heat it on the stovetop over low heat. Avoid bringing it to a boil when reheating, as that can affect texture and flavor.
FAQs
Can I use other types of apples in this Canning Apple Butter Recipe?
Absolutely! While Fuji, Gala, and Honeycrisp are recommended for their sweetness and texture, you can experiment with other varieties like Granny Smith for a tarter twist or a mix of apples for a more complex flavor.
Do I have to use a slow cooker to make this apple butter?
The slow cooker is preferred for its convenience and the way it gently breaks down the apples over several hours. However, you can also make apple butter on the stovetop by simmering the ingredients on low heat, stirring often to prevent burning, until thick and smooth.
How long does canned apple butter last?
Properly sealed and stored in a cool, dark place, canned apple butter can last up to a year without losing flavor or quality. Once opened, it’s best enjoyed within a few weeks refrigerated.
Can I reduce the sugar in the apple butter?
Yes, but keep in mind sugar isn’t just for sweetness; it also helps preserve the apple butter and affects the texture. Reducing sugar significantly may alter the final consistency and shelf life.
Is it safe to can apple butter at home?
When following proper sterilization and water bath processing guidelines like in this recipe, home canning apple butter is safe. Always inspect jars for perfect seals before storing and discard any jars that didn’t seal properly.
Final Thoughts
Making your own apple butter is one of those kitchen projects that fills your home with warmth and results in a delicious treat you can enjoy all year. This Canning Apple Butter Recipe brings together simple ingredients and a bit of patience to create a spread that’s bursting with cozy spices and rich apple flavor. Whether you’re keeping it for yourself or sharing with loved ones, I encourage you to give this recipe a try—your taste buds will thank you!
“`
Print
Canning Apple Butter Recipe
- Prep Time: 30 minutes
- Cook Time: 12 hours
- Total Time: 12 hours 30 minutes
- Yield: 4 half-pint jars (about 4 cups)
- Category: Preserves
- Method: Slow Cooking
- Cuisine: American
- Diet: Vegetarian
Description
This homemade apple butter recipe is a slow-cooked, richly spiced spread made from peeled, cored Fuji, Gala, or Honeycrisp apples. Simmered with brown and granulated sugar along with warming spices like cinnamon, nutmeg, and cloves, this apple butter is perfect for canning and storing to enjoy year-round.
Ingredients
Apple Butter Ingredients
- 6 lbs apples (Fuji, Gala, or Honeycrisp), peeled, cored, and chopped
- 2 cups granulated sugar
- 1 cup brown sugar, packed
- 1 tablespoon ground cinnamon
- ½ teaspoon ground nutmeg
- ½ teaspoon ground cloves
- ¼ teaspoon salt
- 1 tablespoon vanilla extract
- ½ cup apple cider (optional for flavor depth)
Instructions
- Prepare the Apple Butter: Place the peeled, cored, and chopped apples into a large slow cooker. Add the granulated sugar, brown sugar, cinnamon, nutmeg, cloves, salt, and apple cider if using. Stir all ingredients thoroughly to combine, then cover the slow cooker.
- Cook the Apples: Cook the mixture on low heat for 10 to 12 hours, stirring occasionally to prevent sticking. The apples should become very soft and dark brown, developing a concentrated flavor and smooth texture.
- Blend the Apple Mixture: Once the cooking is complete, use an immersion blender to puree the apples until smooth. If the apple butter appears too thin, cook uncovered for an additional 1 to 2 hours to thicken it. Stir in the vanilla extract to finish.
- Sterilize the Jars and Lids: Boil canning jars and lids in water for 10 minutes to sterilize them. Keep the jars warm and ready for filling to prevent breakage.
- Fill and Seal the Jars: Ladle the hot apple butter into the sterilized jars, leaving ¼ inch headspace at the top. Wipe the rims clean, place the lids on, and screw on the rings until fingertip-tight.
- Process in a Water Bath: Submerge the filled jars in a boiling water bath, ensuring at least 1 inch of water covers the jars. Boil the jars for 10 minutes to properly seal and preserve the apple butter, adjusting timing for altitude if necessary.
- Cool and Store: Remove the jars carefully and let them cool completely undisturbed. Once cooled, check for proper seals. Store the sealed jars in a cool, dark place and consume within one year for best quality.
Notes
- Use apples like Fuji, Gala, or Honeycrisp for the best natural sweetness and flavor balance.
- The optional apple cider adds extra depth but can be omitted if unavailable.
- Be sure to sterilize jars and lids thoroughly to prevent spoilage.
- Adjust water bath processing times if you are at altitudes above 1,000 feet for safe canning.
- Store sealed jars away from direct sunlight and heat for maximum shelf life.

