
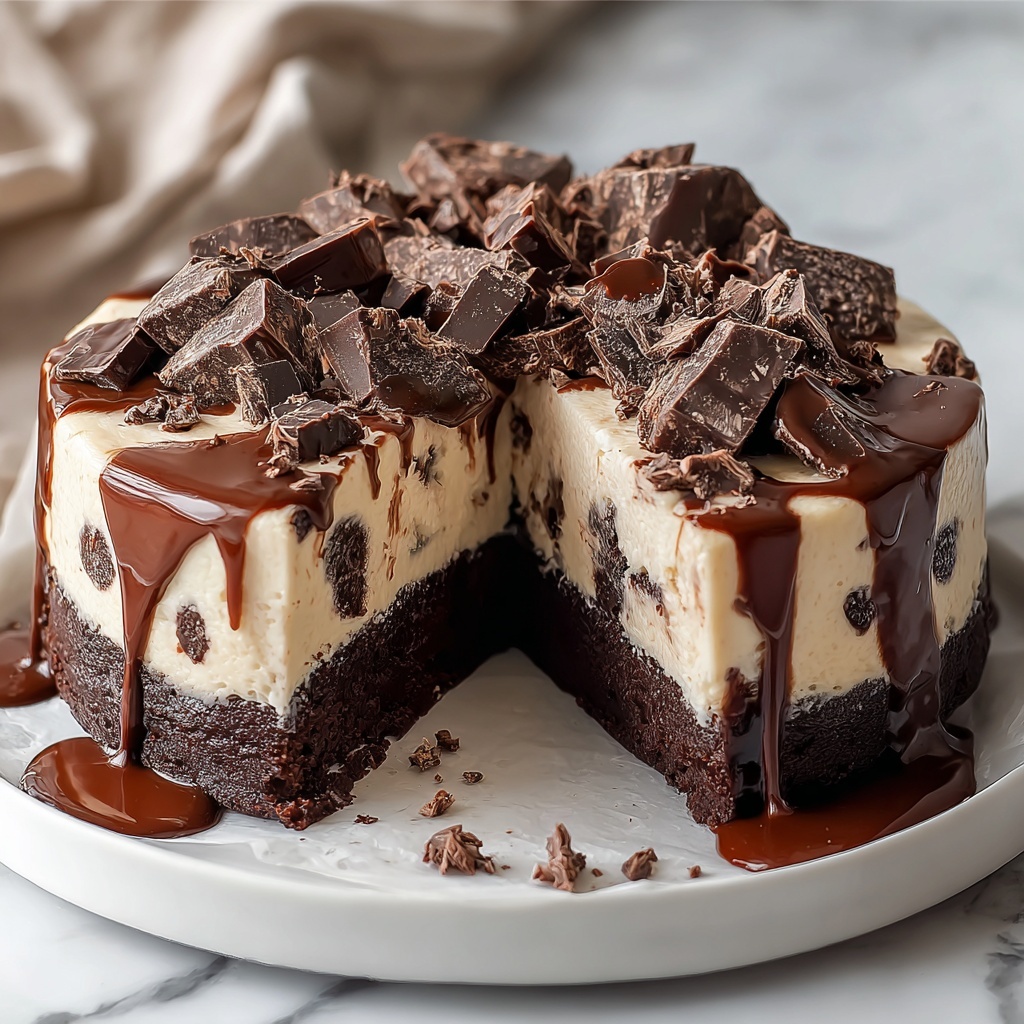
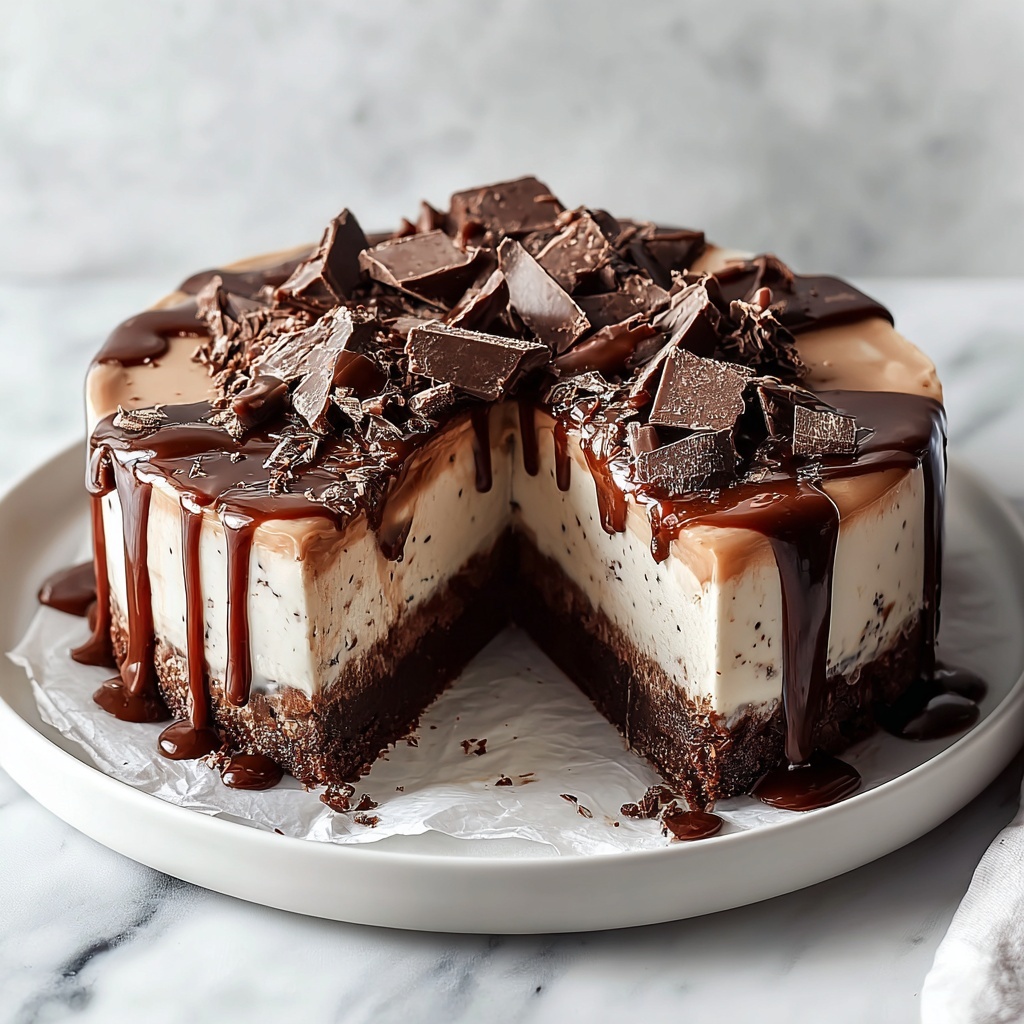
If you’re on the hunt for a truly show-stopping dessert that brings together the fudgy richness of brownies with the cool creaminess of ice cream, look no further than this Brownie Ice Cream Cake Recipe. It’s the perfect way to wow your friends and family with minimal fuss, blending the best of two classic favorites into one irresistible layered treat. Rich chocolate, smooth ice cream, and just the right touch of whipped cream come together in a way that makes every bite a celebration.
Ingredients You’ll Need
This Brownie Ice Cream Cake Recipe uses straightforward, ever-reliable ingredients that are pantry staples, yet each has a starring role in building that perfect balance of texture and flavor. From the deep cocoa in the brownies to the creamy ice cream topping, every component brings something special to the table.
- Unsalted butter (1 cup): Provides moisture and richness, essential for that fudgy brownie texture.
- Granulated sugar (2 cups): Sweetens perfectly to balance the cocoa’s bitterness.
- Large eggs (4): Bind the batter together and add structure.
- Vanilla extract (1 teaspoon): Adds a lovely aromatic warmth that elevates the chocolate.
- All-purpose flour (1 cup): Gives the brownies their form without weighing them down.
- Unsweetened cocoa powder (1 cup): Packs in that rich, deep chocolate flavor everyone craves.
- Salt (½ teaspoon): Enhances all the flavors and balances sweetness.
- Baking powder (½ teaspoon): Helps the brownies rise just enough for a tender crumb.
- Your favorite ice cream (1 quart): Choose any flavor you love or mix – vanilla or chocolate work beautifully here.
- Whipped cream: Adds lightness and creaminess for the perfect finishing touch.
- Chocolate syrup: Drizzled on top for extra decadence.
- Sprinkles or chopped nuts (optional): Adds fun texture and visual appeal.
How to Make Brownie Ice Cream Cake Recipe
Step 1: Preheat and Prepare
Starting off, preheat your oven to 350°F (175°C) and grease a 9×13 inch baking dish thoroughly. This simple prep ensures your brownies bake evenly and come out cleanly, setting the stage for a flawless cake assembly later.
Step 2: Melt Butter and Combine Sugars
Slowly melt the unsalted butter over low heat, then take it off the stove so it cools just a bit. Stir the granulated sugar into the warm butter until fully combined. This step is key for dissolving the sugar well, which helps your brownies have that perfect texture rather than grainy sweetness.
Step 3: Add Eggs and Vanilla
Beat in the eggs one by one, mixing well after each addition. This gradual incorporation creates a smooth, cohesive batter. Follow with the vanilla extract, which will bring everything together with its warm flavor notes.
Step 4: Mix Dry Ingredients Separately
In another bowl, whisk together your flour, cocoa powder, salt, and baking powder. Combining these dry components beforehand ensures they distribute evenly when added to the wet ingredients, preventing any clumps of cocoa or baking powder.
Step 5: Combine Wet and Dry Ingredients
Gradually fold your dry mix into the wet batter, stirring just until smooth. Resist overmixing here to keep your brownies tender and moist, not dense or cakey.
Step 6: Bake Your Brownies
Pour the rich chocolate batter into your prepared pan and bake for 30 to 35 minutes. You’ll know they’re ready when a toothpick inserted in the center comes out clean. After baking, let the brownies cool in the pan for at least 30 minutes to make layering easier.
Step 7: Soften the Ice Cream
While the brownies cool, set your quart of ice cream out at room temperature so it softens for spreading. This step is essential—it helps create those smooth, even layers that make the cake so stunning and delicious.
Step 8: Layer the Cake
Once cooled, carefully remove the brownies from the pan and slice them into two even layers. Place one layer back into the pan, spread a generous layer of softened ice cream on top, then cover with the second brownie layer. This assembly provides the perfect harmony of fudgy, creamy, and cool textures.
Step 9: Freeze Until Set
Cover the entire cake with plastic wrap and freeze for at least two hours. This chilling period lets all those divine layers meld and solidify, guaranteeing each slice holds together beautifully.
Step 10: Add Final Touches
Once your cake is frozen solid, take it out and top with a fluffy crown of whipped cream, a drizzle of chocolate syrup, and sprinkle on any nuts or colorful sprinkles you love. These finishing touches bring extra joy and personality to your dessert plate.
Step 11: Serve and Enjoy
Slice your masterpiece into squares and serve immediately. This is when that perfect blend of creamy ice cream and decadent brownie comes to life—a true crowd-pleaser that’s sure to become a favorite!
How to Serve Brownie Ice Cream Cake Recipe
Garnishes
Garnishing your Brownie Ice Cream Cake Recipe is a wonderful opportunity to add texture and visual delight. Whipped cream is a classic choice, but you can also add chocolate curls, a sprinkle of sea salt, crushed cookies, or toasted nuts for an extra layer of flavor and crunch.
Side Dishes
This decadent dessert pairs beautifully with simple fresh fruit like raspberries or strawberries, which add a refreshing contrast to the richness. A light coffee or a glass of milk also complements this cake perfectly, rounding out the experience without competing with the flavors.
Creative Ways to Present
For a fun twist, serve slices with a scoop of contrasting ice cream flavor on the side or layered in a clear glass bowl for an elegant parfait-style treat. You can also customize by using different ice cream flavors between the brownie layers, creating endless variations on the classic Brownie Ice Cream Cake Recipe.
Make Ahead and Storage
Storing Leftovers
Leftover Brownie Ice Cream Cake Recipe keeps best when wrapped tightly in plastic or stored in an airtight container in the freezer. This helps maintain its freshness and prevents ice crystals from forming.
Freezing
This dessert actually benefits from freezing, making it an ideal make-ahead treat for parties or special occasions. Just cover well and store in the freezer for up to 2 weeks, and you’ve got a stress-free dessert waiting to impress.
Reheating
Since this is an ice cream cake, reheating isn’t necessary or recommended. Instead, allow it to sit out for a few minutes before serving to soften slightly and regain that perfect scoopable texture.
FAQs
Can I use store-bought brownies instead of making them from scratch?
Absolutely! Using high-quality store-bought brownies can save time and still taste fantastic. Just make sure they’re fresh and thick enough to hold the ice cream layers well in your Brownie Ice Cream Cake Recipe.
What ice cream flavors work best in this recipe?
Vanilla and chocolate are classic choices that harmonize beautifully with the rich brownies, but feel free to get creative with flavors like mint chocolate chip, caramel swirl, or even cookies and cream for a personalized twist.
How long does it take to assemble the cake?
Once your brownies are baked and cooled, assembling the cake takes about 15 to 20 minutes, mostly depending on how soft your ice cream is for spreading and your desired garnishing.
Can I make this vegan or dairy-free?
With some ingredient swaps like dairy-free butter, egg replacements, and vegan ice cream, you can definitely adapt this Brownie Ice Cream Cake Recipe to suit vegan or dairy-free diets while still enjoying robust flavors.
What’s the best way to cut the Brownie Ice Cream Cake?
Use a sharp knife dipped in hot water, then wiped dry before slicing. This prevents sticking and helps you get clean, neat slices, showcasing those beautiful brownie and ice cream layers perfectly.
Final Thoughts
This Brownie Ice Cream Cake Recipe is one of those rare desserts that combines simplicity with wow-factor in the best way possible. Whether you’re celebrating a special occasion or just want to indulge yourself and your loved ones, this cake brings smiles with every bite. Give it a try—you’ll quickly see why it’s a forever favorite in my kitchen and hopefully in yours too!
Print
Brownie Ice Cream Cake Recipe
- Prep Time: 15 minutes
- Cook Time: 35 minutes
- Total Time: 3 hours (including freezing and cooling time)
- Yield: 8 servings
- Category: Dessert
- Method: Baking
- Cuisine: American
Description
This delicious Brownie Ice Cream Cake combines rich, fudgy brownies with your favorite ice cream flavors for the ultimate dessert experience. Layers of warm, homemade brownies sandwich creamy ice cream, topped with whipped cream, chocolate syrup, and optional sprinkles or nuts. Perfect for celebrations or a delightful treat on any day.
Ingredients
Brownie Batter
- 1 cup unsalted butter (2 sticks)
- 2 cups granulated sugar
- 4 large eggs
- 1 teaspoon vanilla extract
- 1 cup all-purpose flour
- 1 cup unsweetened cocoa powder
- ½ teaspoon salt
- ½ teaspoon baking powder
Ice Cream Layer
- 1 quart of your favorite ice cream (such as chocolate, vanilla, or any mix you prefer)
Toppings
- Whipped cream
- Chocolate syrup
- Sprinkles or chopped nuts (optional)
Instructions
- Preheat and Prepare Pan: Preheat your oven to 350°F (175°C) and grease a 9×13 inch baking dish thoroughly to prevent sticking.
- Melt Butter: In a medium saucepan, melt the unsalted butter over low heat. Remove from heat and allow to cool slightly to avoid cooking the eggs in the next step.
- Mix Wet Ingredients: Stir in granulated sugar until combined. Add the eggs one at a time, stirring well after each addition to incorporate air and ensure a glossy batter. Mix in vanilla extract for flavor.
- Combine Dry Ingredients: In a separate bowl, whisk together the all-purpose flour, unsweetened cocoa powder, salt, and baking powder for even distribution.
- Make Brownie Batter: Gradually add the dry ingredients to the wet mixture, stirring gently until the batter is smooth and homogenous without overmixing.
- Bake Brownies: Pour the batter into the prepared baking dish, smoothing the top. Bake for 30-35 minutes or until a toothpick inserted into the center comes out clean. Once done, allow the brownies to cool in the pan for at least 30 minutes.
- Soften Ice Cream: While brownies cool, remove the ice cream from the freezer and let it soften at room temperature for easier spreading on the cake layers.
- Assemble Cake Layers: After cooling, remove the brownies from the pan and carefully cut into two even layers. Place one brownie layer back into the baking dish. Spread a generous layer of softened ice cream evenly over the brownies, then top with the second brownie layer.
- Freeze to Set: Cover the assembled cake tightly with plastic wrap and freeze for at least 2 hours to allow the ice cream to firm up and the layers to meld.
- Add Toppings and Serve: Remove the cake from the freezer. Just before serving, top with whipped cream, drizzle with chocolate syrup, and garnish with sprinkles or chopped nuts if desired.
- Serve: Cut the cake into squares and serve immediately to enjoy the perfect texture contrast between brownies and ice cream.
Notes
- Ensure brownies are completely cooled before adding ice cream to prevent melting.
- You can use any flavor of ice cream to customize this cake.
- For easier slicing, let the cake sit at room temperature for a few minutes after removing from the freezer.
- Optional toppings like sprinkles or nuts add texture and visual appeal.
- Store any leftovers tightly covered in the freezer.

