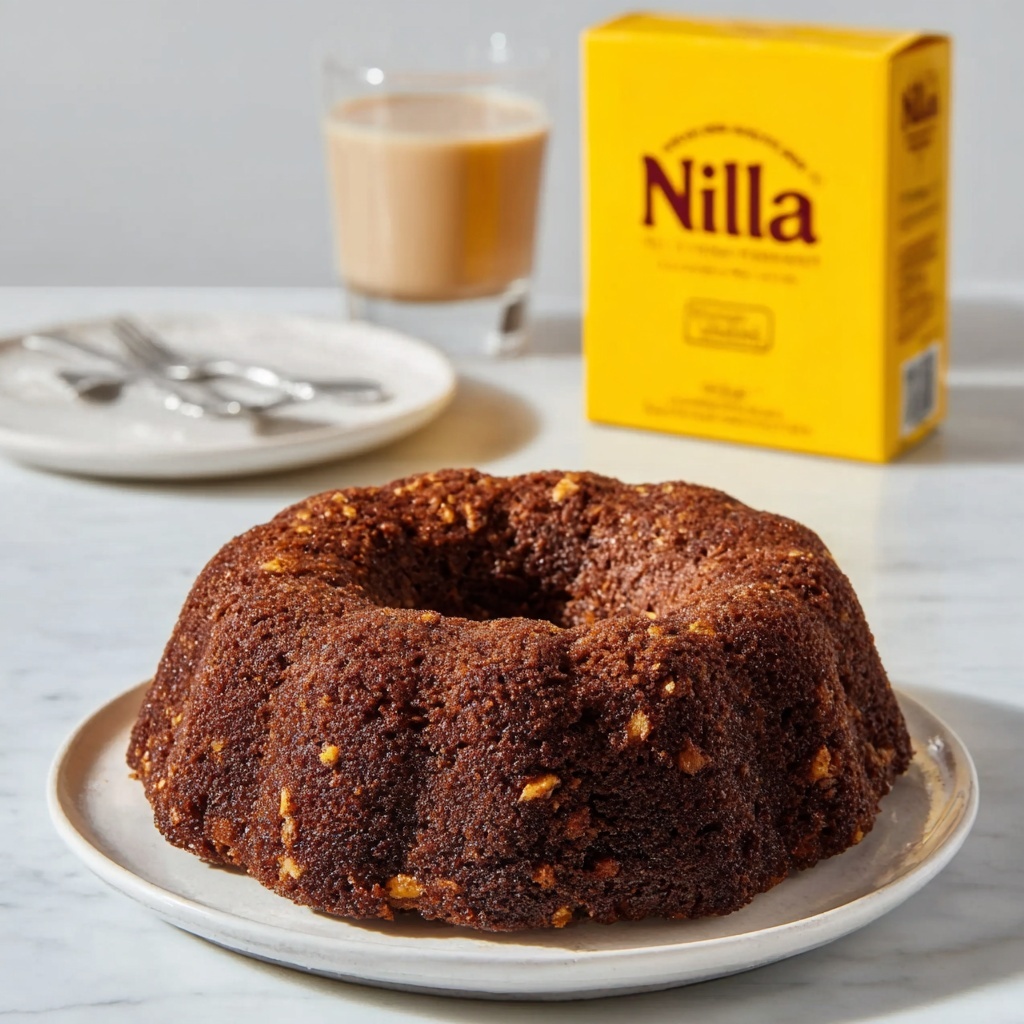
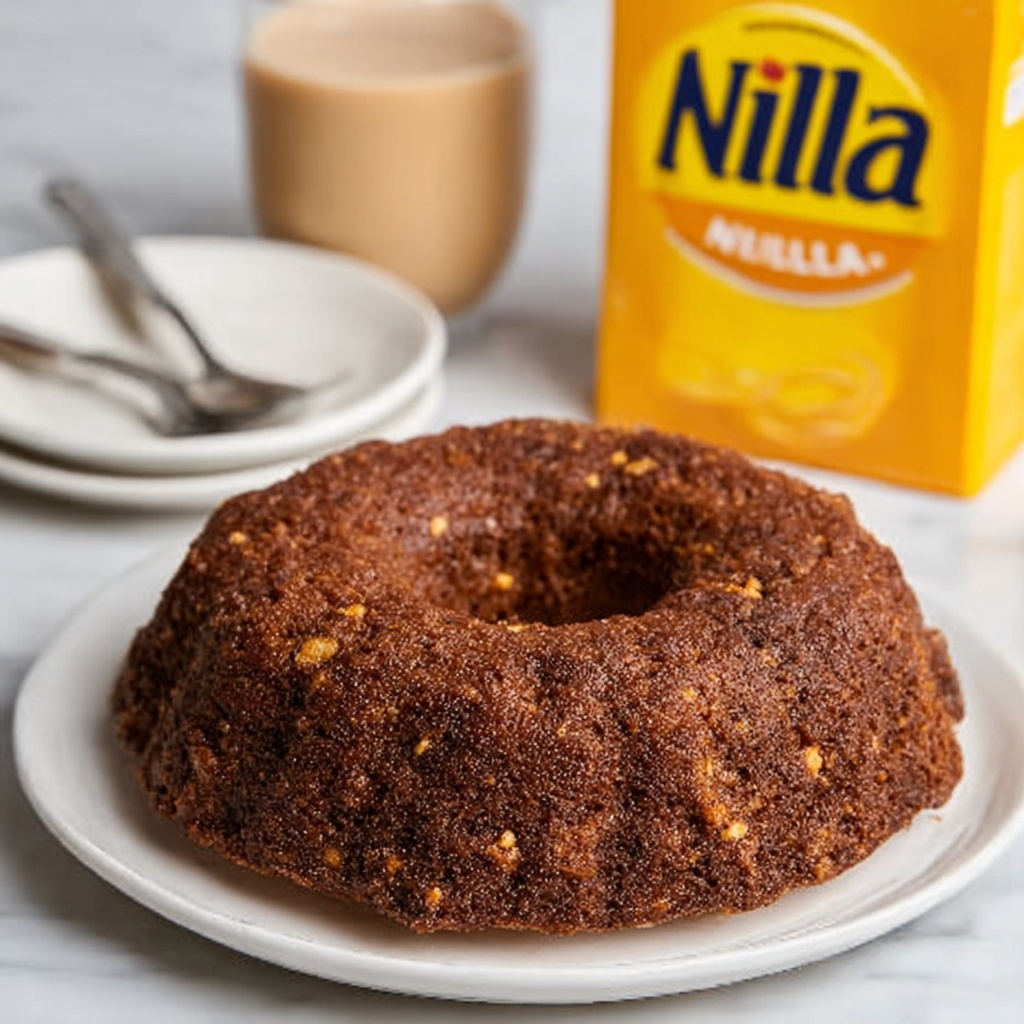
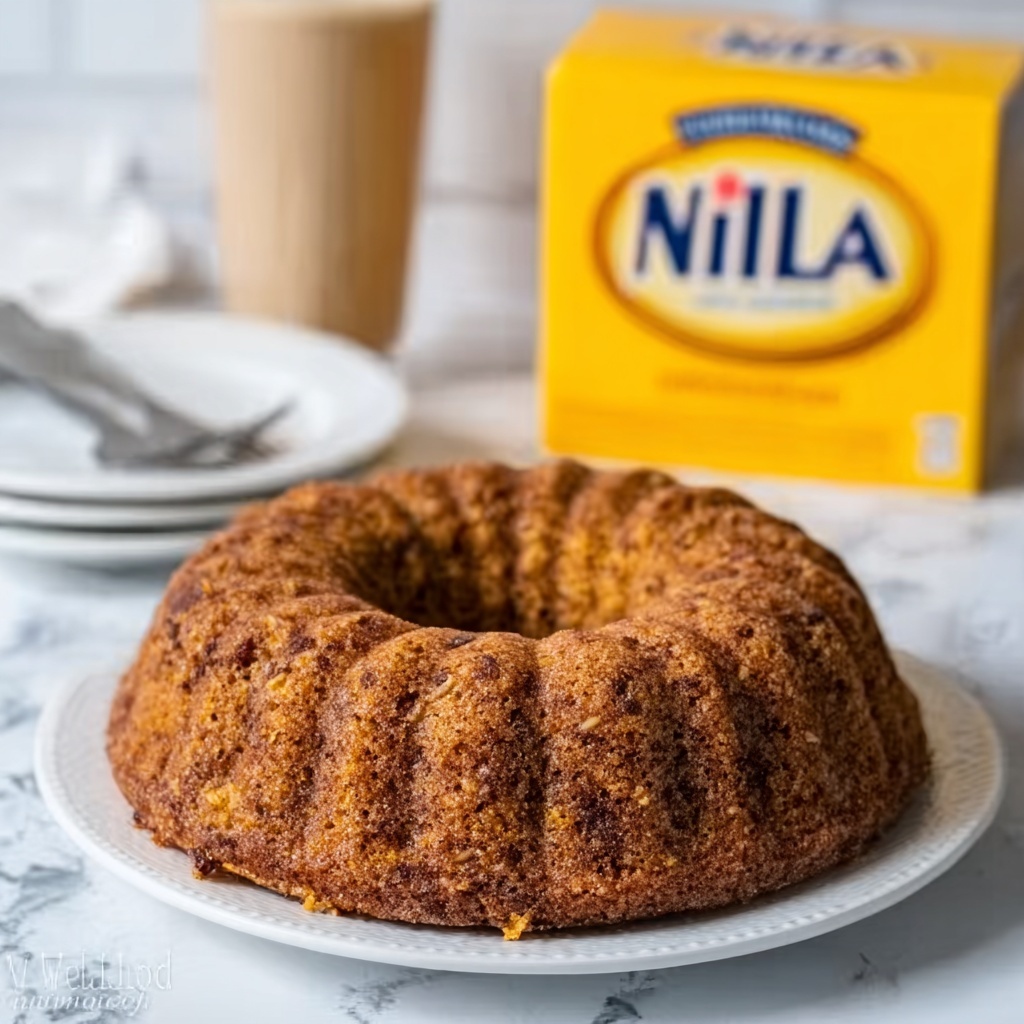
If you have a sweet tooth and love nostalgic, comforting desserts, then this Banana Wafer Cake Recipe will quickly become your new favorite. This cake brings together the unique crunch of vanilla wafers, the tropical hints of shredded coconut, and the warmth of ripe bananas in a wonderfully moist, tender cake. Every slice offers a delightful balance of flavors and textures that feel like a hug from a Southern kitchen. Whether you’re baking for a family gathering or simply want to treat yourself, this Banana Wafer Cake Recipe delivers pure joy in every bite.
Ingredients You’ll Need
The magic of this Banana Wafer Cake Recipe lies in its simple yet thoughtfully selected ingredients. Each component adds its own special touch, from creamy butter creating richness to crushed vanilla wafers lending a subtle crispness and fun texture.
- 1 cup unsalted butter (softened): The base for moistness and that luscious buttery flavor you crave in a cake.
- 2 cups granulated sugar: Sweetens the cake perfectly without overpowering the banana’s natural flavor.
- 4 large eggs: Binds everything together and helps the cake rise beautifully.
- 1 teaspoon vanilla extract: Adds warmth and depth to the banana and wafer flavors.
- 1/2 cup whole milk: Keeps the batter smooth and contributes to a tender crumb.
- 2 ripe bananas (mashed): The star ingredient that brings natural sweetness and moisture.
- 11-ounce box vanilla wafers (finely crushed, about 3 cups): Gives this cake its signature texture and a subtle vanilla crunch.
- 1 cup sweetened shredded coconut: Adds a tropical flair and chewy texture in every bite.
- 1 cup chopped pecans: Brings a nutty crunch and complements the bananas perfectly.
- 1/2 teaspoon baking soda: Helps the cake rise without being too dense or heavy.
- 1/4 teaspoon salt: Balances sweetness and enhances the other flavors.
How to Make Banana Wafer Cake Recipe
Step 1: Prepare Your Baking Pan and Oven
Start by preheating your oven to 325°F (163°C). Whether you use a 9×13-inch baking dish or a bundt pan, make sure to grease and flour it thoroughly. This step is crucial to avoid any sticking and ensures your cake comes out clean and beautiful.
Step 2: Cream Butter and Sugar
In a large bowl, cream the softened butter and granulated sugar until the mixture becomes pale and fluffy. This process incorporates air into the batter, which is essential for a light, tender cake texture.
Step 3: Add Eggs One at a Time
Crack in the eggs one at a time, beating well after each addition. This slow incorporation helps create a smooth, consistent batter that will bake evenly throughout.
Step 4: Mix in Vanilla, Milk, and Mashed Bananas
Add the vanilla extract, whole milk, and the deliciously ripe mashed bananas to the wet mixture. These ingredients bring moisture, flavor, and richness that elevate the cake’s taste to another level.
Step 5: Combine Dry Ingredients
In a separate bowl, whisk together the finely crushed vanilla wafers, shredded coconut, chopped pecans, baking soda, and salt. These dry ingredients provide great texture and that perfect balance of sweetness and seasoning.
Step 6: Gradually Incorporate Dry Ingredients
Add the dry mixture to the wet ingredients slowly, mixing just until combined. Overmixing here can lead to a tough cake, so keep it gentle to maintain a soft crumb and tender bite.
Step 7: Bake to Perfection
Pour the batter into your prepared pan, smoothing the top with a spatula. Bake for 55 to 65 minutes or until a toothpick inserted in the center comes out clean. The cake will have a lovely golden crust and a moist interior that’s bursting with flavor.
Step 8: Cool and Unmold
Allow the cake to cool in the pan for about 15 minutes. If you used a bundt pan, gently transfer the cake to a wire rack to cool completely. For a 9×13-inch dish, allow it to cool fully before slicing. Cooling is key to letting the flavors settle and the texture firm up for perfect slices.
How to Serve Banana Wafer Cake Recipe
Garnishes
Top your Banana Wafer Cake with cream cheese frosting for a tangy contrast or layer on some freshly whipped cream for extra indulgence. Thinly sliced bananas on top add both beauty and a fresh pop of flavor that perfectly complements the dense cake.
Side Dishes
A scoop of vanilla ice cream or a dollop of coconut-flavored yogurt pairs wonderfully with this cake. Fresh berries or a drizzle of caramel sauce can add layers of flavor that round out the dessert experience beautifully.
Creative Ways to Present
Try serving individual slices with a sprinkle of extra crushed vanilla wafers or toasted coconut flakes for crunch. For parties, cut the cake into bite-sized cubes and serve on skewers with banana slices and pecan halves for a playful twist that guests will love.
Make Ahead and Storage
Storing Leftovers
This Banana Wafer Cake stays moist and delicious when stored in an airtight container at room temperature for up to 3 days. If your kitchen is warm, keeping it in the fridge will help preserve freshness for up to a week.
Freezing
Want to save some for later? Wrap the cooled cake tightly in plastic wrap and then aluminum foil before freezing. It will keep well for up to 3 months. Thaw it overnight in the fridge before serving to maintain its texture and flavor.
Reheating
Warm slices gently in the microwave for 15 to 20 seconds or place them in a preheated 300°F oven for about 10 minutes. This light reheating revives the cake’s moistness and makes it feel just baked again.
FAQs
Can I use less sugar in the Banana Wafer Cake Recipe?
Absolutely! You can reduce the sugar slightly if you prefer a less sweet cake, but keep in mind that the ripe bananas and vanilla wafers already contribute natural sweetness, so adjusting too much might affect texture.
What can I substitute for pecans if I have allergies?
Chopped walnuts or almonds work well as substitutes. If you need a nut-free option, toasted sunflower seeds can provide a nice crunch without compromising flavor.
Is this Banana Wafer Cake Recipe gluten-free?
Traditional vanilla wafers contain gluten, so this recipe is not gluten-free as is. However, you can try gluten-free vanilla wafers to adapt the recipe to your dietary needs.
Can I add spices to this cake?
Yes! Adding a pinch of cinnamon or nutmeg brings a lovely warmth that complements the bananas beautifully. Feel free to experiment and find your favorite spice combination.
How ripe should the bananas be?
Use bananas that are very ripe with plenty of brown spots; they are sweeter and mash more easily, contributing more moisture and flavor that’s essential for this cake.
Final Thoughts
This Banana Wafer Cake Recipe is a delightful reminder that sometimes the best desserts come from combining simple ingredients with a little creativity. Its unique texture, rich flavor, and nostalgic charm make it a recipe you’ll want to reach for time and again. Gather your ingredients and give this cake a try—you’re in for a truly heartwarming treat that’s perfect any day of the week.
Print
Banana Wafer Cake Recipe
- Prep Time: 20 minutes
- Cook Time: 1 hour
- Total Time: 1 hour 20 minutes
- Yield: 12–16 servings
- Category: Dessert
- Method: Baking
- Cuisine: Southern American
- Diet: Vegetarian
Description
This moist and flavorful Banana Wafer Cake combines ripe bananas, crunchy pecans, and sweet vanilla wafers into a delightful Southern American dessert. Enhanced with shredded coconut and a hint of vanilla, this cake offers a perfect balance of textures and flavors, ideal for gatherings or a special treat.
Ingredients
Wet Ingredients
- 1 cup unsalted butter (softened)
- 2 cups granulated sugar
- 4 large eggs
- 1 teaspoon vanilla extract
- 1/2 cup whole milk
- 2 ripe bananas (mashed)
Dry Ingredients
- 11-ounce box vanilla wafers (finely crushed, about 3 cups)
- 1 cup sweetened shredded coconut
- 1 cup chopped pecans
- 1/2 teaspoon baking soda
- 1/4 teaspoon salt
Instructions
- Preheat and Prepare Pan: Preheat your oven to 325°F (163°C). Grease and flour a 9×13-inch baking dish or a bundt pan to prevent sticking and ensure even cooking.
- Cream Butter and Sugar: In a large bowl, cream together the softened unsalted butter and granulated sugar until the mixture becomes light and fluffy, which helps create a tender cake texture.
- Add Eggs and Flavorings: Beat in the eggs one at a time, ensuring each is fully incorporated before adding the next. Mix in the vanilla extract, whole milk, and mashed ripe bananas to infuse flavor and moisture.
- Combine Dry Ingredients: In a separate bowl, mix the finely crushed vanilla wafers, sweetened shredded coconut, chopped pecans, baking soda, and salt evenly to distribute the leavening and seasoning.
- Mix Wet and Dry Ingredients: Gradually add the dry mixture to the wet ingredients, stirring just until combined to avoid over-mixing, which could affect cake texture.
- Bake the Cake: Pour the batter into your prepared baking pan, smoothing the top evenly. Bake at 325°F (163°C) for 55 to 65 minutes, or until a toothpick inserted into the center comes out clean.
- Cool the Cake: Allow the cake to cool in the pan for 15 minutes. If using a bundt pan, transfer the cake to a wire rack to cool completely. If using a 9×13 baking dish, let it cool fully before serving.
Notes
- Top with cream cheese frosting, banana slices, or whipped cream for extra flavor and decoration.
- Add a pinch of cinnamon or nutmeg to the batter to introduce warm, spicy notes.
- Use ripe bananas for maximum sweetness and flavor.
- For a nuttier variation, swap pecans with walnuts or almonds.
- Ensure the vanilla wafers are finely crushed to blend well into the batter for a consistent texture.


