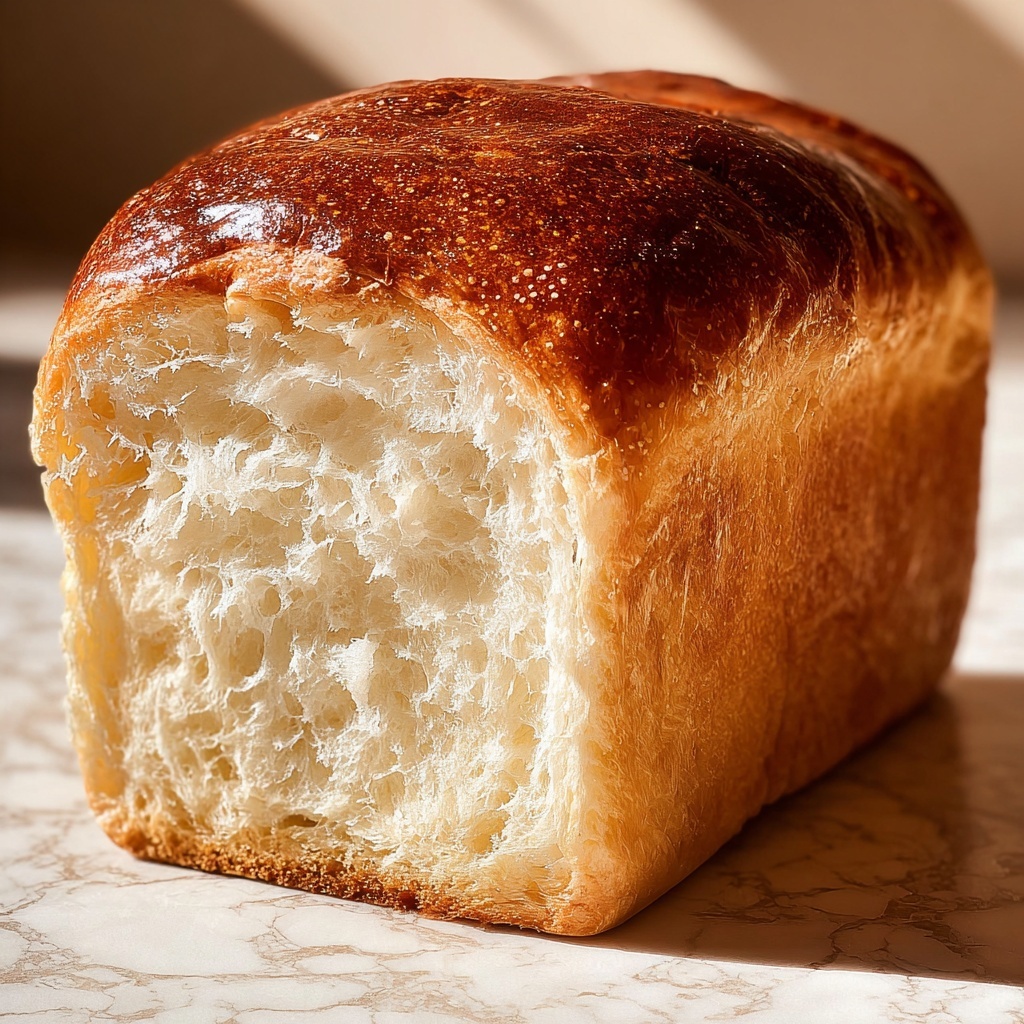
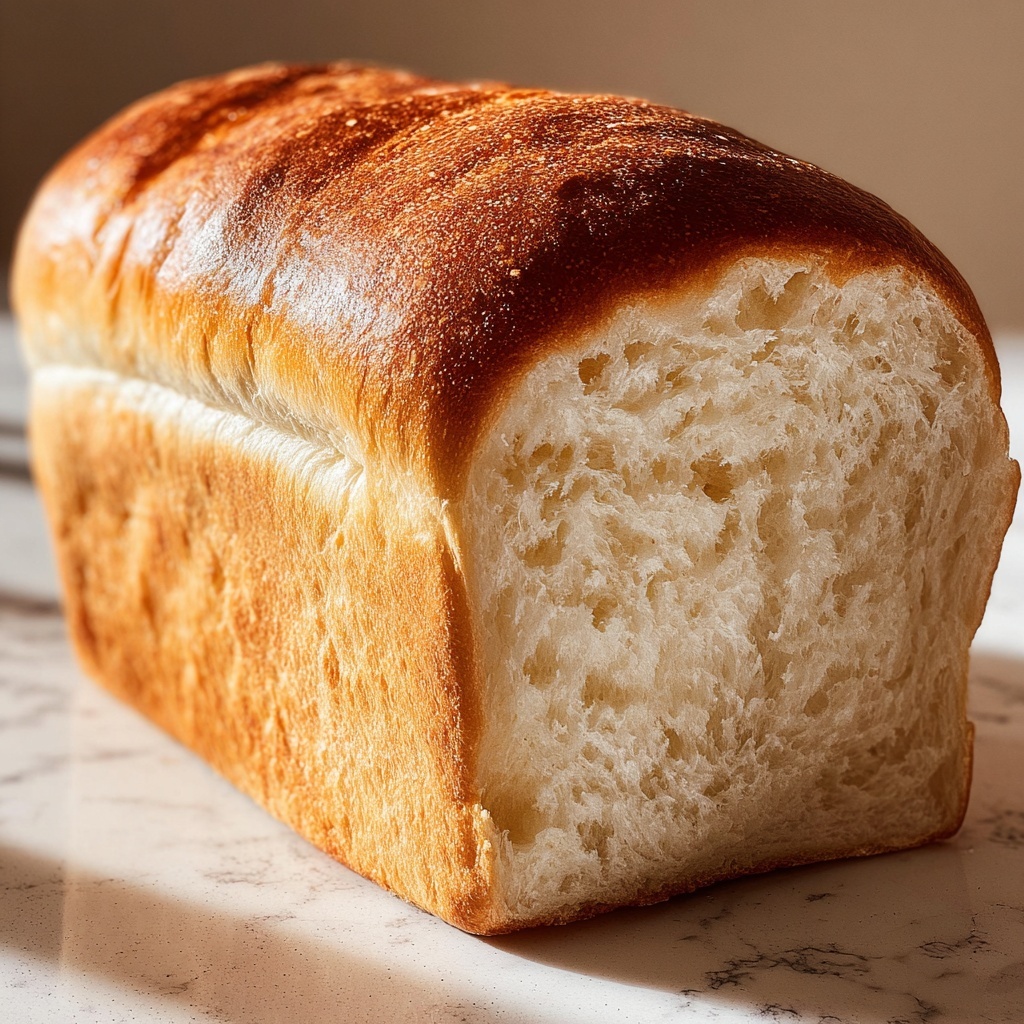
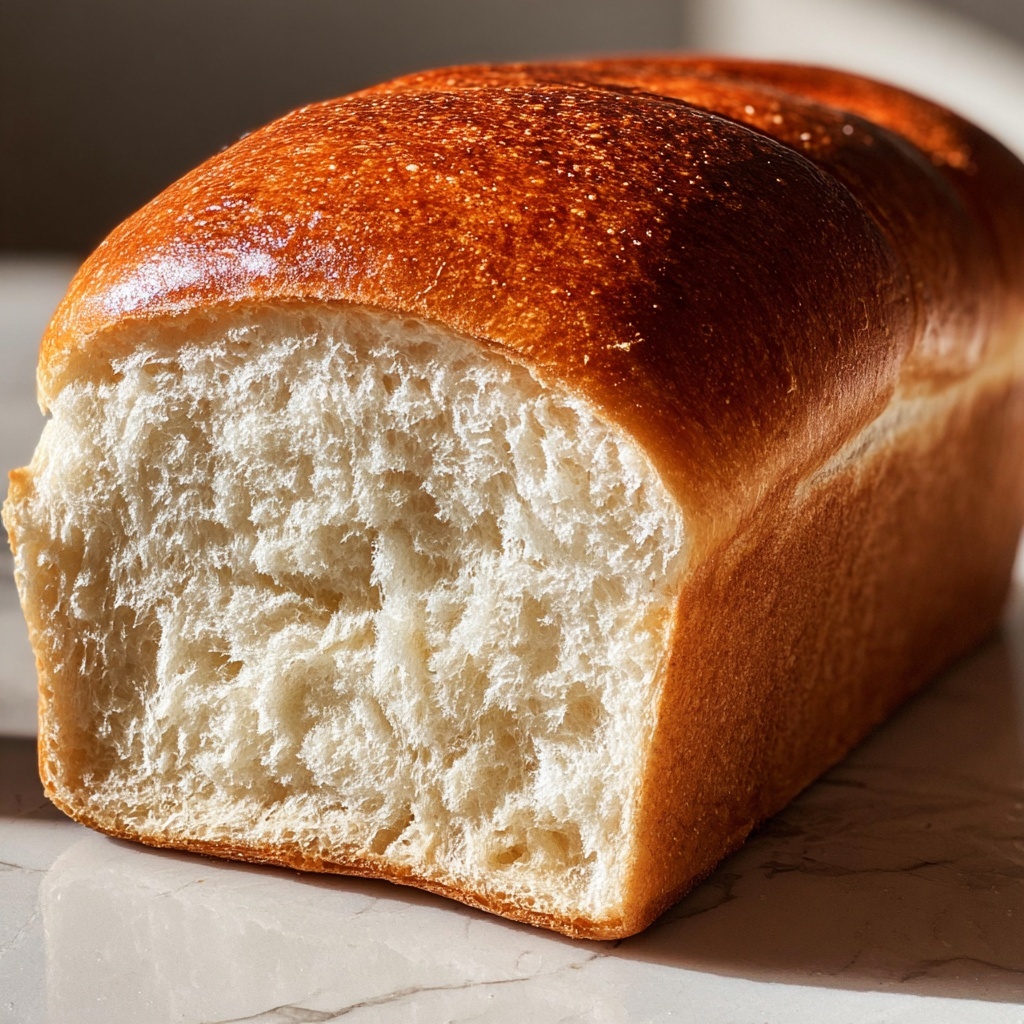
If you’ve ever missed the perfect, fluffy texture of traditional bread while sticking to a gluten-free diet, I’ve got exciting news for you. This Classic Gluten-Free White Sandwich Bread Recipe captures the soft crumb and golden crust you’ve been longing for, without any compromise on taste or texture. It’s simple, comforting, and ideal for everything from school sandwiches to cozy homemade toast. Trust me, once you bake this loaf, you’ll wonder how you ever did without it!
Ingredients You’ll Need
These ingredients are straightforward yet absolutely crucial for crafting the perfect loaf. Each one plays a vital role in achieving that soft, tender crumb and beautiful rise that make this bread so special.
- Gluten-free all-purpose flour (2 cups): The foundation for this bread, providing structure while keeping it light and soft.
- Sugar (1 tablespoon): Feeds the yeast to help the bread rise and adds a subtle sweetness.
- Salt (1 teaspoon): Enhances the flavors and balances the sweetness perfectly.
- Active dry yeast (1 tablespoon): The miracle ingredient responsible for that beautiful, airy texture.
- Warm water (1 cup): Activates the yeast and brings the dough together smoothly.
- Olive oil (2 tablespoons): Adds moisture and keeps the bread tender while contributing a hint of richness.
- Eggs (2): Bind everything together and give the loaf a lovely golden color and sturdy crumb.
How to Make Classic Gluten-Free White Sandwich Bread Recipe
Step 1: Preparing Your Pan and Oven
Preheat your oven to 375°F (190°C) and grease your loaf pan thoroughly. This little step ensures your bread won’t stick and will come out with a perfect crust.
Step 2: Mix Dry Ingredients
In a large mixing bowl, whisk together the gluten-free flour, sugar, salt, and active dry yeast. This combination sets the stage for a perfectly risen loaf with balanced flavor.
Step 3: Combine Wet Ingredients and Form Dough
Add the warm water, olive oil, and eggs to the dry ingredients. Stir everything together until the mixture forms a smooth, cohesive dough — no lumps here! This is your bread’s moment to start coming alive.
Step 4: Transfer Dough to Pan and Smooth the Top
Pour the dough into the prepared loaf pan, then gently smooth the surface with a spatula or your fingers. This step helps the loaf bake evenly and look picture-perfect.
Step 5: Bake Until Golden and Hollow-Sounding
Bake the loaf for about 40 minutes, or until the crust turns a beautiful golden brown. Tap the top of the bread; if it sounds hollow, you know it’s perfectly baked inside.
Step 6: Cooling
Let the bread cool in the pan for 10 minutes, then transfer it to a wire rack to cool completely. Patience here pays off — slicing too soon can lead to a gummy texture.
How to Serve Classic Gluten-Free White Sandwich Bread Recipe
Garnishes
You can elevate this bread with simple garnishes like a sprinkle of sesame seeds or a brush of melted butter for extra shine and flavor. Toasting slices lightly and spreading a dab of homemade jam or herb butter takes it to another level of deliciousness.
Side Dishes
This bread is a fantastic companion to creamy soups, hearty stews, or fresh salads. It’s perfect for soaking up rich sauces or serving as the canvas for your favorite sandwich fillings.
Creative Ways to Present
Try using this bread for classic grilled cheese sandwiches with gooey melted cheese or as the base for an open-faced avocado toast topped with cherry tomatoes and a sprinkle of sea salt. You’ll find this versatile bread elevates every meal.
Make Ahead and Storage
Storing Leftovers
Keep your baked bread in an airtight container or resealable bag at room temperature. It will stay fresh for up to three days, giving you plenty of time to enjoy it slice by slice.
Freezing
If you want to save your gorgeous loaf for longer, slice and freeze it in a freezer-safe bag. Frozen bread keeps well for up to one month and can be toasted straight from the freezer without losing its texture.
Reheating
To bring your bread back to life, toast it lightly or warm it in a 350°F oven for 5–7 minutes. This refreshes the crust and softens the crumb, making every bite taste freshly baked.
FAQs
Can I substitute the olive oil for another type of oil?
Absolutely! You can use vegetable oil, melted coconut oil, or even melted butter if you prefer. Just keep in mind that different oils will subtly affect the flavor and texture of your bread.
Is it necessary to use eggs in this recipe?
Eggs provide structure and moisture, but if you need an egg-free version, you can try a commercial egg replacer or flax eggs. The bread might be a bit denser, but still delicious.
Can I add seeds or nuts to this bread dough?
Yes! Adding sunflower seeds, chia seeds, or chopped nuts can give your loaf a delightful crunch and nutritional boost. Just fold them in gently after mixing the wet and dry ingredients.
Do I need to proof the yeast separately before mixing?
In this recipe, combining the yeast directly with the dry ingredients and then adding warm water works perfectly. But if you want to be extra sure your yeast is active, you can proof it in warm water with a pinch of sugar before adding other ingredients.
How do I know when the bread is fully baked?
The best test is tapping the top of the loaf. If it sounds hollow, your bread is baked through. Also, a golden-brown crust indicates that it’s ready to come out of the oven.
Final Thoughts
Baking your own Classic Gluten-Free White Sandwich Bread Recipe is such a rewarding experience. It’s a cozy, practical recipe that delivers a soft, versatile loaf perfect for every meal of the day. I hope you enjoy making it as much as you enjoy eating it — this bread might just become a new staple in your kitchen!
Print
Classic Gluten-Free White Sandwich Bread Recipe
- Prep Time: 10 minutes
- Cook Time: 40 minutes
- Total Time: 55 minutes
- Yield: 1 loaf (8 slices approximately)
- Category: Bread
- Method: Baking
- Cuisine: American
- Diet: Gluten Free
Description
Classic White Sandwich Bread made with gluten-free all-purpose flour, perfect for those seeking a soft, homemade loaf that is both delicious and suitable for gluten-free diets. This easy-to-make bread has a tender crumb and a golden crust, ideal for sandwiches or toast.
Ingredients
Dry Ingredients
- 2 cups gluten-free all-purpose flour
- 1 tablespoon sugar
- 1 teaspoon salt
- 1 tablespoon active dry yeast
Wet Ingredients
- 1 cup warm water
- 2 tablespoons olive oil
- 2 eggs
Instructions
- Preheat the Oven: Preheat your oven to 375°F (190°C). Grease a loaf pan thoroughly to prevent sticking and ensure easy removal of the bread after baking.
- Combine Dry Ingredients: In a large mixing bowl, whisk together the gluten-free all-purpose flour, sugar, salt, and active dry yeast evenly.
- Add Wet Ingredients: Pour the warm water, olive oil, and eggs into the bowl with the dry ingredients. Mix well until a smooth dough is formed, ensuring all ingredients are fully incorporated.
- Prepare for Baking: Transfer the dough into the greased loaf pan. Use a spatula to smooth the top of the dough evenly for a uniform loaf shape.
- Bake the Bread: Place the loaf pan in the preheated oven and bake for approximately 40 minutes. The bread is done when it turns golden brown and sounds hollow when tapped on the bottom.
- Cool the Bread: Remove the bread from the oven and allow it to cool in the pan for 10 minutes. Then carefully transfer it onto a wire rack to cool completely before slicing to maintain its texture.
Notes
- Make sure the water is warm, not hot, to activate the yeast properly without killing it.
- Using gluten-free flour blend ensures that the bread is suitable for those with gluten intolerance.
- Letting the bread cool completely before slicing helps prevent it from becoming gummy.
- You can store the bread in an airtight container for up to 3 days or freeze for longer storage.


