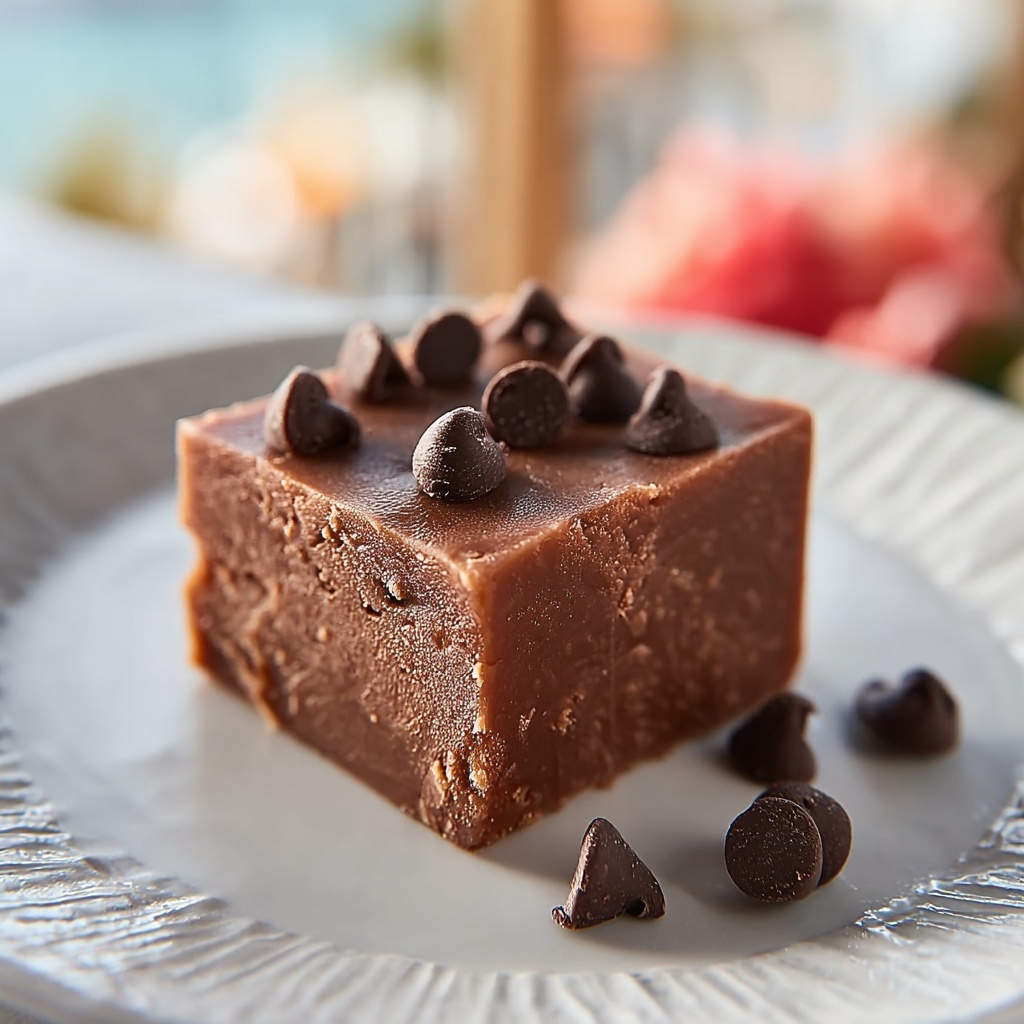
There is something truly comforting and nostalgic about Mom’s Classic Fudge Recipe. This timeless treat brings together a rich blend of cocoa, creamy butter, and vanilla that melts in your mouth with every bite. It’s the kind of fudge that everyone remembers from childhood holidays or family gatherings, a simple yet indulgent delight that’s perfect for sharing. Making this recipe feels like receiving a warm hug from the past, and it’s guaranteed to become your new favorite sweet indulgence.
Ingredients You’ll Need
Gathering just a handful of classic ingredients, this recipe proves that simplicity can lead to spectacular results. Each ingredient plays a crucial role, creating the smooth, luscious texture and that perfect balance of chocolatey sweetness you crave.
- 3 cups granulated sugar: The foundational sweetness that gives the fudge its signature sugary bite.
- 2/3 cup unsweetened cocoa powder: Provides deep chocolate flavor without any added sweetness, balancing the sugar perfectly.
- 1/8 teaspoon salt: Enhances all the flavors and cuts through the sweetness just enough to make the fudge irresistible.
- 1 1/2 cups whole milk: Adds creaminess and helps the mixture reach the right stage for perfect fudge consistency.
- 1/4 cup unsalted butter: Adds richness and a velvety texture that melts beautifully on your tongue.
- 1 teaspoon vanilla extract: A touch of warmth and aromatic depth that rounds out the chocolate flavor flawlessly.
How to Make Mom’s Classic Fudge Recipe
Step 1: Mix the Dry Ingredients
Begin by combining granulated sugar, cocoa powder, and salt in a heavy saucepan. Stir these together until they’re fully blended. This step is the foundation for your fudge’s deep chocolate flavor and ensures every bite is uniformly delicious.
Step 2: Add Milk and Heat
Pour in the whole milk and stir the mixture. Place your saucepan over medium heat and heat the mixture until it reaches a rolling boil. This is crucial to ensure everything dissolves properly and your fudge will set correctly.
Step 3: Boil to Soft Ball Stage
Once boiling, stop stirring and let the mixture continue to boil undisturbed until it hits 234°F on a candy thermometer—a stage known as the soft ball stage. This precise temperature is key to achieving that perfect fudge texture, firm yet creamy.
Step 4: Add Butter and Vanilla
Remove the pan from heat. Stir in the unsalted butter and vanilla extract. Then, allow the mixture to cool without stirring until it reaches 110°F. This resting period lets the fudge mixture start solidifying.
Step 5: Beat Until Thickened
Using a wooden spoon, beat the mixture vigorously until it thickens and loses its glossy shine. This usually takes 7 to 10 minutes. This step transforms the liquid into the luscious, creamy fudge you know and love.
Step 6: Set and Cut the Fudge
Pour the fudge into a buttered 8×8-inch pan and spread it evenly. Let it set at room temperature until firm. Once set, cut into 36 delicious bite-sized squares, perfect for sharing (or savoring all by yourself).
How to Serve Mom’s Classic Fudge Recipe
Garnishes
While this fudge tastes amazing on its own, you can jazz it up by sprinkling a pinch of sea salt on top just before it sets, enhancing its chocolate depth. Crushed nuts, like pecans or walnuts, add a delightful crunch and beautifully contrast the smooth fudge texture.
Side Dishes
If you’re serving this at a party or holiday gathering, pair Mom’s Classic Fudge Recipe with rich coffee or a creamy hot chocolate to complement those chocolatey flavors. Fresh berries or a citrus fruit salad make lovely sides, offering a refreshing contrast to the fudge’s sweetness.
Creative Ways to Present
Presentation is half the fun! For gifts, wrap individual fudge squares in colorful parchment paper or place them in decorative tins. You can also layer them between wax paper sheets in a jar for a charming homemade gift. For a festive touch, sprinkle edible gold dust or add a drizzle of caramel or white chocolate over the fudge before it sets.
Make Ahead and Storage
Storing Leftovers
Mom’s Classic Fudge Recipe keeps beautifully at room temperature for up to two weeks when stored in an airtight container. Make sure to place parchment or wax paper between layers to prevent sticking. This way, your fudge stays fresh and ready for an indulgent bite whenever the craving hits.
Freezing
If you want to keep your fudge longer, it freezes wonderfully. Wrap individual squares tightly in plastic wrap, then place them in an airtight freezer container. Frozen fudge can last up to three months and thaw quickly at room temperature without losing any of its creamy goodness.
Reheating
Fudge doesn’t need to be reheated to enjoy it, but if it becomes too firm from refrigeration or freezing, just let it sit at room temperature for 15 to 20 minutes. This will soften it up nicely and bring back that melt-in-your-mouth texture you adore.
FAQs
Can I use a different type of milk for this fudge?
Whole milk gives the best texture and richness for this fudge, but you can experiment with 2% or even half-and-half for creamier results. Just avoid low-fat or skim milk as they may affect the fudge’s consistency.
Why is a candy thermometer necessary?
Using a candy thermometer ensures you cook the fudge to the precise temperature for perfect setting. Without it, you risk ending up with fudge that’s too soft or too hard.
Can I add nuts or flavorings to Mom’s Classic Fudge Recipe?
Absolutely! Adding chopped nuts, peppermint extract, or even a swirl of peanut butter can customize this classic fudge to your taste. Just fold in any mix-ins after removing the fudge from heat.
How long does it take for the fudge to set?
The fudge usually sets within 2 to 3 hours at room temperature. If you’re in a hurry, chilling it in the refrigerator can speed things up to about an hour.
Is it normal for the fudge to be a bit crumbly?
A slight crumbly texture can occur if the fudge was cooked a little past the soft ball stage. Make sure to follow the temperature guidelines closely for that perfect, smooth consistency.
Final Thoughts
There’s a special kind of joy in making and sharing Mom’s Classic Fudge Recipe. It’s more than just a sweet treat—it’s a tradition, a memory, and a comfort all rolled into one delicious square. So gather your ingredients, embrace the process, and treat yourself to this timeless fudge that’s sure to become a beloved classic in your own kitchen.
Print
Mom’s Classic Fudge Recipe
- Prep Time: 10 minutes
- Cook Time: 25 minutes
- Total Time: 35 minutes
- Yield: 36 servings
- Category: Dessert
- Method: Stovetop
- Cuisine: American
Description
A classic homemade fudge recipe that yields rich, creamy chocolate squares with a perfect soft texture. This traditional treat combines sugar, cocoa, milk, and butter, cooked to the soft ball stage and beaten to a smooth finish for an irresistible sweet indulgence.
Ingredients
Fudge Ingredients
- 3 cups granulated sugar
- 2/3 cup unsweetened cocoa powder
- 1/8 teaspoon salt
- 1 1/2 cups whole milk
- 1/4 cup unsalted butter
- 1 teaspoon vanilla extract
Instructions
- Mix Dry Ingredients: In a heavy saucepan, combine the granulated sugar, unsweetened cocoa powder, and salt. Stir the mixture well until all the dry ingredients are thoroughly blended together.
- Add Milk and Heat: Pour in the whole milk and stir to combine with the dry mixture. Place the saucepan over medium heat and bring the mixture to a rolling boil, stirring occasionally to prevent scorching.
- Cook to Soft Ball Stage: Once boiling, stop stirring and allow the mixture to continue boiling until it reaches 234°F on a candy thermometer, which is the soft ball stage. This is crucial for achieving the proper fudge texture.
- Add Butter and Vanilla, Cool: Remove the saucepan from heat. Add the unsalted butter and vanilla extract to the hot mixture. Let the mixture cool down without stirring until it reaches 110°F, allowing it to set slightly.
- Beat the Mixture: Using a wooden spoon, beat the fudge mixture vigorously until it thickens and loses its glossy appearance. This process takes about 7 to 10 minutes and helps develop the ideal fudge consistency.
- Pour and Set: Pour the beaten fudge evenly into a buttered 8×8-inch pan. Spread it out smoothly and allow it to set at room temperature until firm. Once set, cut into 36 squares to serve.
Notes
- Using a candy thermometer is essential for accuracy in reaching the soft ball stage for perfect fudge texture.
- Do not stir the mixture once it reaches a rolling boil to ensure proper crystallization.
- Cooling to exactly 110°F before beating helps the fudge set correctly.
- Beating with a wooden spoon is traditional and recommended to achieve the correct consistency – an electric mixer can be too aggressive.
- For easier removal, line the pan with parchment paper before buttering.
- Store fudge in an airtight container at room temperature for up to two weeks.


