
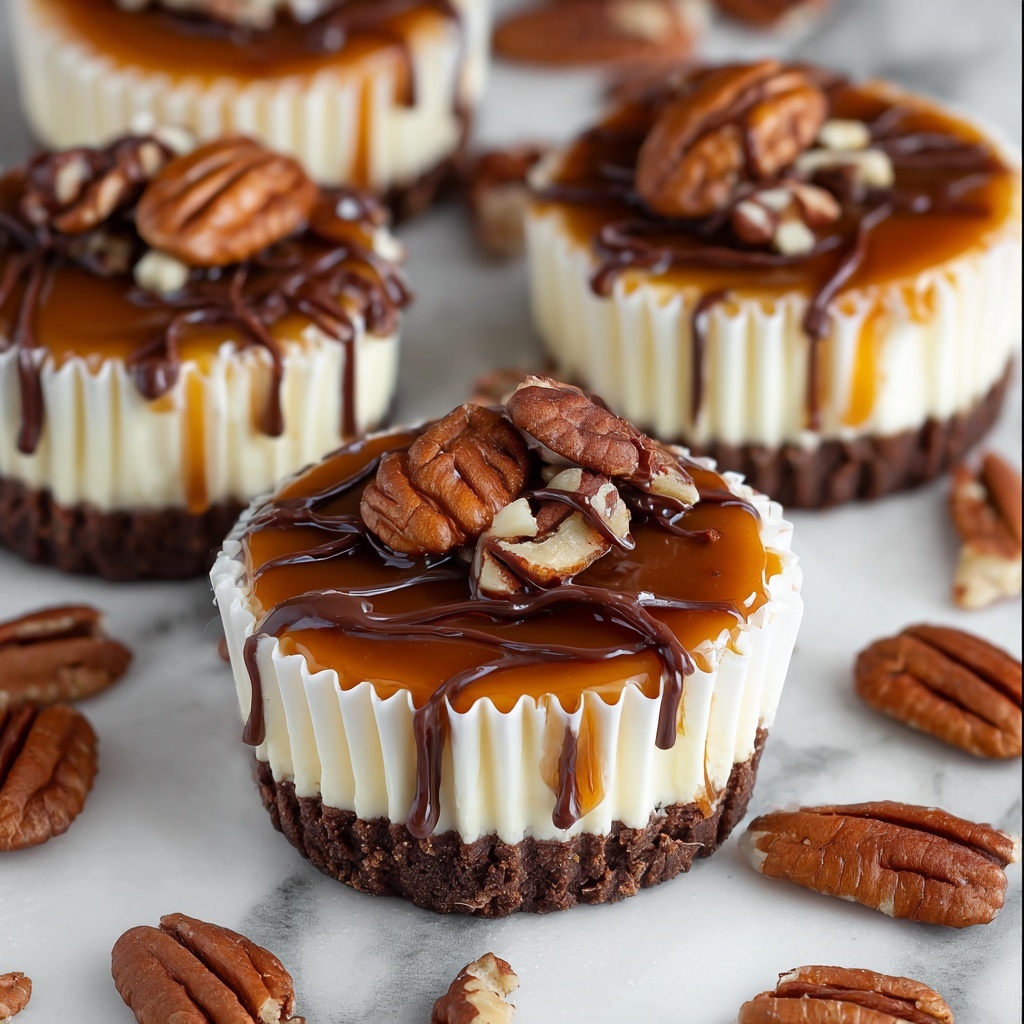
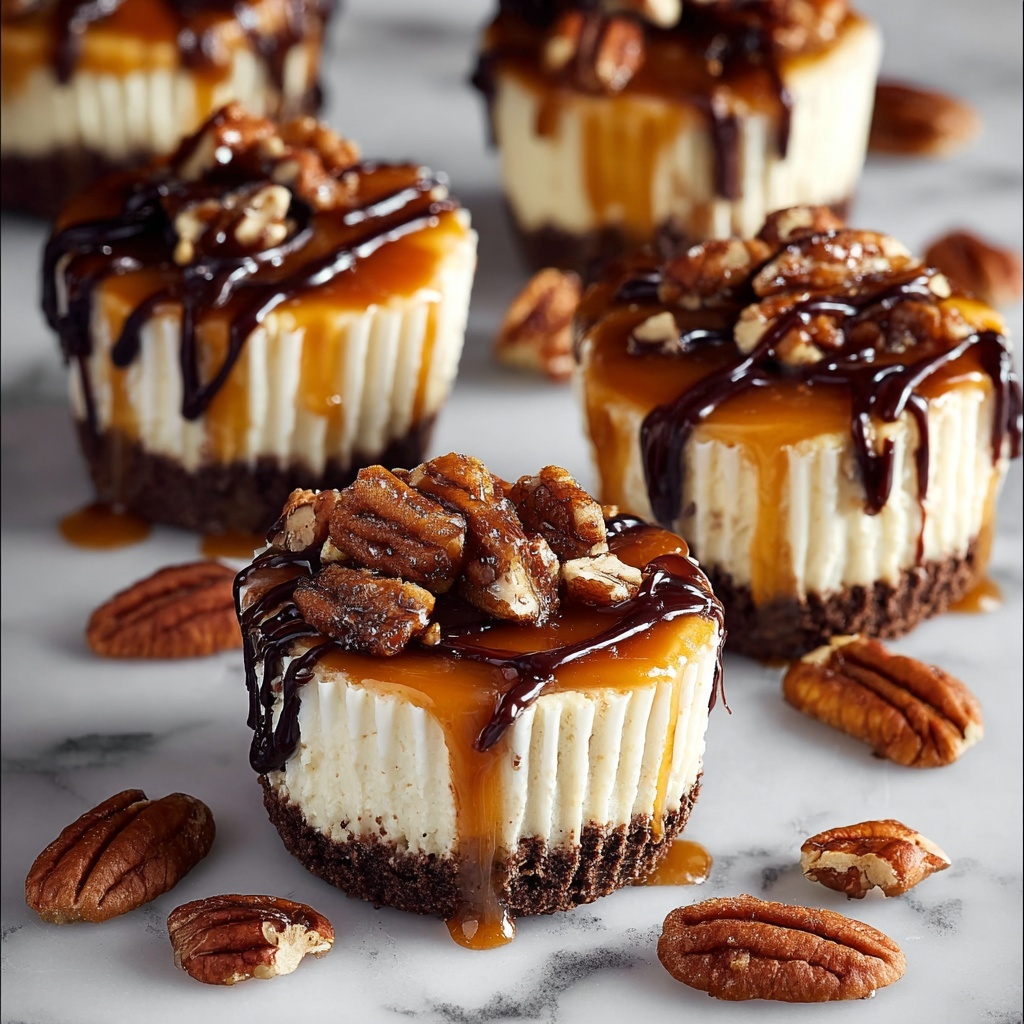
If you have a soft spot for rich, creamy desserts with just the right amount of gooey caramel and crunchy nuts, you are going to fall head over heels for this Mini Turtle Cheesecakes Recipe. These bite-sized delights blend a buttery graham cracker crust with smooth cheesecake filling, then get a glorious topping of luscious caramel, toasted pecans, and silky chocolate drizzles. It’s like enjoying the classic turtle candy in a cute, charming cheesecake form that’s perfect for any occasion or just a sweet little treat to brighten your day.
Ingredients You’ll Need
Getting the ingredients right is key to nailing the perfect balance of flavors and textures in this recipe. Each component—from the buttery crust to the creamy filling and the decadent toppings—works together to create a mini dessert that’s as beautiful as it is delicious.
- 1 cup graham cracker crumbs: This forms the sturdy, buttery base that adds a subtle sweetness and delightful crunch.
- 2 tablespoons sugar: Helps sweeten and bind the crust for that balanced flavor and texture.
- 4 tablespoons unsalted butter, melted: Adds richness and holds the crust together perfectly.
- 8 oz cream cheese, softened: The star of the cheesecake, providing that smooth and tangy creaminess.
- 1/4 cup sugar: Sweetens the creamy filling without overpowering its natural tang.
- 1 egg: Binds the cheesecake mixture and imparts a silky texture when baked.
- 1 teaspoon vanilla extract: A warm flavor enhancer that makes the filling irresistibly aromatic.
- 1/2 cup caramel sauce: The gooey, sweet drizzle that gives the turtle cheesecake its signature flavor.
- 1/4 cup chopped pecans: Adds a toasty crunch and nutty depth.
- 1/4 cup melted chocolate (milk or semi-sweet): Provides a smooth, luscious finish drizzled on top.
How to Make Mini Turtle Cheesecakes Recipe
Step 1: Prepare the Crust
Preheat your oven to 325°F (163°C) and line a muffin tin with cupcake liners to create individual servings. Combine the graham cracker crumbs, sugar, and melted butter in a bowl, mixing until the crumbs are evenly coated. Press this mixture firmly into the bottoms of each cupcake liner to form the crust. This step sets the foundation for your mini cheesecakes, so make sure to press tightly for a compact base.
Step 2: Make the Cheesecake Filling
In a mixing bowl, beat the softened cream cheese and sugar together until the mixture is silky smooth and fully combined. The key here is to avoid lumps, so take your time and mix thoroughly. Next, add the egg and vanilla extract, beating until just incorporated to keep the texture light and creamy without overmixing.
Step 3: Fill and Bake
Spoon the cheesecake filling into your prepared crusts, filling each about three-quarters full to leave room for a slight rise during baking. Place the muffin tin in the oven and bake for 18 to 20 minutes. You’ll know they’re done when the centers are set but still have a little jiggle. This gentle bake ensures a creamy texture without cracks.
Step 4: Chill and Add Toppings
Allow the cheesecakes to cool to room temperature right in the tin before transferring them to the refrigerator. Chill them for at least 2 hours to let them firm up perfectly. Once chilled, spoon a generous layer of caramel sauce on top of each cheesecake, then sprinkle with chopped pecans and drizzle with melted chocolate. These final touches bring that classic turtle candy experience to life in every bite.
How to Serve Mini Turtle Cheesecakes Recipe
Garnishes
Beyond the caramel, pecans, and chocolate drizzle, feel free to add a pinch of flaky sea salt or a few mini chocolate chips to amp up the flavor complexity. Fresh mint leaves or a light dusting of cocoa powder can add a pop of color and freshness that makes these mini cheesecakes pop on any dessert table.
Side Dishes
These mini cheesecakes pair wonderfully with a scoop of vanilla bean ice cream or a light, fruity sorbet to balance out their richness. For a beverage pairing, think rich coffee, sweet dessert wine, or even a creamy hot chocolate, which complements the turtle flavors beautifully.
Creative Ways to Present
Try serving these tiny delights on a decorative platter lined with parchment paper or in clear mini dessert cups for a modern touch. You can also stack them on a tiered cake stand for parties, making it easy for guests to grab a perfectly portioned dessert that looks as inviting as it tastes.
Make Ahead and Storage
Storing Leftovers
If you have any leftovers (which is rare!), store these mini cheesecakes in an airtight container in the refrigerator. They will stay fresh and creamy for up to 3 days, making them an ideal treat to enjoy the next day or even for a spontaneous dessert.
Freezing
You can freeze the mini cheesecakes before topping them to keep their texture intact. Freeze them in a single layer on a baking sheet, then transfer to a freezer-safe container. When ready to serve, thaw them overnight in the refrigerator and add your caramel, pecans, and chocolate just before serving to keep everything fresh and vibrant.
Reheating
Because these cheesecakes are best served chilled, reheating is not recommended. Instead, bring them to room temperature for about 10 minutes before serving if you prefer them less cold. This helps revive their creamy texture without losing their classic appeal.
FAQs
Can I use a different nut instead of pecans?
Absolutely! Walnuts or almonds make excellent substitutes and both bring their own unique crunch and flavor that pairs well with caramel and chocolate.
What type of chocolate works best for drizzling?
Milk chocolate offers a sweeter, creamier taste, whereas semi-sweet provides a nice balance with a bit of bitterness that complements the sweet caramel perfectly. Choose based on your preference.
How do I prevent cracks in the cheesecake filling?
Mild baking temperatures and not overmixing the batter are key to that smooth filling. Also, filling each liner only about 3/4 full gives room for slight expansion without cracking.
Can I make this recipe gluten-free?
Yes! Simply substitute the graham cracker crumbs with gluten-free graham crackers or crushed gluten-free cookies to make these mini cheesecakes safe for gluten-sensitive guests.
How long do I need to chill the cheesecakes?
At least 2 hours is ideal to ensure they fully set and achieve that rich, creamy texture. If you’re short on time, chilling them for one hour can work, but the filling might be slightly softer.
Final Thoughts
There is something undeniably special about the Mini Turtle Cheesecakes Recipe that warms the heart and satisfies the sweetest cravings. Whether you’re making them for a holiday party, a casual get-together, or just because, they never fail to impress with their perfect combination of textures and flavors. I hope you enjoy making and sharing these tiny treasures as much as I do—it’s truly a dessert that brings smiles and a little bit of magic to any day.
Print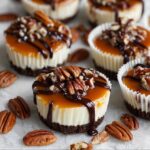
Mini Turtle Cheesecakes Recipe
- Prep Time: 20 minutes
- Cook Time: 20 minutes
- Total Time: 2 hours 40 minutes
- Yield: 12 servings
- Category: Dessert
- Method: Baking
- Cuisine: American
Description
These Mini Turtle Cheesecakes combine a creamy cheesecake filling with a buttery graham cracker crust, topped with rich caramel sauce, crunchy pecans, and a drizzle of melted chocolate. Perfectly portioned for individual servings, they make a delightful treat for any occasion.
Ingredients
Crust
- 1 cup graham cracker crumbs
- 2 tablespoons sugar
- 4 tablespoons unsalted butter, melted
Cheesecake Filling
- 8 oz cream cheese, softened
- 1/4 cup sugar
- 1 egg
- 1 teaspoon vanilla extract
Toppings
- 1/2 cup caramel sauce
- 1/4 cup chopped pecans
- 1/4 cup melted chocolate (milk or semi-sweet)
Instructions
- Prepare the Crust: Preheat your oven to 325°F (163°C) and line a muffin tin with cupcake liners to ensure easy removal later.
- Mix Crust Ingredients: In a bowl, combine the graham cracker crumbs, sugar, and melted butter thoroughly until the mixture resembles wet sand.
- Form the Crust: Divide and press the crust mixture firmly into the bottom of each cupcake liner, creating an even layer to provide a sturdy base for the cheesecake.
- Make the Cheesecake Filling: Using a mixer or whisk, beat the softened cream cheese and sugar until the mixture is smooth and creamy, free of lumps.
- Add Egg and Vanilla: Incorporate the egg and vanilla extract into the cream cheese mixture, mixing until everything is fully combined and the batter is silky.
- Fill Liners: Spoon the cheesecake filling into each lined muffin cup, filling about 3/4 full to allow room for setting.
- Bake the Cheesecakes: Bake the cheesecakes in the preheated oven for 18-20 minutes, or until the centers barely jiggle and appear set.
- Cool and Chill: Let the cheesecakes cool to room temperature on a wire rack; then refrigerate for at least 2 hours to fully set and develop flavor.
- Add Toppings: Once chilled, spoon caramel sauce generously over each mini cheesecake.
- Sprinkle and Drizzle: Top with chopped pecans and finish by drizzling melted chocolate across the caramel for a beautiful and delicious finish.
- Serve: Carefully remove the cupcake liners and serve the mini turtle cheesecakes chilled for the best texture and taste experience.
Notes
- Make sure the cream cheese is softened to room temperature to avoid lumps in the filling.
- Use cupcake liners for easy removal and less mess during serving.
- For a variety of flavors, try using dark chocolate instead of milk or semi-sweet chocolate.
- Allow sufficient chilling time so the cheesecakes set properly and are easier to handle.
- Store leftovers covered in the refrigerator and consume within 3 days for best freshness.

