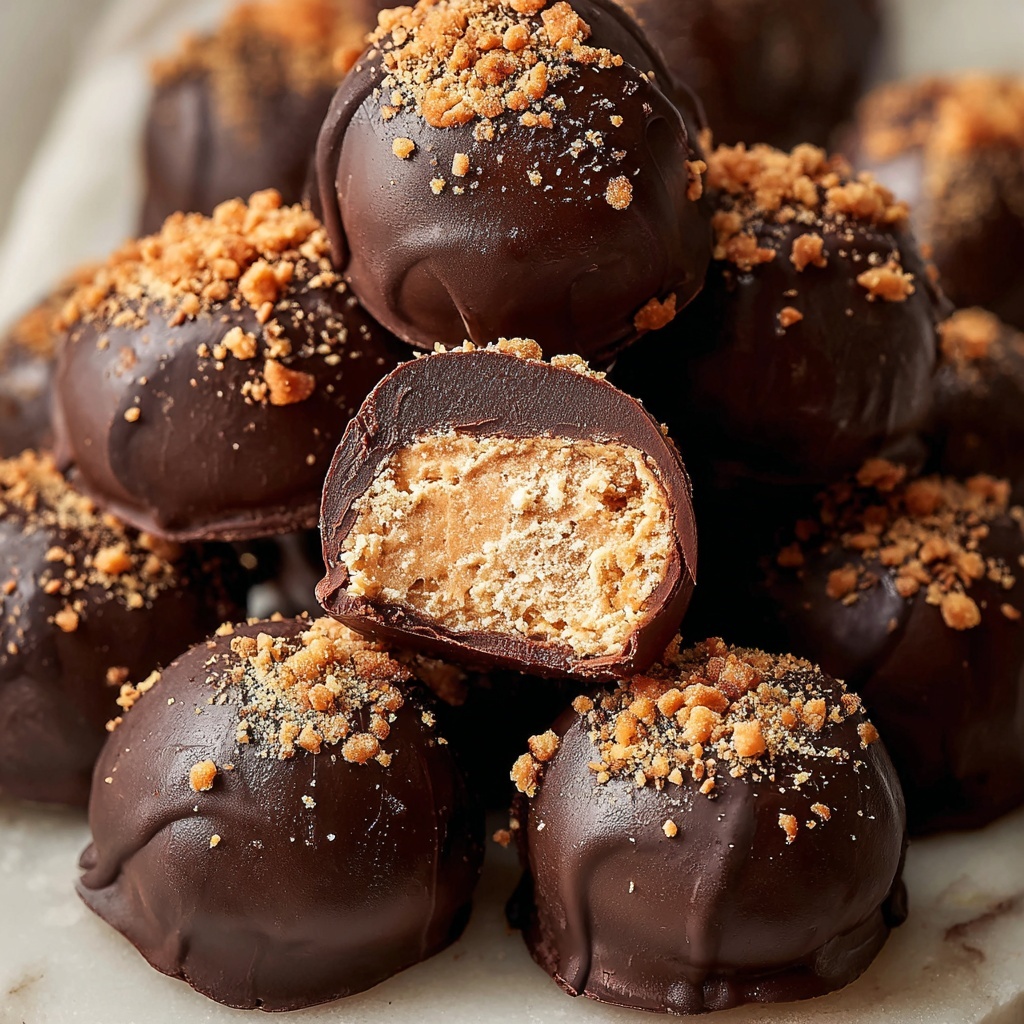
If you’re searching for a crowd-pleasing treat that combines rich peanut butter flavor with crunchy, caramelized candy bits, this Butterfinger Balls Recipe is an absolute must-try. These delightful little bites boast a heavenly blend of creamy texture and sweet crispiness that will keep you coming back for more. Perfect for parties, holidays, or just a midweek indulgence, Butterfinger Balls are easy to make and irresistibly delicious.
Ingredients You’ll Need
This Butterfinger Balls Recipe uses simple yet essential ingredients that work harmoniously to create the perfect balance of flavor and texture. Each component adds something special, from creamy richness to sweet crunch.
- Creamy peanut butter: The star of the show, providing a smooth and nutty base that holds everything together wonderfully.
- Salted butter (softened): Adds richness and moisture for a luscious mouthfeel while enhancing the peanut butter’s flavor.
- Vanilla extract: A splash of sweetness and depth that rounds out the flavor profile beautifully.
- Powdered sugar: Sweetens the mixture and helps it firm up, making these balls perfectly bite-sized and not overly sticky.
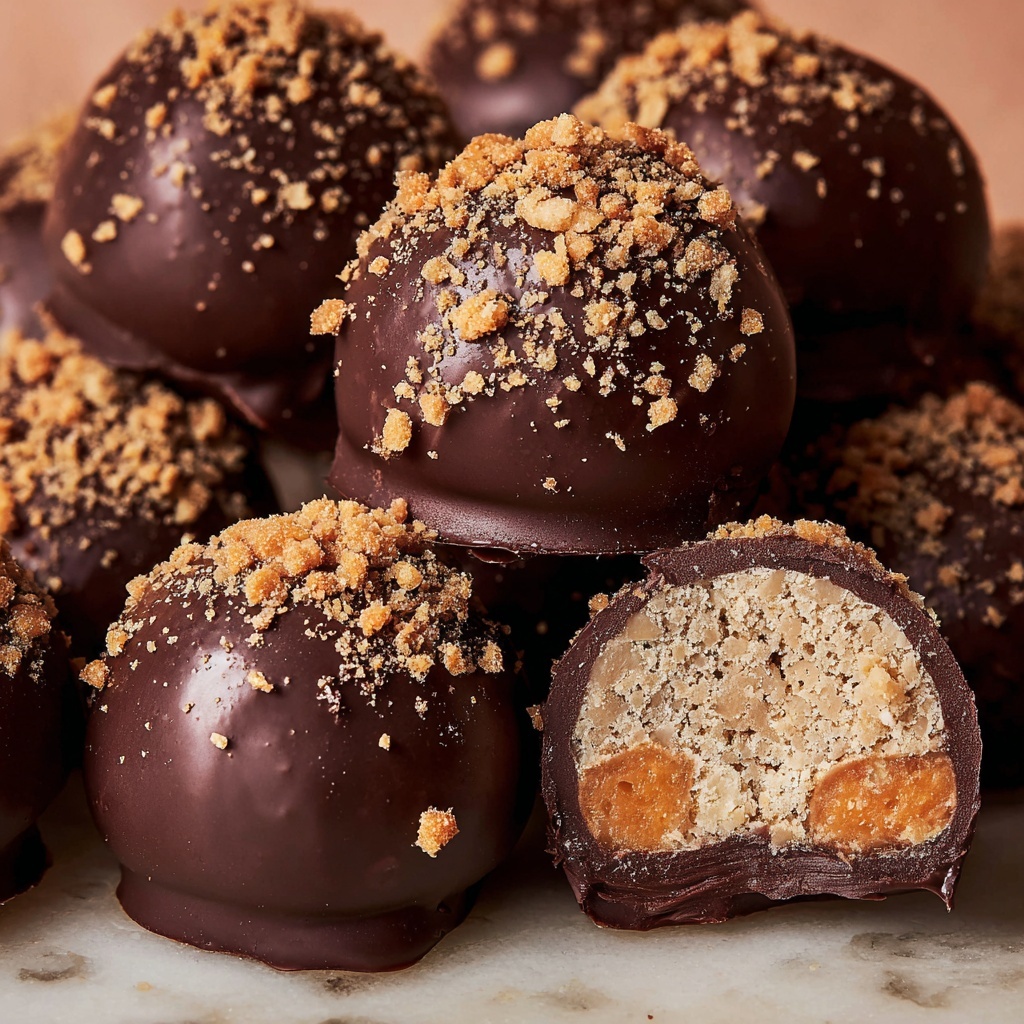
- Butterfinger Bits: These crunchy candy pieces bring satisfying texture and an extra burst of butterscotch-caramel flavor inside and on top.
- Chocolate melting wafers: Used for coating, they create a smooth, shiny shell that adds richness and helps keep the balls intact.
How to Make Butterfinger Balls Recipe
Step 1: Cream the Peanut Butter, Butter, and Vanilla
Begin by combining the creamy peanut butter, softened butter, and vanilla extract in a large bowl or stand mixer. Beat everything together for about 30 seconds until smooth and creamy, which creates a luscious base for your Butterfinger Balls.
Step 2: Incorporate the Powdered Sugar
Sift the powdered sugar into the mixture to avoid lumps, then beat until the mixture turns silky and smooth. This step sweetens and firms up the base, making it easier to shape the balls later on.
Step 3: Fold in the Butterfinger Bits
Gently stir in the crunchy Butterfinger Bits for that signature candy crunch. These little nuggets of butterscotch and peanut candy add exciting texture and bursts of flavor in every bite.
Step 4: Chill the Mixture
Cover your bowl and place it in the refrigerator for 30 minutes. Chilling stiffens the mixture, which makes it much easier to handle when forming the balls and helps the flavors meld.
Step 5: Form the Balls
Line a cookie sheet with parchment paper. Use a medium cookie scoop to portion out the peanut butter mixture, then roll each scoop between your palms into smooth, round balls. Arrange them on the prepared sheet, then pop them in the freezer for 20 to 30 minutes to firm up completely.
Step 6: Melt the Chocolate Wafers
While the balls chill, melt the chocolate wafers in a wide glass bowl in 30-second bursts, stirring well between each interval. Continue until the chocolate is completely melted and smooth—this will make dipping easier and give your Butterfinger Balls a glossy finish.
Step 7: Dip the Balls in Chocolate
Using a fork or dipping tool, dip each frozen ball into the melted chocolate, making sure it’s fully coated. Place the dipped balls back on the parchment-lined cookie sheet to set.
Step 8: Garnish and Set
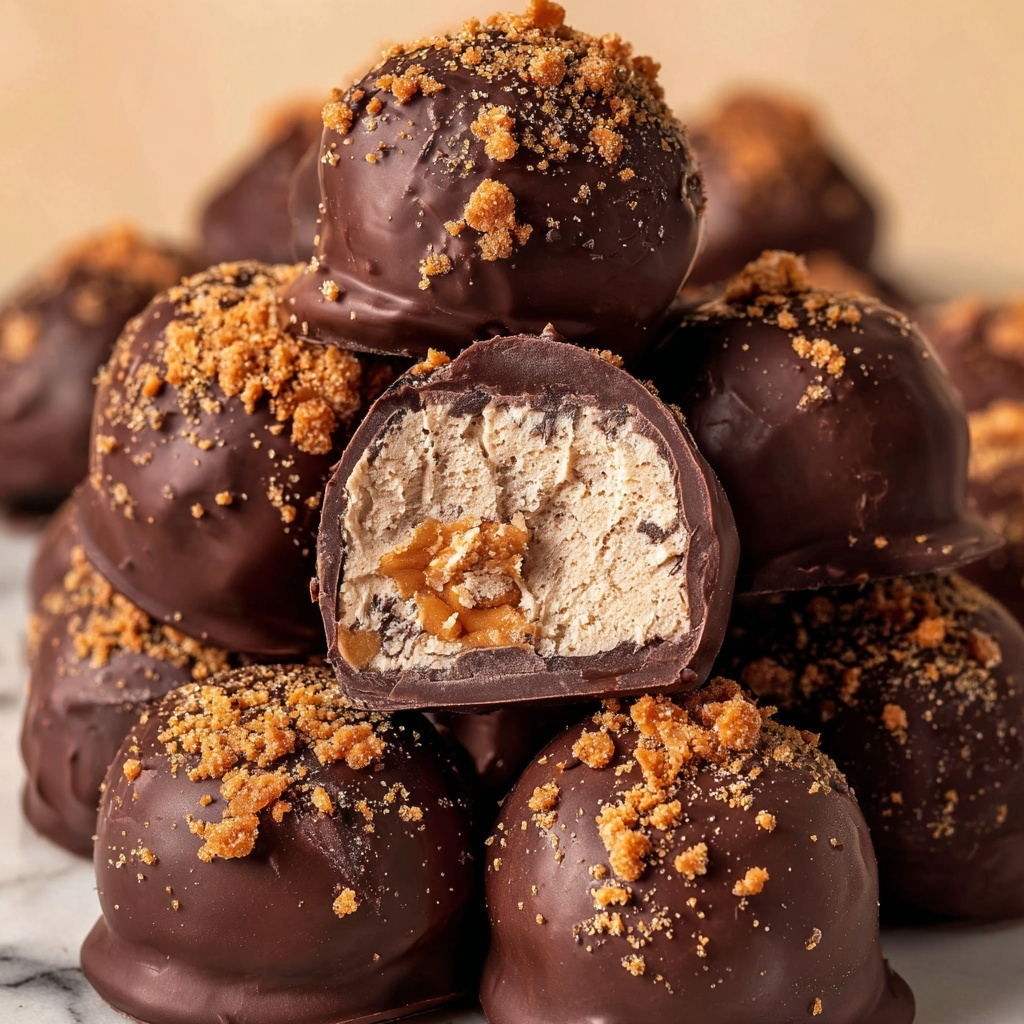
Before the chocolate hardens, sprinkle extra Butterfinger Bits on top of each ball. This final touch enhances crunch and adds visual appeal. Allow them to sit until the chocolate coating hardens completely.
How to Serve Butterfinger Balls Recipe
Garnishes
Adding a sprinkle of Butterfinger Bits on top of these balls creates that perfect finishing touch, making them look irresistible. You can also dust with a little cocoa powder or drizzle white chocolate for additional flair and taste contrast.
Side Dishes
Butterfinger Balls pair beautifully with a cup of hot coffee or milk for a comforting treat. They also make a lovely accompaniment to fresh fruit or vanilla ice cream, balancing their richness with a fresh burst.
Creative Ways to Present
For holiday parties or gift-giving, arrange Butterfinger Balls in decorative cupcake liners or colorful mini muffin tins. You can also stack them on a tiered dessert stand or package them in a clear jar tied with a ribbon for an adorable homemade gift.
Make Ahead and Storage
Storing Leftovers
Butterfinger Balls keep well in an airtight container at room temperature for up to two days. For longer storage, refrigeration is ideal to keep them fresh and firm.
Freezing
If you want to make these in advance, Butterfinger Balls freeze wonderfully. Place them in a single layer on a parchment-lined tray to freeze first, then transfer to an airtight container or freezer bag. They can be stored frozen for up to two months.
Reheating
Thaw frozen Butterfinger Balls in the refrigerator overnight. Since they’re no-bake treats, there’s no need to reheat—simply enjoy them cold or at room temperature!
FAQs
Can I use crunchy peanut butter instead of creamy?
Yes, you can, but keep in mind crunchy peanut butter will add more texture inside the balls. If you enjoy extra crunch, go for it! Otherwise, creamy peanut butter blends more smoothly with the other ingredients.
What if I can’t find Butterfinger Bits?
If Butterfinger Bits aren’t available, you can chop up regular Butterfinger bars into small pieces or substitute with other crunchy peanut butter candies like Reese’s Pieces for a slightly different twist.
Can I use regular chocolate instead of chocolate melting wafers?
Regular chocolate can be used, but melting wafers are easier to work with since they melt smoothly without seizing. If you use regular chocolate, consider adding a little vegetable oil to keep the coating silky.
How long do Butterfinger Balls last?
When stored properly in an airtight container, they last about one week in the refrigerator. Freezing extends their life to a couple of months without sacrificing taste or texture.
Can I make these nut-free?
This recipe heavily relies on peanut butter and Butterfinger candy, which contains nuts and peanut products. For nut-free alternatives, you could try sunflower seed butter and look for nut-free candy bits, but it will change the traditional flavor.
Final Thoughts
There’s something truly special about this Butterfinger Balls Recipe that makes it a go-to for parties, gifts, or that sweet craving you just can’t shake. Once you make them, I promise you’ll fall in love with the perfect harmony of creamy peanut butter, crunchy candy, and rich chocolate coating. So go ahead, grab those simple ingredients, and treat yourself to these delicious, bite-sized treasures—you won’t regret it!
Print
Butterfinger Balls Recipe
- Prep Time: 30 minutes
- Cook Time: 0 minutes
- Total Time: 1 hour
- Yield: 34 servings
- Category: Dessert
- Method: No-Cook
- Cuisine: American
Description
Butterfinger Balls are a delightful no-bake treat combining creamy peanut butter, rich butter, and crunchy Butterfinger candy bits, all coated in smooth melted chocolate. Perfect for parties or a sweet snack, these bite-sized balls are easy to make and irresistibly delicious.
Ingredients
Base Mixture
- 1⅓ cups creamy peanut butter
- ½ cup salted butter (softened)
- 1 teaspoon vanilla extract
- 2 cups powdered sugar
- 1½ cups Butterfinger Bits (plus more for topping, optional)
Chocolate Coating
- 3 cups chocolate melting wafers
Instructions
- Cream Base Ingredients: Add the peanut butter, softened butter, and vanilla extract into a large bowl or stand mixer. Cream together for 30 seconds until smooth and combined.
- Add Powdered Sugar: Sift the powdered sugar into the bowl to prevent lumps, then beat the mixture until smooth and fully incorporated.
- Mix in Butterfinger Bits: Fold in 1½ cups of Butterfinger Bits until evenly distributed throughout the mixture.
- Chill the Mixture: Cover and refrigerate the mixture for 30 minutes to firm up, making it easier to handle.
- Form Balls: Line a cookie sheet with parchment paper. Using a medium cookie scoop, portion out the chilled peanut butter mixture and roll into uniform balls. Place them on the prepared sheet and freeze for 20 to 30 minutes to set.
- Melt Chocolate Wafers: Just before removing the balls from the freezer, melt the chocolate melting wafers in a wide glass bowl using 30-second intervals in the microwave, stirring between each interval until completely melted and smooth.
- Dip the Balls: Using a fork or dipping tool, carefully dip each peanut butter ball into the melted chocolate coating, ensuring it is fully covered. Return the coated balls to the parchment-lined sheet.
- Decorate and Set: Optionally sprinkle additional Butterfinger Bits on top of the chocolate-coated balls. Allow them to sit at room temperature or refrigerate until the chocolate hardens and sets completely.
Notes
- For easier rolling, chill the mixture well before shaping into balls.
- Use parchment paper or a silicone mat to prevent sticking during freezing and dipping.
- Store Butterfinger Balls in an airtight container in the refrigerator for up to one week.
- For a glossy chocolate coating, temper the chocolate wafers or add a small amount of vegetable oil when melting.
- These treats are perfect for holiday gifting or as a sweet party favor.


