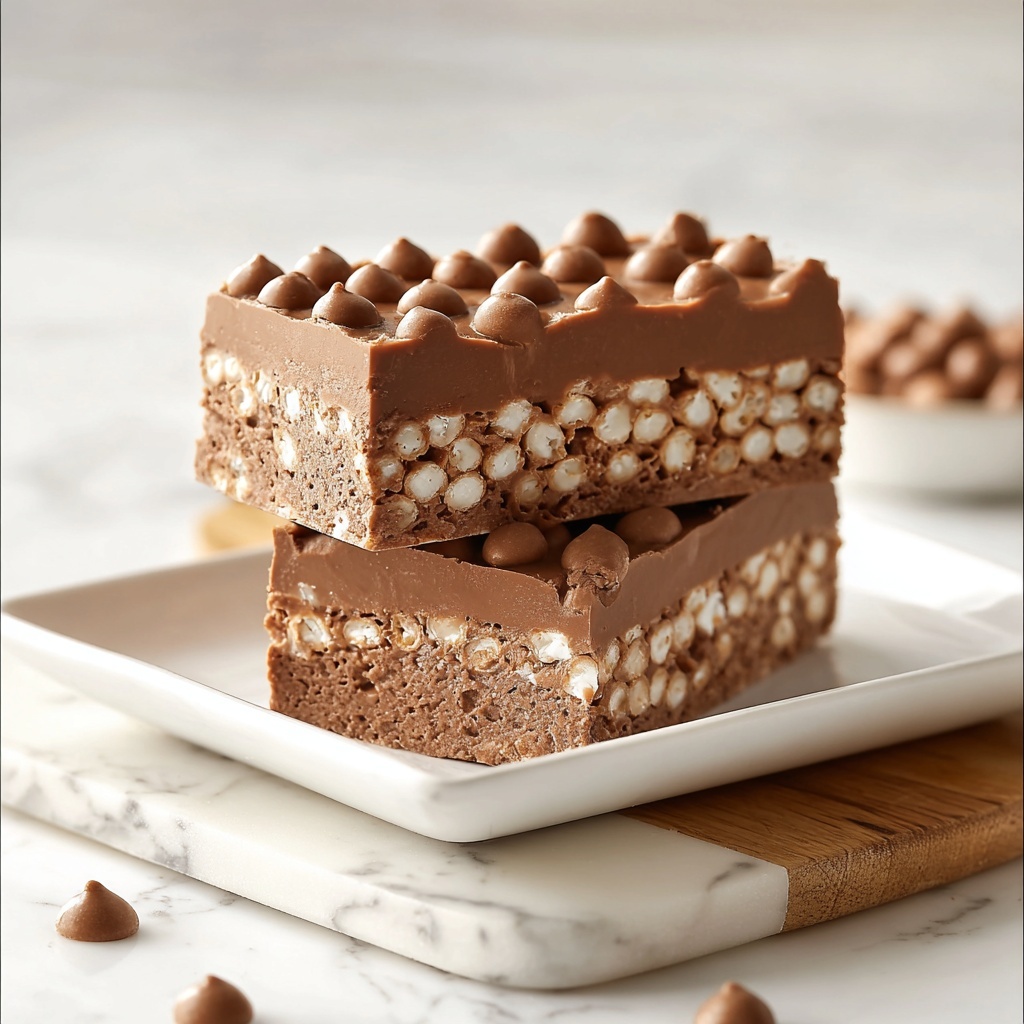
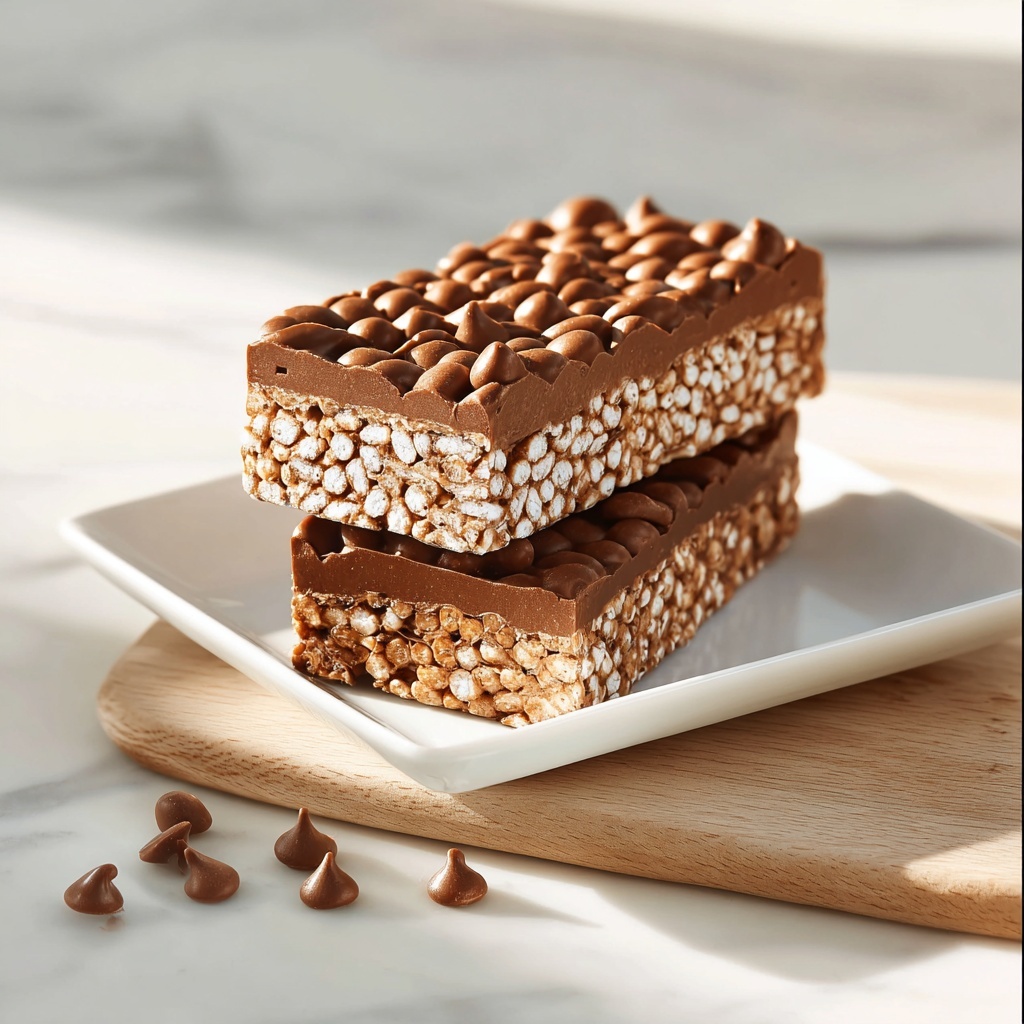
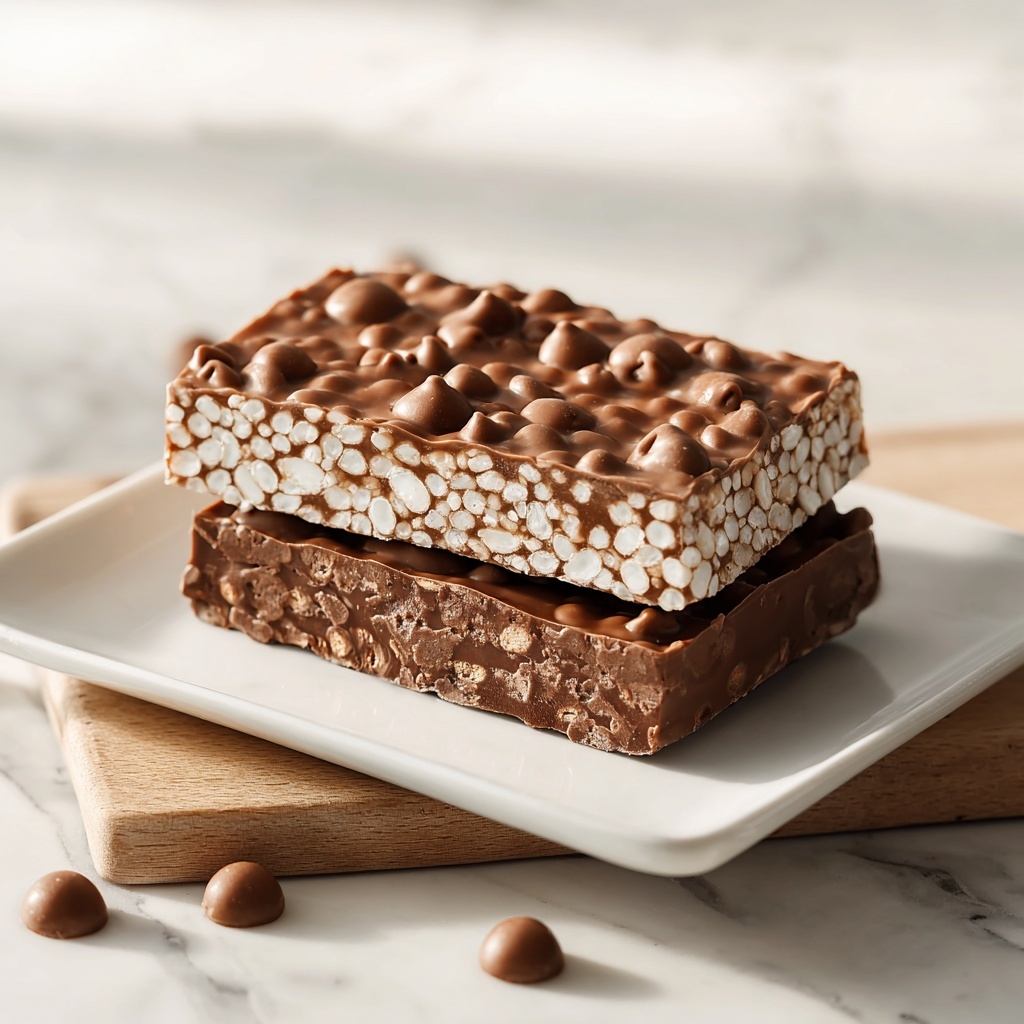
If you have a sweet tooth and love treats with a perfect crunch, then you are going to adore this Chocolate Crunch Bars Recipe. These bars are the ideal blend of rich, velvety chocolate combined with light, crispy puffed rice cereal that creates a satisfying texture in every bite. Whether you need a quick snack to satisfy your chocolate cravings or a homemade treat to impress friends, this recipe is simple, delightful, and utterly irresistible.
Ingredients You’ll Need
Gathering the right ingredients is the first step to making your Chocolate Crunch Bars Recipe a total success. Each component contributes its unique flavor and texture, creating a harmonious and crunchy chocolate delight.
- Dark chocolate chips: Use good quality dark or semi-sweet chocolate chips for a deep, rich flavor that melts beautifully.
- Almond butter: Provides a creamy, nutty base and helps bind the bars together; feel free to swap with any nut butter you prefer.
- Honey: Adds natural sweetness and helps hold the crisp rice cereal tightly packed in the bars; maple syrup works perfectly too.
- Vanilla extract: Gives a subtle warmth and depth to the chocolate that makes each bite more indulgent.
- Puffed rice cereal: The star crunch factor—light, airy, and crisp, it gives these bars that delightful texture contrast.
How to Make Chocolate Crunch Bars Recipe
Step 1: Prepare Your Pan
Start by lining an 8×8 inch baking dish with parchment paper. This is a simple trick that makes it super easy to lift out your bars once they’ve set. Leave a generous overhang on the sides so you get perfect squares without the sticky mess.
Step 2: Melt the Chocolate Mixture
In a microwave-safe bowl, combine your chocolate chips, almond butter, and honey. Heat the mixture in 30-second bursts, stirring in between to prevent burning. Keep going until everything is silky, smooth, and beautifully blended, making it easier to coat the cereal perfectly.
Step 3: Add Vanilla Extract
Once the chocolate blend is melted and smooth, stir in the vanilla extract. This little addition makes all the difference by rounding out the flavors and adding a lovely aromatic layer to your bars.
Step 4: Mix in the Puffed Rice Cereal
Now the fun part: gently fold the puffed rice cereal into the chocolate mixture. Take your time here—you want every piece coated but be careful not to crush the cereal so it remains light and crunchy in the final bars.
Step 5: Press Mixture into Pan
Pour the entire mixture into your lined pan and use a spatula to spread it evenly. Press down firmly but gently to ensure the bars hold together well once set, creating that classic dense but crunchy chew.
Step 6: Refrigerate Until Firm
Pop the pan into the fridge for at least two hours. This chilling step is key—it lets the bars solidify fully so they’re easy to slice and hold their shape instead of crumbling.
Step 7: Slice and Serve
After chilling, lift the bars out of the pan by the parchment overhang and place on a cutting board. Use a sharp knife to cut into squares, and voila—your Chocolate Crunch Bars Recipe is ready to wow your taste buds!
How to Serve Chocolate Crunch Bars Recipe
Garnishes
While these bars are delicious all on their own, you can sprinkle a pinch of flaky sea salt or drizzle some melted white chocolate over the top for a fancy finish. Toasted coconut flakes or chopped nuts also make lovely garnishes that add extra texture and flavor contrast.
Side Dishes
The crunchy, sweet nature of these bars pairs well with a creamy side like Greek yogurt or a scoop of vanilla ice cream. For a refreshing balance, serve alongside fresh berries or fruit salad to brighten the dessert experience.
Creative Ways to Present
Want to impress your guests? Arrange your Chocolate Crunch Bars on a wooden board layered with cupcake liners or pretty parchment triangles. For parties, cut them into mini squares or bars, stack them in a tiered dessert stand, or wrap each piece individually with colorful ribbons as adorable take-home treats.
Make Ahead and Storage
Storing Leftovers
You can store any leftover bars in an airtight container at room temperature for up to 3 days, or keep them in the fridge for even longer freshness. This keeps their perfect crunch intact without getting soggy.
Freezing
These bars freeze beautifully! Wrap them tightly in plastic wrap and place in a freezer-safe container. They’ll keep for up to two months. When you’re ready to enjoy, simply thaw at room temperature for about 20-30 minutes.
Reheating
Since these bars are best enjoyed cool and crunchy, reheating is not usually necessary. If you want to soften them slightly, pop them in the microwave for 5-10 seconds but watch carefully as you don’t want to melt the chocolate too much.
FAQs
Can I use peanut butter instead of almond butter?
Absolutely! Peanut butter or any other nut butter can be substituted with great results, just pick your favorite flavor to make it your own.
Is it possible to make these bars vegan?
Yes, swap the honey for maple syrup and use vegan dark chocolate chips to keep this recipe plant-based and just as delicious.
How crunchy will the bars stay after a few days?
If stored properly in an airtight container, your bars will keep their crunchy texture for several days, especially if refrigerated.
Can I add extras like nuts or dried fruit?
Definitely! Chopped nuts, shredded coconut, or dried cranberries mixed into the batter can add exciting flavors and textures.
What’s the best way to cut these bars cleanly?
Use a sharp knife and wipe it clean between cuts to prevent sticking. You can also warm the knife slightly under hot water and dry it before slicing for perfect edges.
Final Thoughts
I can’t recommend this Chocolate Crunch Bars Recipe enough if you love treats that combine simple ingredients into something truly special. It’s a fast, fun, and flexible recipe that always brings smiles, whether for a quick snack or sharing around the table. Give it a try—you might just find your new favorite chocolate snack!
Print
Chocolate Crunch Bars Recipe
- Prep Time: 15 minutes
- Cook Time: 0 minutes
- Total Time: 2 hours 15 minutes
- Yield: 12 servings
- Category: Dessert
- Method: No-Cook
- Cuisine: American
- Diet: Vegetarian
Description
Delicious and easy-to-make Chocolate Crunch Bars combining melted chocolate, almond butter, and puffed rice cereal for a crispy, sweet treat perfect for snacks or dessert. These no-bake bars offer a rich chocolate flavor with a satisfying crunch, set firmly in the refrigerator.
Ingredients
Chocolate Mixture
- 1 1/4 cups dark chocolate chips (or semi-sweet chocolate chips)
- 1/2 cup almond butter (or any nut butter)
- 1/4 cup honey (or maple syrup)
- 1 teaspoon vanilla extract
Cereal
- 3 cups puffed rice cereal
Instructions
- Prepare the Baking Dish: Line an 8×8 inch baking dish with parchment paper, ensuring the paper extends beyond the edges to make it easier to lift the bars out later.
- Melt the Chocolate Mixture: In a microwave-safe bowl, combine the dark chocolate chips, almond butter, and honey. Microwave in 30-second intervals, stirring after each, until the mixture is smooth and fully melted.
- Add Flavoring: Stir in the vanilla extract thoroughly to infuse the chocolate mixture with rich vanilla flavor.
- Combine with Cereal: Add the puffed rice cereal to the melted chocolate mixture. Gently fold the cereal in until every piece is coated evenly without crushing the cereal.
- Press into Dish: Pour the combined mixture into the prepared baking dish. Use a spatula to press it down evenly and compactly to ensure the bars hold their shape once set.
- Refrigerate to Set: Place the dish in the refrigerator for at least 2 hours, or until the bars are firm and set completely.
- Cut and Serve: Lift the firmly set mixture out of the dish using the parchment paper overhang. Cut into squares and serve as a tasty snack or dessert.
Notes
- Use almond butter or substitute with any nut butter of your choice.
- Honey can be replaced with maple syrup for a vegan option.
- Ensure to microwave in short intervals and stir frequently to prevent burning the chocolate.
- Press the mixture firmly to prevent the bars from crumbling when cut.
- Store leftovers in an airtight container in the refrigerator for up to one week.


