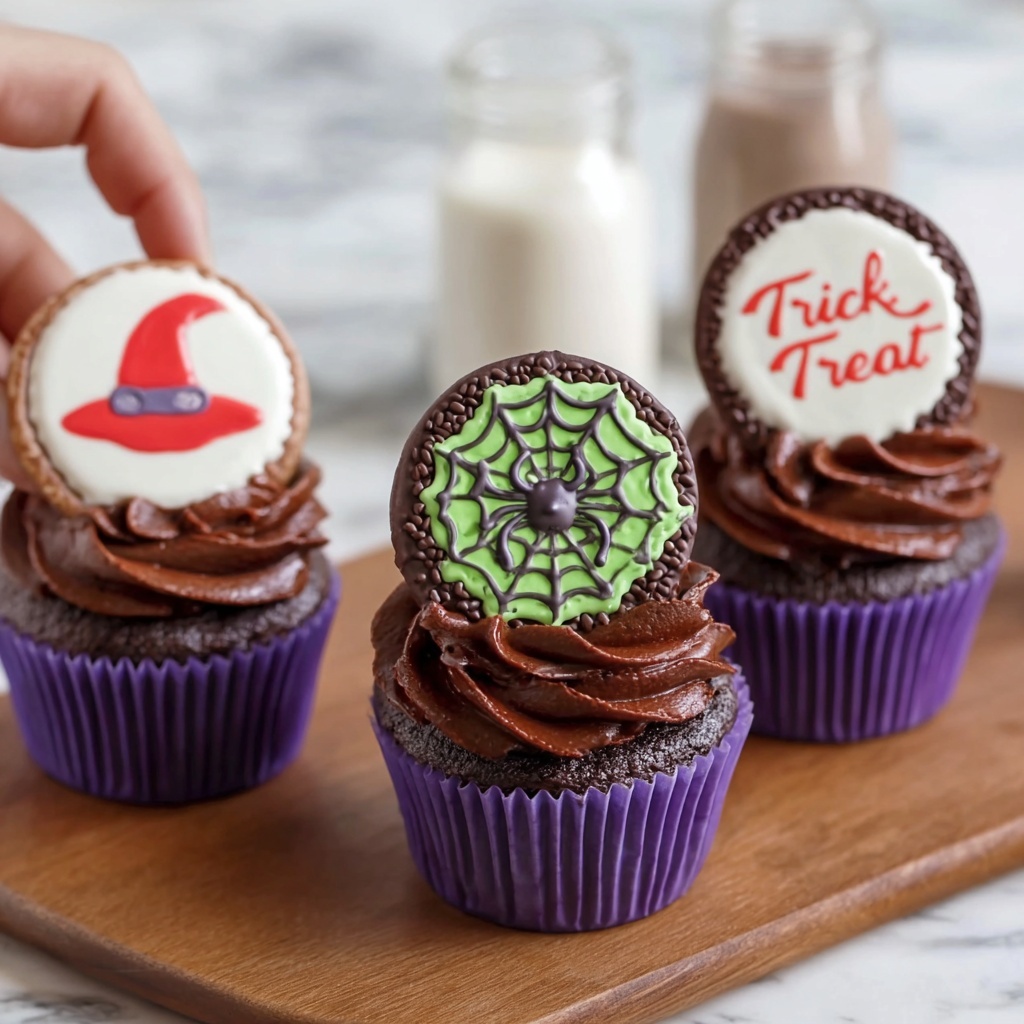
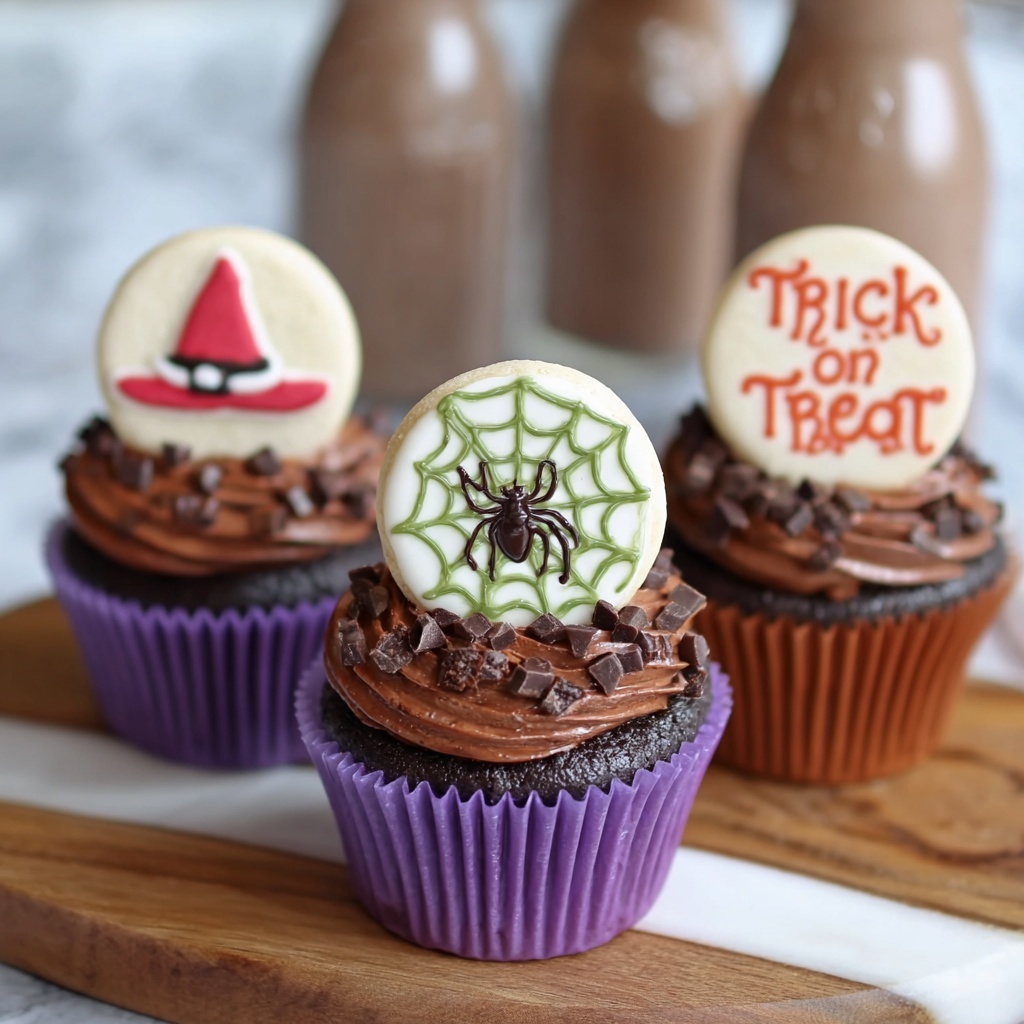
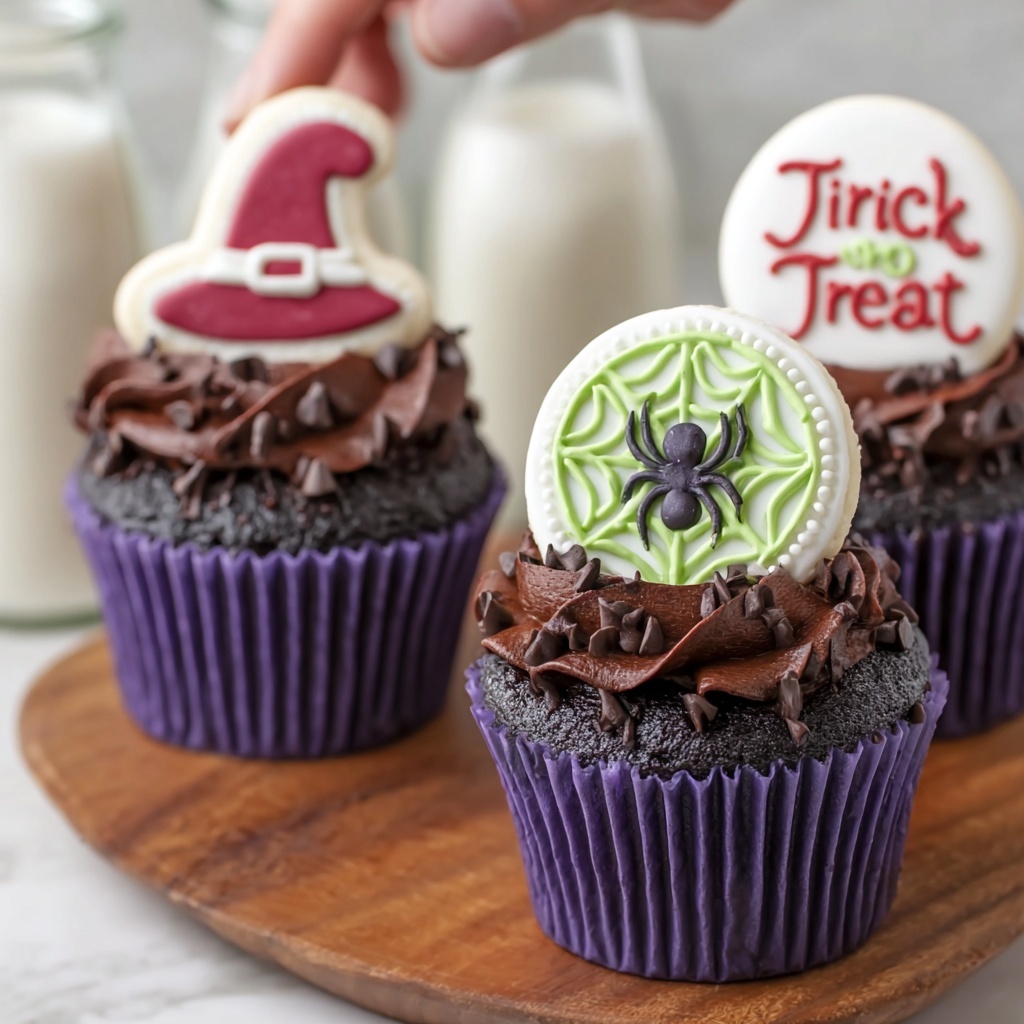
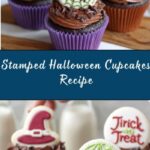
There is nothing quite like the charm and whimsy of a perfectly themed dessert to elevate your Halloween celebrations, and this Stamped Halloween Cupcakes Recipe does exactly that. Imagine moist, rich chocolate cupcakes topped with vibrant, colorful frosting, each lovingly stamped with spooky and playful Halloween designs that are sure to delight kids and adults alike. This recipe combines simple, pantry-friendly ingredients to create show-stopping treats that bring festive fun to every bite, making it an absolute must-try for your seasonal gatherings.
Ingredients You’ll Need
Gathering your ingredients is a breeze, as each one plays an important role in making these cupcakes irresistibly delicious. From the cocoa that creates a deep chocolate flavor to the buttermilk that adds tenderness, every component helps craft the perfect cake texture and taste, while the colorful frosting and stamping bring Halloween spirit to life.
- All-purpose flour (1 1/2 cups): The base of the cupcakes that provides structure without weighing them down.
- Unsweetened cocoa powder (1/2 cup): Delivers rich chocolate intensity and vibrant color.
- Baking soda (1 teaspoon): Ensures the cupcakes rise nicely while keeping them fluffy.
- Salt (1/2 teaspoon): Enhances the flavors and balances sweetness perfectly.
- Granulated sugar (1 cup): Sweetens the cupcakes with just the right amount to keep them indulgent.
- Vegetable oil (1/2 cup): Keeps the cupcakes moist and tender for days.
- Large eggs (2): Bind the ingredients together and add richness.
- Vanilla extract (1 teaspoon): Adds warmth and rounds out the chocolate flavors beautifully.
- Buttermilk (3/4 cup): Contributes a subtle tang and soft crumb texture.
- Hot water (1/2 cup): Helps dissolve the cocoa and intensifies the chocolate taste.
- Unsalted butter, softened (1/2 cup): For the creamy frosting base.
- Powdered sugar (2 cups): Sweetens and thickens the frosting.
- Milk or cream (2 tablespoons): Adjusts frosting consistency for easy spreading or piping.
- Food coloring (orange, purple, green, or black): Brings your spooky frosting to life with vivid seasonal hues.
- Halloween-themed sprinkles (optional): For an extra festive touch on top.
- Food-safe rubber or silicone stamps and edible gel food coloring or paint: Essential for creating those iconic Halloween images on each cupcake.
- Small food-safe paintbrush: To transfer the edible color cleanly from the stamp to your frosting.
How to Make Stamped Halloween Cupcakes Recipe
Step 1: Prepare Your Oven and Liners
Start by preheating your oven to 350°F (175°C) to ensure it’s perfectly hot when the batter’s ready. Line a 12-cup muffin tin with Halloween-themed cupcake liners to set the festive tone right from the get-go.
Step 2: Mix the Dry Ingredients
In a large bowl, whisk together the all-purpose flour, unsweetened cocoa powder, baking soda, and salt. This step ensures the cocoa is evenly distributed and helps your cupcakes rise beautifully.
Step 3: Combine the Wet Ingredients
In a separate bowl, whisk the granulated sugar, vegetable oil, eggs, and vanilla extract until smooth and well blended. The silky texture here is key to a tender crumb.
Step 4: Incorporate Dry and Wet Mixtures
Alternate adding the dry ingredients and buttermilk into the wet mixture, stirring just until combined after each addition. This creates a smooth batter without overmixing, which keeps the cupcakes light.
Step 5: Add Hot Water
Lastly, stir in the hot water until the batter is completely smooth and thin. This extra liquid helps intensify the chocolate flavor and gives the cupcakes a wonderfully moist texture.
Step 6: Bake the Cupcakes
Divide the batter evenly among the cupcake liners, filling each about three-quarters full. Bake for 18–20 minutes, or until a toothpick inserted into the center comes out clean. Cooling completely is crucial before frosting to keep the designs crisp and intact.
Step 7: Prepare the Frosting
Beat the softened unsalted butter until creamy and fluffy. Gradually add powdered sugar, followed by milk or cream and vanilla extract, beating continuously to achieve a light, smooth frosting. Tint the frosting with your chosen food colors to bring Halloween spirit to every swirl.
Step 8: Frost and Stamp the Cupcakes
Use a piping bag or an offset spatula to evenly frost each cooled cupcake. For the stamping, lightly brush your clean Halloween-themed rubber or silicone stamp with edible gel food coloring using a food-safe brush, then gently press it onto the frosting and lift straight up. Repeat with various designs for maximum spooky effect.
How to Serve Stamped Halloween Cupcakes Recipe
Garnishes
A little extra flair goes a long way—sprinkle Halloween-themed edible glitter, candy eyes, or tiny sugar pumpkins around your stamped designs to make each cupcake pop with personality. The contrast between the smooth frosting and textured decorations invites curious hands and hungry eyes.
Side Dishes
Pair these cupcakes with cold autumn beverages like spiced apple cider or a creamy pumpkin latte for a perfectly balanced treat experience. For a party spread, add some crunchy roasted pumpkin seeds or caramel popcorn to complement the soft sweetness of the cupcakes.
Creative Ways to Present
Arrange cupcakes on tiered stands draped with faux spider webs for an enchanting display, or present them in decorative Halloween boxes tied with themed ribbons as memorable take-home favors. You can even cluster cupcakes with mini pumpkins and candles on your dessert table to create a festive focal point everyone will admire.
Make Ahead and Storage
Storing Leftovers
Keep leftover stamped Halloween cupcakes fresh by storing them in an airtight container at room temperature for up to 2 days, or refrigerate for up to 4 days. Make sure to avoid stacking to preserve the delicate stamped designs on top.
Freezing
You can freeze unfrosted cupcakes for up to 3 months. When you’re ready to enjoy, thaw completely before frosting and stamping. If freezing frosted cupcakes, place them on a tray to freeze individually before transferring to a sealed container to protect the frosting and stamping.
Reheating
Allow refrigerated or thawed cupcakes to come to room temperature naturally. If you want a warm treat, heat gently in the microwave for about 10 seconds, but avoid reheating for too long as this might soften the frosting and blur the stamping.
FAQs
Can I use other flavors of cupcakes instead of chocolate for the Stamped Halloween Cupcakes Recipe?
Absolutely! While chocolate pairs wonderfully with Halloween themes, you can experiment with vanilla, pumpkin spice, or red velvet cupcakes. Just ensure the frosting surface is smooth and firm enough for stamping.
What types of stamps work best for stamping cupcakes?
Food-safe rubber or silicone stamps with simple, bold designs yield the best results because they transfer color cleanly and don’t smudge. Make sure the stamps are thoroughly cleaned before use for hygiene and clarity of the images.
Is it necessary to chill the cupcakes before stamping?
Chilling the frosted cupcakes for about 15–20 minutes firms up the surface, making stamping easier and the impressions sharper. This simple step can really elevate the appearance of your finished cupcakes.
Can kids safely help with decorating these cupcakes?
Yes, kids will love piping frosting, choosing colors, and stamping the spooky designs. Just supervise the stamping with food-safe brushes and ensure hygiene by keeping the stamps clean.
How long does it take to make these cupcakes from start to finish?
The entire process, including prep, baking, cooling, frosting, and stamping, takes around 40 minutes plus cooling time. Allow extra time if you plan detailed stamping or decorating with sprinkles.
Final Thoughts
Trying out this Stamped Halloween Cupcakes Recipe is like inviting a burst of festive magic straight into your kitchen. The combination of rich chocolate goodness, colorful frosting, and spooky-themed stamped details makes these cupcakes a total showstopper. Whether you’re hosting a Halloween party or just want a fun baking project with family, these cupcakes are sure to bring smiles and sweet memories. So grab your stamps and get baking—Halloween has never tasted this good!
Print
Stamped Halloween Cupcakes Recipe
- Prep Time: 20 minutes
- Cook Time: 20 minutes
- Total Time: 40 minutes (plus cooling)
- Yield: 12 cupcakes
- Category: Dessert
- Method: Baking
- Cuisine: American
- Diet: Vegetarian
Description
Delight in these festive Stamped Halloween Cupcakes, featuring rich chocolate cupcakes topped with vibrant, colorful frosting and decorated with fun Halloween-themed stamped designs. Perfect for spooky celebrations and parties, these cupcakes combine moist texture with creative, edible art for a treat that’s both delicious and visually captivating.
Ingredients
For the cupcakes:
- 1 1/2 cups all-purpose flour
- 1/2 cup unsweetened cocoa powder
- 1 teaspoon baking soda
- 1/2 teaspoon salt
- 1 cup granulated sugar
- 1/2 cup vegetable oil
- 2 large eggs
- 1 teaspoon vanilla extract
- 3/4 cup buttermilk
- 1/2 cup hot water
For the frosting:
- 1/2 cup unsalted butter, softened
- 2 cups powdered sugar
- 2 tablespoons milk or cream
- 1/2 teaspoon vanilla extract
- Food coloring (orange, purple, green, or black)
- Optional: Halloween-themed sprinkles
For stamping:
- Clean rubber or silicone stamps with Halloween designs (bats, pumpkins, ghosts, etc.)
- Food-safe gel food coloring or edible food paint
- Small food-safe paintbrush
Instructions
- Preheat and Prepare: Preheat your oven to 350°F (175°C) and line a 12-cup muffin tin with Halloween-themed cupcake liners to set the stage for baking.
- Mix Dry Ingredients: In a large bowl, whisk together the all-purpose flour, unsweetened cocoa powder, baking soda, and salt until well combined to ensure an even distribution.
- Mix Wet Ingredients: In another bowl, whisk the granulated sugar, vegetable oil, eggs, and vanilla extract together until smooth and fully incorporated.
- Combine Ingredients: Alternate adding the dry ingredients and buttermilk into the wet mixture, mixing just until combined to keep the batter light. Stir in the hot water last; the batter will be thin but that contributes to moist cupcakes.
- Bake the Cupcakes: Divide the batter evenly among the cupcake liners, filling about 3/4 full. Bake for 18–20 minutes or until a toothpick inserted into the center comes out clean. Remove from oven and let cool completely on a wire rack before decorating.
- Prepare the Frosting: Beat the softened unsalted butter until creamy. Gradually add powdered sugar, milk or cream, and vanilla extract. Continue beating until the frosting is fluffy and smooth. Tint the frosting with your chosen food coloring.
- Frost the Cupcakes: Using a piping bag or an offset spatula, frost the cooled cupcakes evenly with the colored frosting, creating a smooth or decorative finish.
- Stamp the Decorations: Lightly brush your clean rubber or silicone Halloween-themed stamps with gel food coloring or edible food paint using a food-safe paintbrush. Gently press the stamp straight down onto the frosted cupcake surface and lift carefully. Repeat with different designs for variety.
Notes
- Ensure that all stamps used are food-safe and thoroughly cleaned before application to maintain hygiene and safety.
- Chill frosted cupcakes for a short time before stamping to firm up the frosting surface and achieve clearer stamped impressions.
- If stamps are unavailable, kids can assist by decorating with colorful sprinkles and piped frosting for a festive look.
