
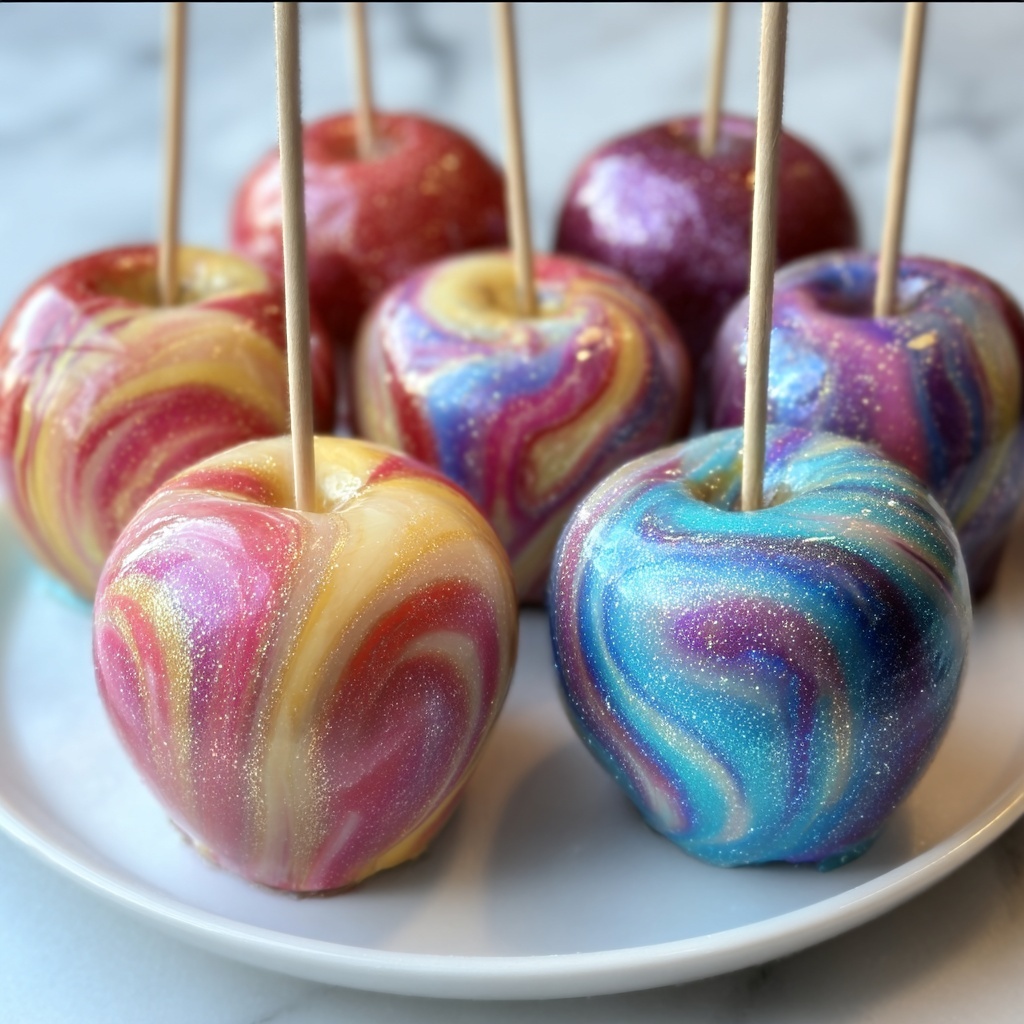
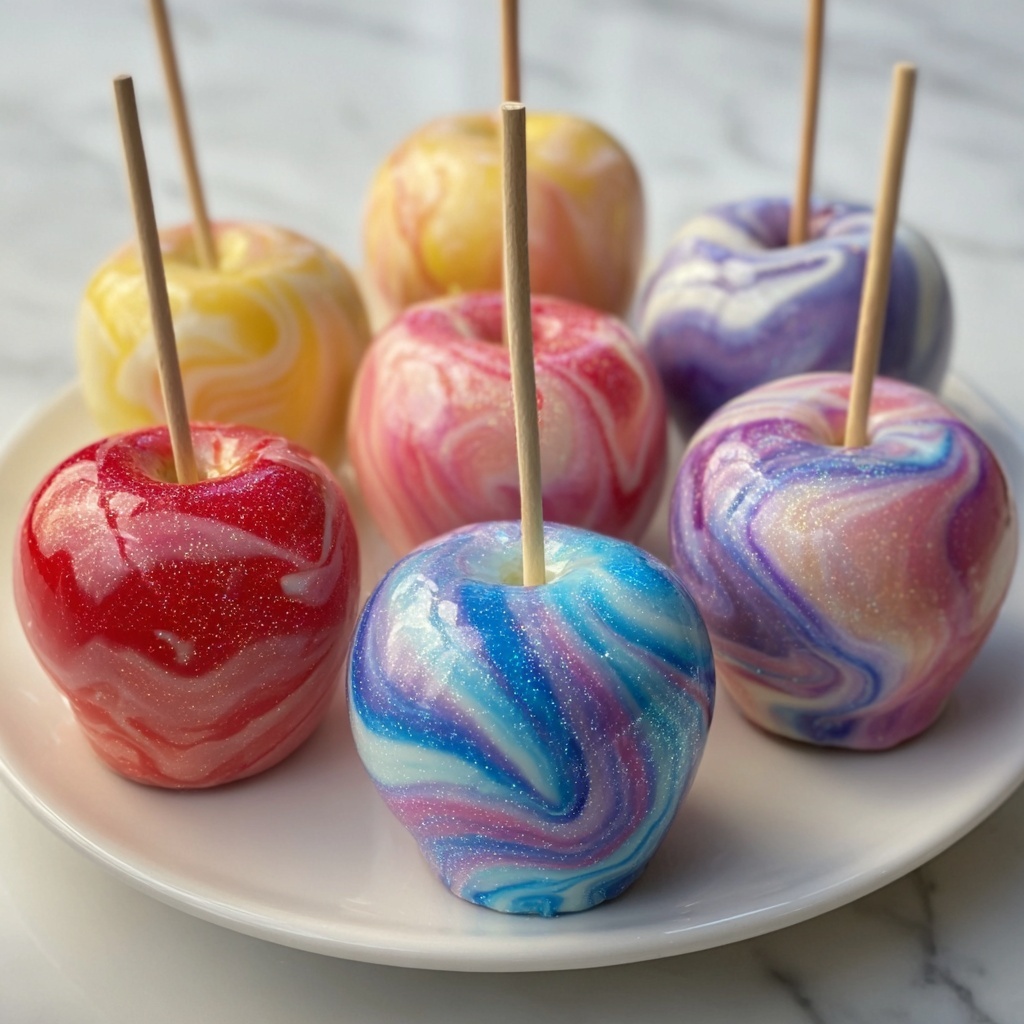
If you have a sweet tooth and love a striking twist on a classic treat, the Marbled Effect Candy Apples Recipe is a total game-changer. These glossy, swirled apples combine that perfect crisp apple bite with an eye-catching marbled candy coating that’s fun, festive, and irresistibly delicious. Whether it’s for a party, a holiday treat, or just a special snack, this recipe brings that magical carnival feel right into your kitchen. The unique marbling effect not only dazzles the eyes but also layers the candy coating with vibrant colors that make each apple a little work of edible art.
Ingredients You’ll Need
This recipe keeps things simple but colors your snack table perfectly. Each ingredient plays a key role in crafting the ideal balance of sweetness, texture, and that shimmering candy shell that cracks just right.
- 6 small apples (washed and thoroughly dried): Choose firm, crisp apples to handle the candy coating and deliver that satisfying crunch.
- 2 cups granulated sugar: The foundation of the candy coating, providing sweetness and structure when cooked to the hard crack stage.
- ½ cup light corn syrup: Helps prevent crystallization and keeps the candy smooth and glossy.
- ½ cup water: Combines with sugar for the perfect cooking medium.
- ½ teaspoon white gel food coloring: Creates a bright, opaque base for the marbled colors to pop against.
- 1–2 drops colored gel food coloring (red, pink, blue, purple, etc.): The star of the show for achieving those vibrant swirls without affecting candy consistency.
- Wooden candy apple sticks or skewers: Essential for holding your apples during dipping and enjoying them afterward.
- Candy thermometer: A must-have to reach the critical 300°F hard crack temperature for perfect candy coating.
- Parchment paper or silicone baking mat: Provides a non-stick surface for cooling your beautiful creations.
How to Make Marbled Effect Candy Apples Recipe
Step 1: Prepare the Apples and Workstation
Start by firmly inserting the wooden candy sticks into the tops of your dry apples—this makes dipping much easier and safer. Line a baking sheet with parchment paper or a silicone mat to catch dripping candy and allow your apples to cool calmly without sticking.
Step 2: Cook the Candy Mixture
In a medium saucepan over medium heat, combine the sugar, corn syrup, and water. Stir gently until the sugar dissolves. Attach your candy thermometer to the pan’s side and let the mixture cook without stirring until it reaches 300°F, known as the hard crack stage—this step ensures your candy coating will be hard, glossy, and crack just right when you bite into it.
Step 3: Add Color and Create the Marbled Effect
Immediately remove the pan from heat and stir in the white gel food coloring to turn your syrup into an opaque, brilliant base. Working fast, add 1 to 2 drops of your chosen colored gel and swirl it lightly using a skewer or toothpick. Be careful not to mix thoroughly—you want those beautiful, flowing swirls that give each apple its unique marbled charm.
Step 4: Dip the Apples
Carefully dip each apple into the candy coating, turning slowly to coat evenly. The colors will naturally swirl around the apple’s surface, creating that unforgettable marbled look. Allow excess candy to drip off before placing the apple onto your lined baking sheet. Repeat with the remaining apples, gently swirling the candy mixture between dips to keep the marbled effect fresh and captivating.
How to Serve Marbled Effect Candy Apples Recipe
Garnishes
Although the marbling itself is stunning, you can take your Marbled Effect Candy Apples Recipe to the next level with a few garnishes. Think edible glitter for a touch of sparkle, crushed nuts for a lovely crunch contrast, or even a light dusting of colored sugar crystals that enhance the colors and add extra texture.
Side Dishes
Pair these candy apples with warm fall-inspired treats like spiced cider, pumpkin muffins, or even simple popcorn spiced with cinnamon and sugar. Such sides create a cozy, autumnal vibe around your snack time and balance the intense sweetness of the candy coating.
Creative Ways to Present
Presentation is everything when it comes to the Marbled Effect Candy Apples Recipe. Display them upright in a decorated jar filled with colorful candy corn or scatter autumn leaves and tiny strings of fairy lights around the platter for an enchanting effect. You can even wrap each apple individually in cellophane tied with a festive ribbon for fabulous party favors.
Make Ahead and Storage
Storing Leftovers
If you end up with any leftover candy apples, store them at room temperature in an airtight container to preserve their crisp candy shell. Avoid refrigerating as condensation can make the candy coating sticky and lose its signature crunch.
Freezing
Freezing candy apples is not recommended since the moisture can damage the candy shell and change the apple’s texture. It’s best to enjoy them fresh within a day or two of making.
Reheating
Since the candy coating is already hardened, reheating isn’t generally needed or advised. If the candy surface softens, it will compromise the signature crack when bitten, so serving at room temperature is ideal.
FAQs
Can I use liquid food coloring for the marbled effect?
It’s best to avoid liquid food coloring because it can affect the candy’s consistency, making it less likely to harden properly. Gel food coloring is thicker and maintains the candy’s structure while providing vibrant color.
What types of apples are best for this recipe?
Firm and tart varieties like Granny Smith, Fuji, or Honeycrisp work best as they provide a nice balance to the sweet candy coating and hold up well during dipping.
How do I achieve the marbled effect without mixing colors completely?
After adding your drops of gel color, use a skewer or toothpick to gently swirl the colors into the white base. Avoid stirring fully; light swirling keeps the colors distinct and marbled.
Is it safe to eat the candy coating right after dipping?
Allow the coated apples to cool completely on parchment paper or a silicone mat; this lets the candy harden fully for that satisfying crunch. Eating immediately may result in sticky fingers and a softer shell.
Can I make this recipe for Halloween or themed parties?
Absolutely! Using dark gel colors like navy, black, or purple combined with white creates a “galaxy” or spooky vibe perfect for Halloween or themed events.
Final Thoughts
Trying out the Marbled Effect Candy Apples Recipe is like crafting a little piece of edible magic. From the shiny, mirrored candy shells to those swirls of color that make each apple unique, this recipe is pure joy for your taste buds and your eyes. Whether you’re treating yourself or sharing with friends and family, these candy apples add a special touch of fun and sophistication to any occasion. Give it a go—you’ll be amazed at how easy and rewarding this colorful twist on a classic can be!
Print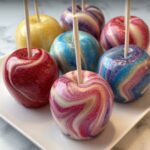
Marbled Effect Candy Apples Recipe
- Prep Time: 15 minutes
- Cook Time: 15 minutes
- Total Time: 30 minutes
- Yield: 6 candy apples
- Category: Dessert, Snack
- Method: Stovetop
- Cuisine: American
- Diet: Gluten Free, Vegetarian
Description
These Marbled Effect Candy Apples are a visually stunning and delicious treat perfect for Halloween, carnivals, or any festive occasion. Crisp apples are coated in a hard, glossy candy shell with a unique marbled swirl of colorful gel food colorings, creating a fun and eye-catching appearance. The candy coating is made from a classic sugar syrup cooked to the hard crack stage, ensuring a perfect crunchy texture that hardens beautifully around the apple.
Ingredients
Apples
- 6 small apples (washed and thoroughly dried)
Candy Coating
- 2 cups granulated sugar
- ½ cup light corn syrup
- ½ cup water
- ½ teaspoon white gel food coloring
- 1–2 drops of colored gel food coloring (red, pink, blue, purple, etc.)
Equipment
- Wooden candy apple sticks or skewers
- Candy thermometer
- Parchment paper or silicone baking mat
Instructions
- Prepare the Apples: Insert wooden sticks firmly into the tops of the washed and dried apples to create handles for dipping. Line a baking sheet with parchment paper or a silicone baking mat to prepare for cooling the candy apples later.
- Make the Candy Syrup: In a medium saucepan over medium heat, combine the sugar, light corn syrup, and water. Stir gently just until the sugar dissolves completely. Attach a candy thermometer to the side of the pan to monitor the temperature precisely.
- Cook to Hard Crack Stage: Allow the sugar mixture to boil without stirring until it reaches 300°F (hard crack stage) on the candy thermometer. This is critical for creating a hard, crunchy candy shell. Immediately remove the pan from heat once the temperature is reached.
- Add Base Color: Quickly stir in the white gel food coloring to turn the syrup into an opaque white base, ensuring the candy coating will have a marbled effect rather than a transparent candy shell.
- Create the Marbled Effect: Working quickly before the syrup cools, add 1–2 drops of your chosen colored gel food coloring to the syrup. Using a skewer or toothpick, swirl the colors lightly, being careful not to fully mix so the distinctive marbled look remains.
- Dip the Apples: Carefully dip each apple into the candy coating, turning it to coat evenly. The marbled colors will swirl naturally as you dip. Let excess syrup drip off each apple, then place it onto the prepared baking sheet to cool and harden.
- Repeat Dipping: Repeat the dipping process with the remaining apples. Swirl the candy coating gently between dips to maintain the marbled effect for each apple.
Notes
- Be extremely cautious when handling hot sugar syrup as it can cause serious burns.
- For a dramatic galaxy or Halloween-themed look, try using dark gel food colors such as navy blue, black, or purple combined with white.
- Avoid using liquid food coloring in the syrup because it may alter the consistency and prevent the candy from setting properly.
