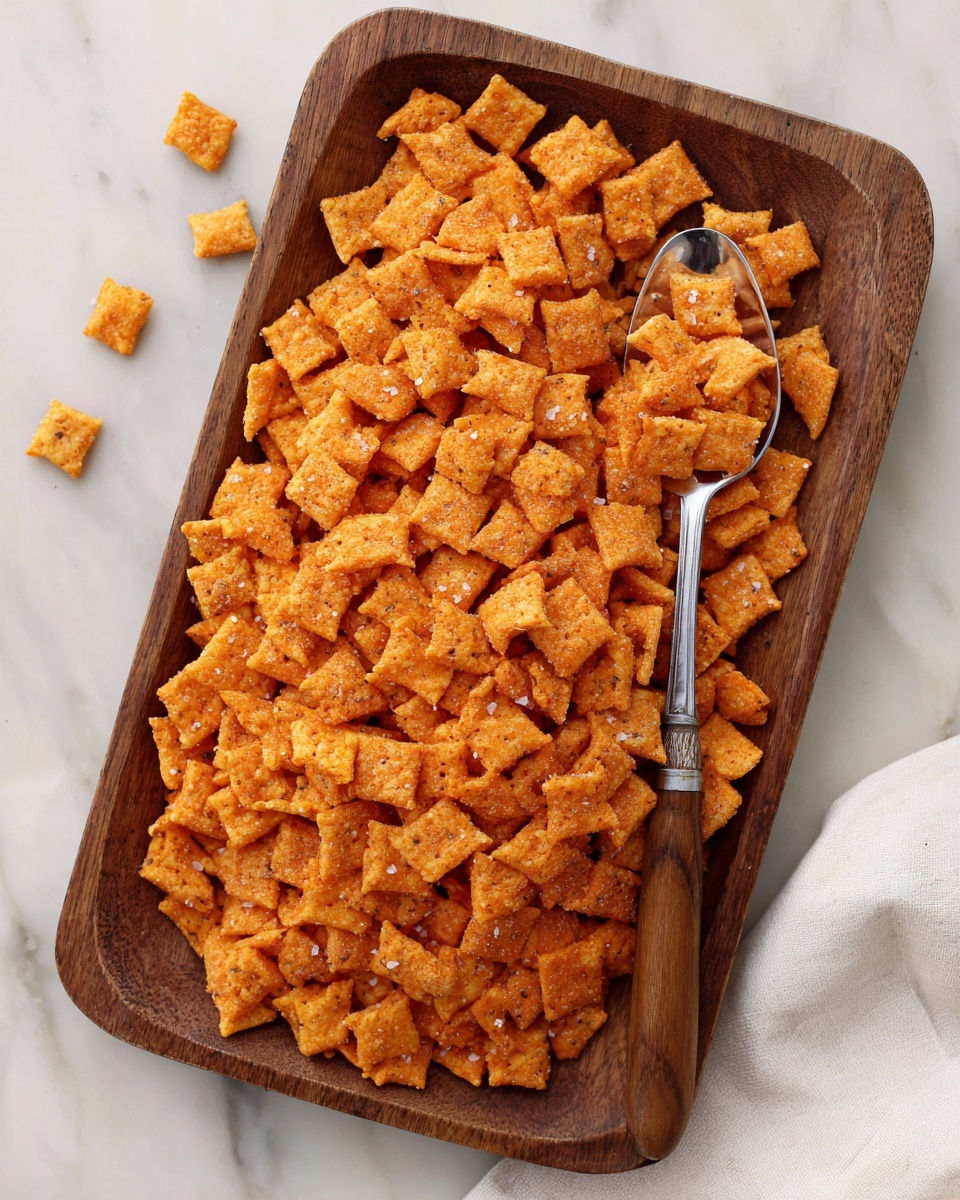
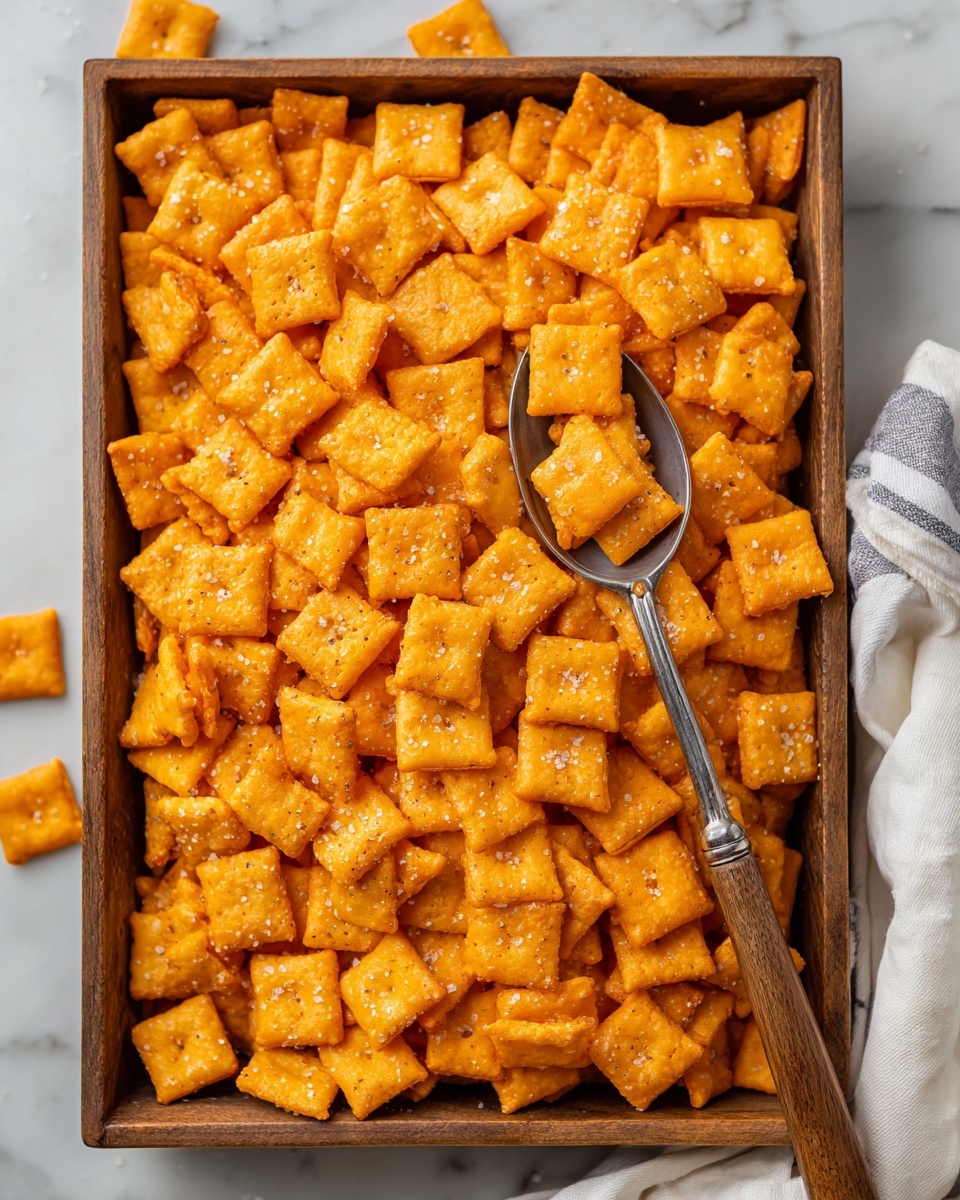
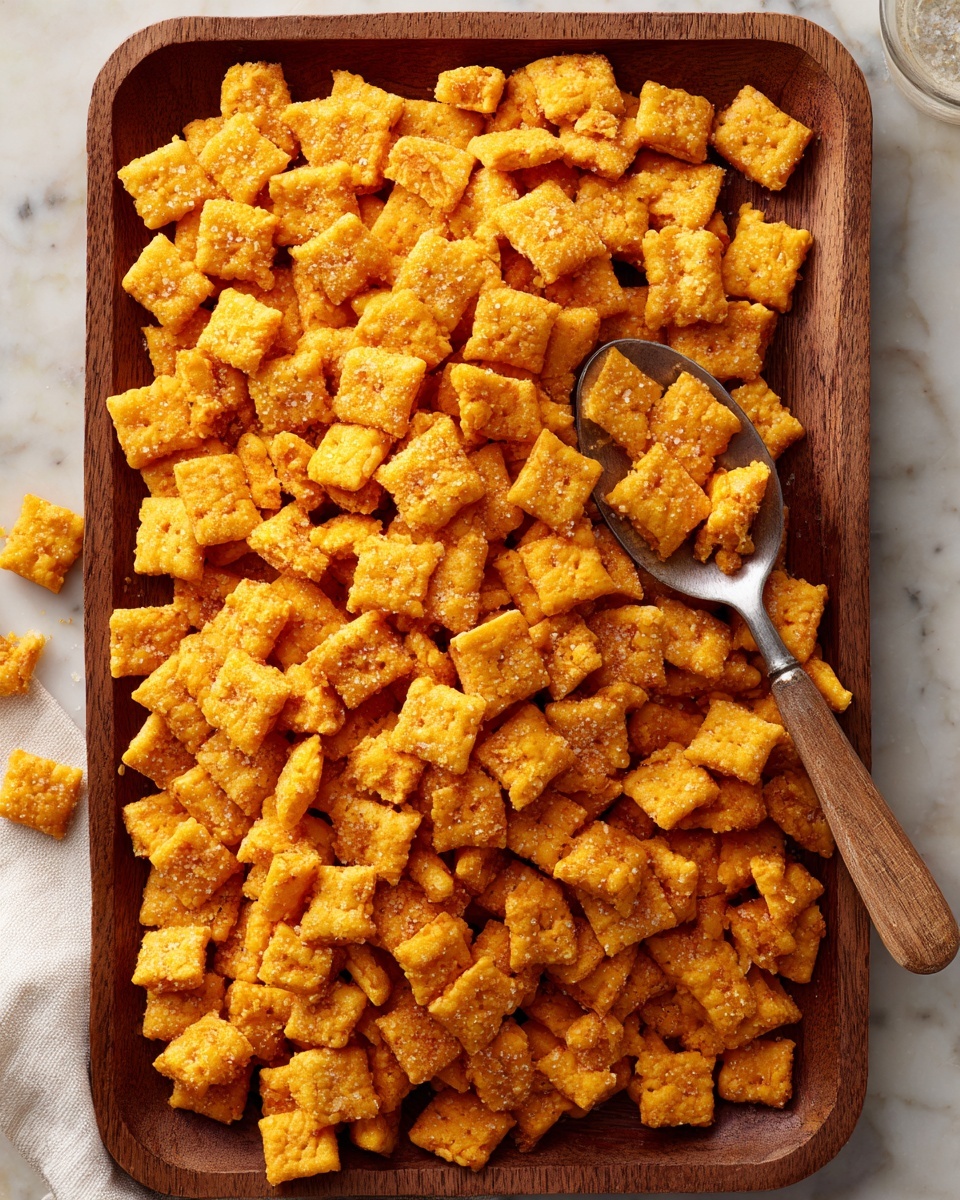
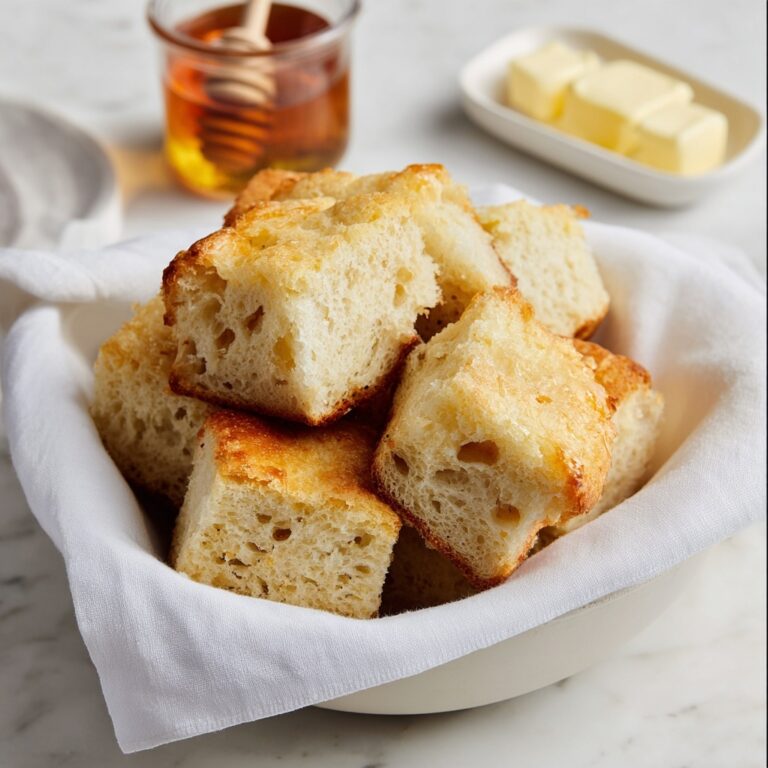
If you have ever wished for the perfect crunchy, cheesy snack that feels like a warm hug from your oven, this Homemade Cheez-Its Recipe is exactly what you need. It brings together sharp cheddar cheese, flaky butter, and just the right touch of seasoning to create those iconic little squares that are bursting with flavor in every bite. Making these at home means you get the freshest, cheesier experience possible, with the freedom to tweak the heat and texture exactly how you like. Trust me, once you try this recipe, your snack game will never be the same.
Ingredients You’ll Need
Each ingredient in this Homemade Cheez-Its Recipe plays a vital role to balance taste, texture, and color. These simple pantry staples come together to create a biscuit that’s crispy on the outside, satisfyingly cheesy, and tender enough to melt in your mouth.
- Sharp cheddar cheese: Grated for that bold, tangy cheese flavor which is the heart of any classic Cheez-It.
- Unsalted butter: Cold and cubed, it adds richness and a flaky texture that makes each bite irresistible.
- All-purpose flour: The base that holds everything together and gives structure to your crackers.
- Salt: Enhances the cheddar’s flavor and balances out the buttery richness.
- Water: Adds moisture just enough to bind the dough without making it sticky—adjust as needed for perfect consistency.
- Cayenne pepper (optional): A hint of heat to elevate the flavor and add a surprising twist.
How to Make Homemade Cheez-Its Recipe
Step 1: Prepare Your Workspace and Oven
Before diving into mixing, preheat your oven to 350°F (175°C) and line two baking sheets with parchment paper. This ensures your crackers bake evenly and come off the pan effortlessly, giving you that flawless golden-brown finish.
Step 2: Combine Cheese and Butter
In a large mixing bowl, add the grated sharp cheddar cheese and cold cubed butter. Using your fingers or a pastry cutter, break the mixture down until it resembles coarse crumbs. This step is critical because the butter pieces create those perfect pockets of flakiness in each cracker.
Step 3: Add Dry Ingredients
Sprinkle in the flour and salt, and if you’re feeling adventurous, add cayenne pepper to taste. Stir everything together gently so the cheese and butter remain well distributed, but don’t overwork the dough yet.
Step 4: Form the Dough
Gradually add water, one tablespoon at a time, mixing gently as you go. You’re aiming for a dough that holds together without being sticky. When it forms a smooth ball, transfer it onto a floured surface and knead lightly to bring it all together.
Step 5: Roll and Cut
Roll the dough out to about 1/8 inch thickness. This thinness is key for that classic crunch. Use a knife or cookie cutter to cut into squares or your favorite shapes. Prick each cracker with a fork to prevent puffing in the oven—you want them to stay flat and crisp.
Step 6: Bake Until Golden
Place your cut dough onto the prepared baking sheets and bake for 15 to 20 minutes. Keep an eye on those edges turning a gorgeous golden brown. Once done, let them cool completely so they crisp up even more before serving.
How to Serve Homemade Cheez-Its Recipe
Garnishes
While these homemade Cheez-Its are fantastic on their own, sprinkling a little smoked paprika, extra grated cheese, or even a sea salt flake just as they come out of the oven can take them to the next level. A touch of fresh herbs like finely chopped chives also adds a lovely pop of color and flavor.
Side Dishes
These crackers pair beautifully with a variety of dips and spreads. Think creamy pimento cheese, tangy salsa, or even a rich spinach dip. They also make an excellent crunchy contrast alongside soups or salads, adding a satisfying snack element anytime you want a savory bite.
Creative Ways to Present
For parties or cozy get-togethers, serve your Homemade Cheez-Its Recipe in a rustic wooden bowl or on a cheese board alongside charcuterie and fresh fruit. You can layer them with slices of sharp cheeses or drizzle with honey for a sweet-savory combo that will wow your guests.
Make Ahead and Storage
Storing Leftovers
Once your homemade Cheez-Its are completely cooled, store them in an airtight container at room temperature. They stay fresh and crispy for up to a week, which makes them perfect for prepping in advance or nibbling on throughout the week.
Freezing
If you want to make a big batch ahead of time, you can freeze the unbaked dough wrapped snugly in plastic wrap and foil. Thaw it overnight in the fridge before rolling and baking. This is a convenient way to enjoy fresh Cheez-Its whenever the craving strikes without starting from scratch each time.
Reheating
To bring back that just-baked crispness, warm your crackers in a 300°F oven for about 5 minutes. Avoid microwaving as it will make them chewy instead of crunchy. This little step refreshes their texture and aroma in moments.
FAQs
Can I use a different type of cheese?
Absolutely! While sharp cheddar gives the classic tangy flavor, you can experiment with cheeses like Parmesan, Gouda, or even a spicy pepper jack for interesting twists—just keep in mind the texture can vary slightly.
Do I have to use cayenne pepper?
Nope, cayenne pepper is entirely optional. It adds a subtle heat that contrasts beautifully with the cheddar, but you can leave it out if you prefer a more traditional, mellow flavor.
What’s the best thickness for rolling the dough?
Rolling the dough about 1/8 inch thick gives you that wonderful crispy crunch. Going thinner may result in overly delicate crackers, while thicker may be softer and less chewable.
Can I make these gluten-free?
With a few adjustments, yes! Substitute the all-purpose flour for a gluten-free flour blend that holds up well in baking. You might need to tweak the water amount to get the dough’s texture just right.
How do I keep the crackers from puffing up while baking?
Pricking each cracker with a fork before baking allows steam to escape, preventing them from ballooning up. This keeps your Cheez-Its nice and flat, just like the originals.
Final Thoughts
There’s something deeply satisfying about biting into a homemade snack that’s crispy, cheesy, and perfectly seasoned, and this Homemade Cheez-Its Recipe delivers all of that and more. It’s simple enough to whip up on any given day but special enough to impress family and friends. So grab your cheese and flour, roll up your sleeves, and get ready to fall in love with homemade snacking all over again!
Print
Homemade Cheez-Its Recipe
- Prep Time: 15 minutes
- Cook Time: 20 minutes
- Total Time: 35 minutes
- Yield: 30 servings
- Category: Snack
- Method: Baking
- Cuisine: American
Description
Homemade Cheez-Its are crispy, cheesy crackers made from sharp cheddar cheese and simple pantry ingredients. This easy recipe delivers a deliciously savory snack perfect for sharing or enjoying anytime you crave a crunchy, cheesy treat.
Ingredients
Cheese Mixture
- 1 cup sharp cheddar cheese, grated
- 1/2 cup unsalted butter, cold and cubed
Dry Ingredients
- 1 cup all-purpose flour
- 1/2 tsp salt
- 1/8 tsp cayenne pepper (optional)
Liquid
- 3 tbsp water (adjust as needed)
Instructions
- Preheat Oven: Preheat your oven to 350°F (175°C) and line two baking sheets with parchment paper to prevent sticking and ensure even baking.
- Combine Cheese and Butter: In a large mixing bowl, combine the grated sharp cheddar cheese with cold, cubed unsalted butter. Mix until the mixture resembles coarse crumbs, which helps create a flaky texture.
- Add Dry Ingredients: Stir in the all-purpose flour and salt. If you desire a slight kick, add the optional cayenne pepper for extra flavor, distributing it evenly throughout the mixture.
- Form Dough: Gradually add the water a tablespoon at a time, mixing until a smooth dough forms. Knead gently on a floured surface to bring it all together without overworking.
- Roll and Cut: Roll out the dough to about 1/8 inch thickness. Cut into small squares or any desired shapes to resemble classic Cheez-Its.
- Bake: Arrange the dough pieces on the prepared baking sheets. Bake in the preheated oven for 15-20 minutes until the crackers turn golden brown, indicating they’re crisp and ready.
- Cool and Serve: Let the baked crackers cool completely on a wire rack before enjoying, allowing them to firm up into the perfect crunchy texture.
Notes
- Use cold butter to achieve flaky, tender crackers.
- Adjust water quantity slightly as needed to bring the dough together without it becoming too sticky.
- Adding cayenne pepper is optional but adds a nice subtle heat.
- Store cooled crackers in an airtight container to keep them crisp for up to one week.
- Feel free to experiment with different cheeses for unique flavors.

